php网站建设含义广州seo优化公司排名
本节博客,我们继续讲解,如何在cpu+windows上,跑通自己的实例分割模型。
完整项目一键下载【⬇️⬇️⬇️】:
【GitHub跑通项目:YOLOs-CPP】+【计算机视觉:完整项目】+【YOLOv5-v11模型】+【Cpp+ONNX+cpu部署】+【目标检测+实例分割】资源-CSDN文库
目录
模型
类别名称
量化
导出模型
拉取最新代码
进入官网ultralytics

模型
该项目包括存储在 models 和 quantized_models 目录中的各种预训练标准 YOLO 模型:
| 模型类型 | 模型名称 |
|---|---|
| 标准模型 | yolo5-n6.onnx |
| yolo7-tiny.onnx | |
| yolo8n.onnx | |
| yolo8n-seg.onnx | |
| yolo10n.onnx | |
| yolo11n.onnx | |
| yolo11n-seg.onnx | |
| 量化模型 | yolo5-n6_uint8.onnx |
| yolo7-tiny-uint8.onnx | |
| yolo8n_uint8.onnx | |
| yolo8n-seg_uint8.onnx | |
| yolo10n_uint8.onnx | |
| yolo11n_uint8.onnx | |
| yolo11n-seg_uint8.onnx |
你也可以使用带有自定义类别的自定义 YOLO 版本!
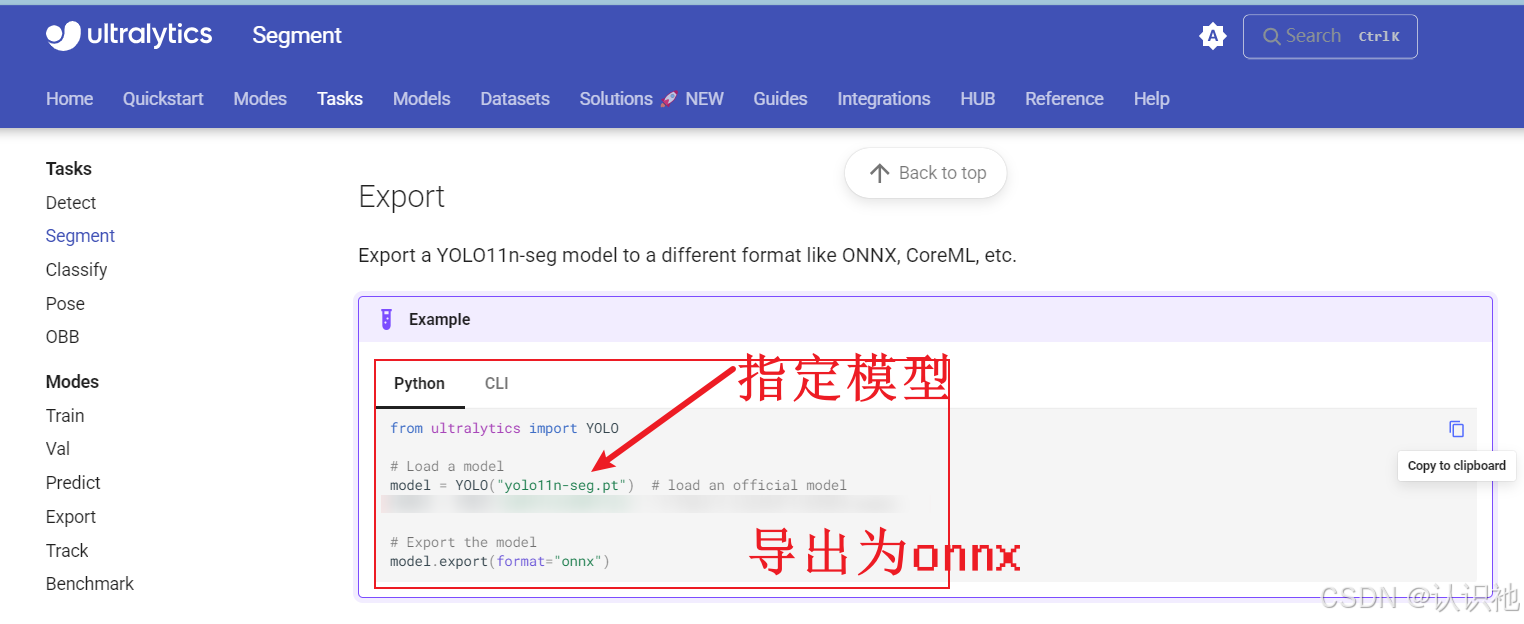
比如,我们用ultralytics训练好的实例分割模型best.pt,我们再用原生的ultralytics转onnx方式,转为best.onnx。如下:

类别名称
-
coco.names:包含模型所使用的类别标签列表。

这里,我们也要修改coco.names,改为自己的标签!
量化
quantized_models 目录中包含针对低精度推理优化的 YOLO 模型的量化版本。此外,quantized_models/yolos_quantization.py 脚本可用于对自定义 YOLO 模型进行自定义量化。
注意:量化模型具有模型体积更小的优势,并且在准确性略有下降的情况下,可能实现更快的推理速度。
我们先不量化试一下:

修改源码:

然后,点击重新生成!
并且,运行exe,但是,你会发现,没有出结果。

怎么办呢?我们查看项目源码,发现,后来支持了seg:

但是,源码还是det【目标检测】。
因此,我们将源码从原始代码:
/*** @file image_inference.cpp* @brief Object detection in a static image using YOLO models (v5, v7, v8, v10).* * This file implements an object detection application that utilizes YOLO * (You Only Look Once) models, specifically versions 5, 7, 8, and 10. * The application loads a specified image, processes it to detect objects, * and displays the results with bounding boxes around detected objects.** The application supports the following functionality:* - Loading a specified image from disk.* - Initializing the YOLO detector with the desired model and labels.* - Detecting objects within the image.* - Drawing bounding boxes around detected objects and displaying the result.** Configuration parameters can be adjusted to suit specific requirements:* - `isGPU`: Set to true to enable GPU processing for improved performance; *   set to false for CPU processing.* - `labelsPath`: Path to the class labels file (e.g., COCO dataset).* - `imagePath`: Path to the image file to be processed (e.g., dogs.jpg).* - `modelPath`: Path to the desired YOLO model file (e.g., ONNX format).** The application can be extended to use different YOLO versions by modifying * the model path and the corresponding detector class.** Usage Instructions:* 1. Compile the application with the necessary OpenCV and YOLO dependencies.* 2. Ensure that the specified image and model files are present in the *    provided paths.* 3. Run the executable to initiate the object detection process.** @note The code includes commented-out sections to demonstrate how to switch * between different YOLO models and image inputs.** Author: Abdalrahman M. Amer, www.linkedin.com/in/abdalrahman-m-amer* Date: 29.09.2024*/// Include necessary headers
#include <opencv2/highgui/highgui.hpp>
#include <iostream>
#include <string>// #include "YOLO5.hpp"  // Uncomment for YOLOv5
// #include "YOLO7.hpp"  // Uncomment for YOLOv7
// #include "YOLO8.hpp"  // Uncomment for YOLOv8
// #include "YOLO10.hpp" // Uncomment for YOLOv10
#include "YOLO11.hpp" // Uncomment for YOLOv11int main()
{// Paths to the model, labels, and test imageconst std::string labelsPath = "../../models/coco.names";const std::string imagePath = "../../data/dogs.jpg";           // Primary image path// Uncomment the desired image path for testing// const std::string imagePath = "../data/happy_dogs.jpg";  // Alternate image// const std::string imagePath = "../data/desk.jpg";        // Another alternate image// Model paths for different YOLO versions// Uncomment the desired model path for testing// const std::string modelPath = "../models/yolo5-n6.onnx";      // YOLOv5// const std::string modelPath = "../models/yolo7-tiny.onnx";       // YOLOv7// const std::string modelPath = "../models/yolo8n.onnx"; // YOLOv8// const std::string modelPath = "../quantized_models/yolo10n_uint8.onnx"; // Quantized YOLOv10 const std::string modelPath = "../../models/yolo11n.onnx"; // YOLOv11 // Initialize the YOLO detector with the chosen model and labelsbool isGPU = true; // Set to false for CPU processing// YOLO7Detector detector(modelPath, labelsPath, isGPU);// YOLO5Detector detector(modelPath, labelsPath, isGPU);  // Uncomment for YOLOv5// YOLO8Detector detector(modelPath, labelsPath, isGPU);  // Uncomment for YOLOv8// YOLO10Detector detector(modelPath, labelsPath, isGPU); // Uncomment for YOLOv10YOLO11Detector detector(modelPath, labelsPath, isGPU); // Uncomment for YOLOv11// Load an imagecv::Mat image = cv::imread(imagePath);if (image.empty()){std::cerr << "Error: Could not open or find the image!\n";return -1;}// Detect objects in the image and measure execution timeauto start = std::chrono::high_resolution_clock::now();std::vector<Detection> results = detector.detect(image);auto duration = std::chrono::duration_cast<std::chrono::milliseconds>(std::chrono::high_resolution_clock::now() - start);std::cout << "Detection completed in: " << duration.count() << " ms" << std::endl;// Draw bounding boxes on the image//detector.drawBoundingBox(image, results); // simple bbox drawingdetector.drawBoundingBoxMask(image, results); // Uncomment for mask drawing// Display the imagecv::imshow("Detections", image);cv::waitKey(0); // Wait for a key press to close the windowreturn 0;
}
修改为如下:
/*** @file image_inference.cpp*/// Include necessary headers
#include <opencv2/highgui/highgui.hpp>
#include <iostream>
#include <string>
#include "YOLO11Seg.hpp" // 确保包含实例分割的头文件int main()
{// Paths to the model, labels, and test imageconst std::string labelsPath = "../../models/coco.names";const std::string imagePath = "../../data/1.jpg";           // Primary image path// Model paths for different YOLO versions// Uncomment the desired model path for testing// const std::string modelPath = "../quantized_models/yolo10n_uint8.onnx"; // Quantized YOLOv10 const std::string modelPath = "../../models/best.onnx"; // // Initialize the YOLO detector with the chosen model and labelsbool isGPU = true; // Set to false for CPU processingYOLOv11SegDetector detector(modelPath, labelsPath, isGPU);// Load an imagecv::Mat image = cv::imread(imagePath);if (image.empty()){std::cerr << "Error: Could not open or find the image!\n";return -1;}// 执行实例分割auto start = std::chrono::high_resolution_clock::now();std::vector<Segmentation> results = detector.segment(image);auto duration = std::chrono::duration_cast<std::chrono::milliseconds>(std::chrono::high_resolution_clock::now() - start);std::cout << "Segmentation completed in: " << duration.count() << " ms" << std::endl;// 绘制结果// 可以选择绘制带掩码的检测框或仅绘制掩码//detector.drawSegmentations(image, results); // 仅绘制掩码detector.drawSegmentationsAndBoxes(image, results); //drawSegmentationsAndBoxes// Display the imagecv::imshow("Detections", image);cv::waitKey(0); // 按任意键关闭窗口return 0;
}
再次编译,可以看到,成功啦!
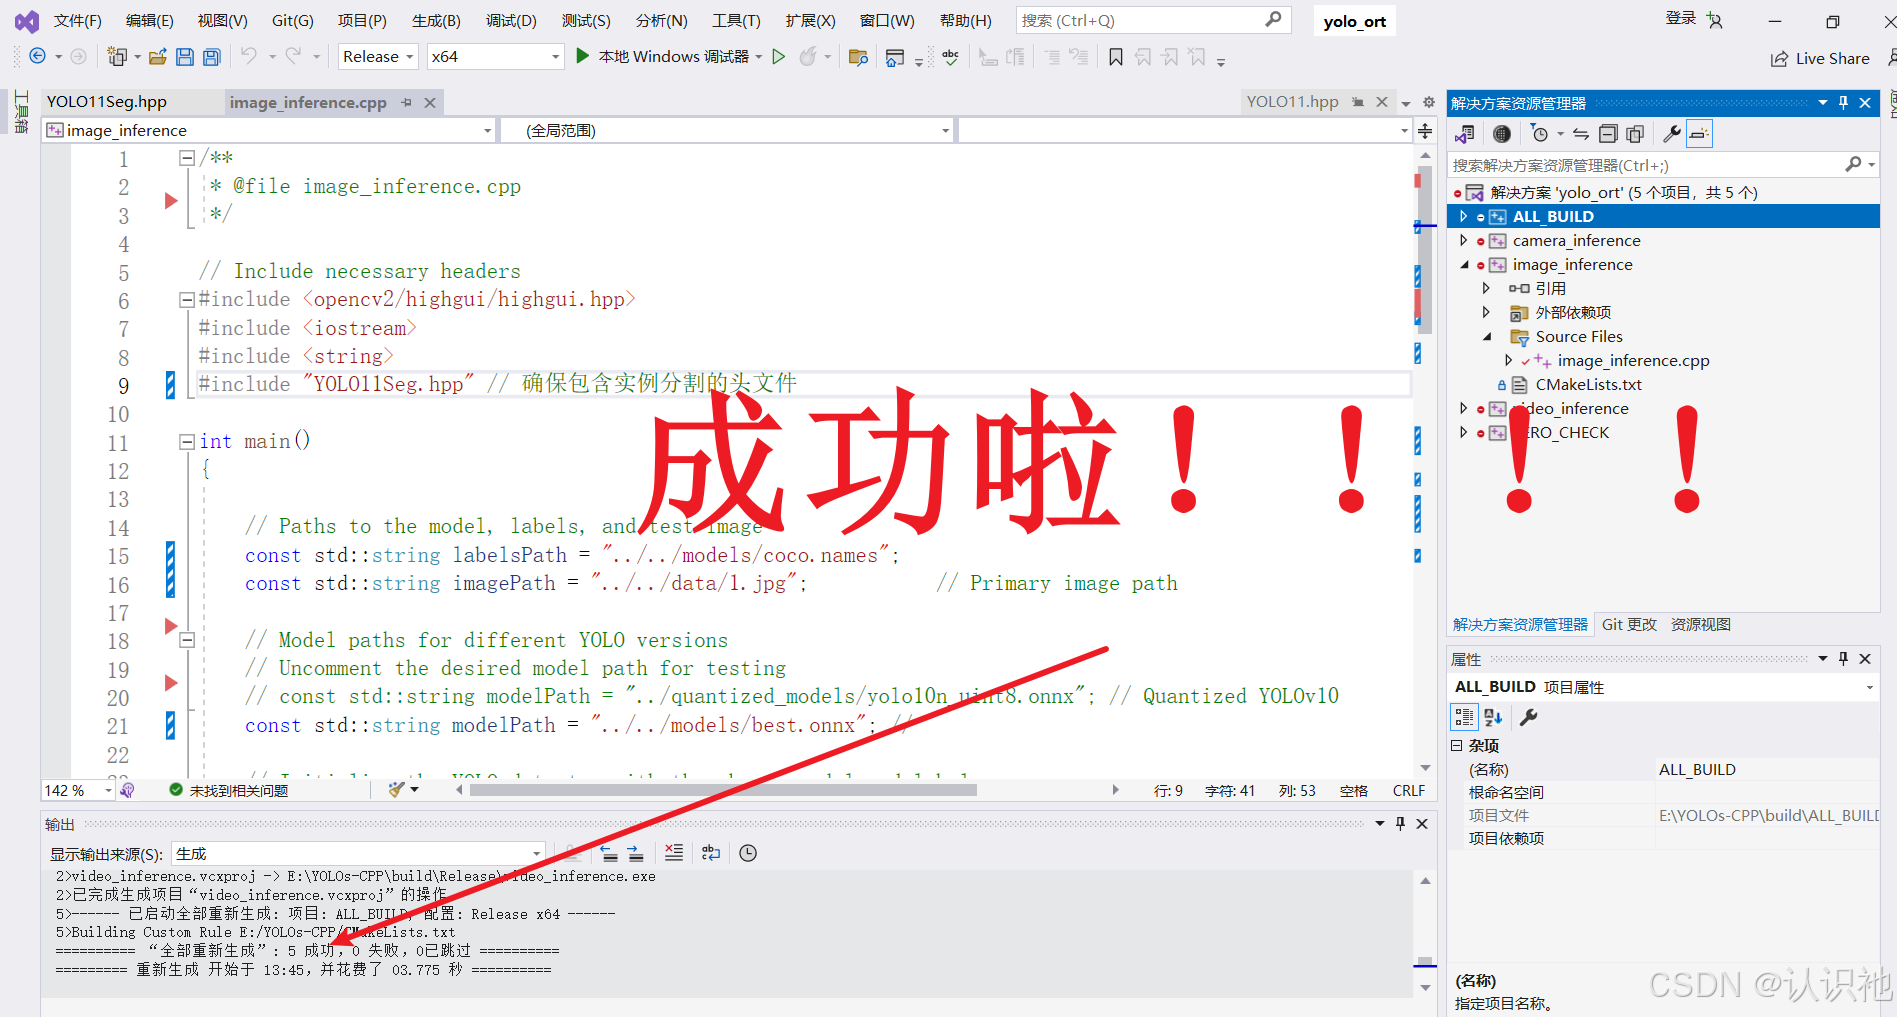
然后,我们运行生成的exe。
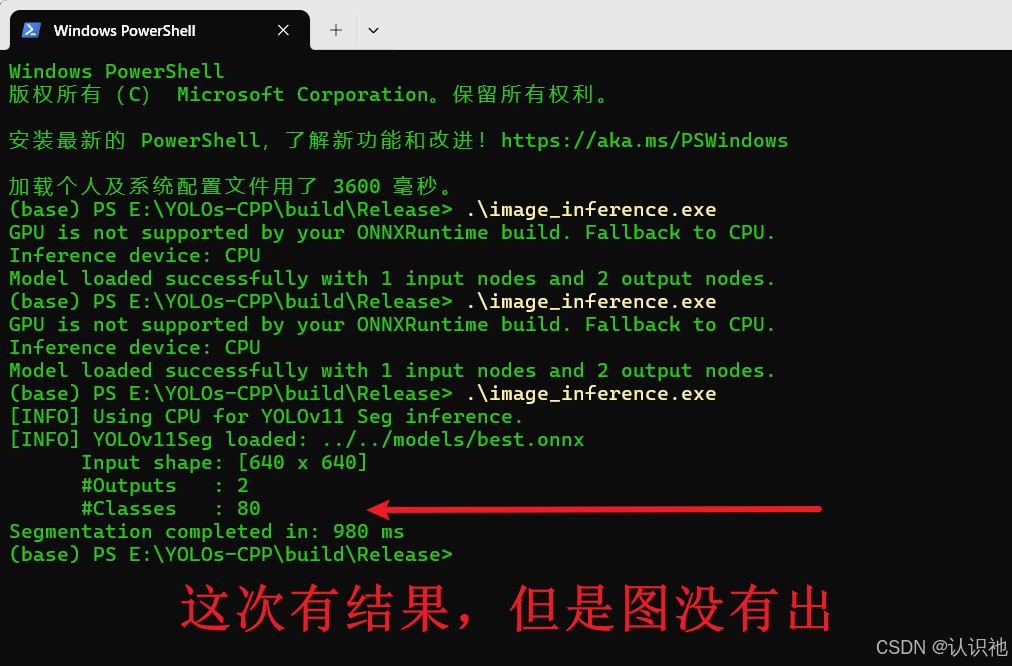
有结果,但是,没有出图,什么原因呢?
我怀疑可能是模型有问题,因此,先使用原始项目提供的实例分割模型,进行了测试。首先,修改代码如下:
/*** @file image_inference.cpp*/// Include necessary headers
#include <opencv2/highgui/highgui.hpp>
#include <iostream>
#include <string>
#include "YOLO11Seg.hpp" // 确保包含实例分割的头文件int main()
{// Paths to the model, labels, and test imageconst std::string labelsPath = "../../models/coco.names";const std::string imagePath = "../../data/dog.jpg";           // Primary image path// Model paths for different YOLO versions// Uncomment the desired model path for testing// const std::string modelPath = "../quantized_models/yolo10n_uint8.onnx"; // Quantized YOLOv10 const std::string modelPath = "../../models/yolo11n-seg.onnx"; // // Initialize the YOLO detector with the chosen model and labelsbool isGPU = false; // Set to false for CPU processingYOLOv11SegDetector detector(modelPath, labelsPath, isGPU);// Load an imagecv::Mat image = cv::imread(imagePath);if (image.empty()){std::cerr << "Error: Could not open or find the image!\n";return -1;}// 执行实例分割auto start = std::chrono::high_resolution_clock::now();std::vector<Segmentation> results = detector.segment(image);auto duration = std::chrono::duration_cast<std::chrono::milliseconds>(std::chrono::high_resolution_clock::now() - start);std::cout << "Segmentation completed in: " << duration.count() << " ms" << std::endl;// 打印推理结果std::cout << "Number of detected objects: " << results.size() << std::endl;for (const auto& seg : results) {std::cout << "Class ID: " << seg.classId << ", Confidence: " << seg.conf << std::endl;std::cout << "Bounding Box: (" << seg.box.x << ", " << seg.box.y << ")"<< " width: " << seg.box.width << " height: " << seg.box.height << std::endl;if (seg.mask.empty()) {std::cout << "Mask is empty!" << std::endl;}else {std::cout << "Mask size: " << seg.mask.size() << std::endl;}}// 绘制结果// 可以选择绘制带掩码的检测框或仅绘制掩码//detector.drawSegmentations(image, results); // 仅绘制掩码detector.drawSegmentationsAndBoxes(image, results); //drawSegmentationsAndBoxes// 保存图像到文件cv::imwrite("result.jpg", image);// Display the imagecv::imshow("Detections", image);cv::waitKey(0); // 按任意键关闭窗口return 0;
}
还原了coco.names。
person
bicycle
car
motorbike
aeroplane
bus
train
truck
boat
traffic light
fire hydrant
stop sign
parking meter
bench
bird
cat
dog
horse
sheep
cow
elephant
bear
zebra
giraffe
backpack
umbrella
handbag
tie
suitcase
frisbee
skis
snowboard
sports ball
kite
baseball bat
baseball glove
skateboard
surfboard
tennis racket
bottle
wine glass
cup
fork
knife
spoon
bowl
banana
apple
sandwich
orange
broccoli
carrot
hot dog
pizza
donut
cake
chair
sofa
pottedplant
bed
diningtable
toilet
tvmonitor
laptop
mouse
remote
keyboard
cell phone
microwave
oven
toaster
sink
refrigerator
book
clock
vase
scissors
teddy bear
hair drier
toothbrush
再次编译,并运行,就会发现,可以出结果:
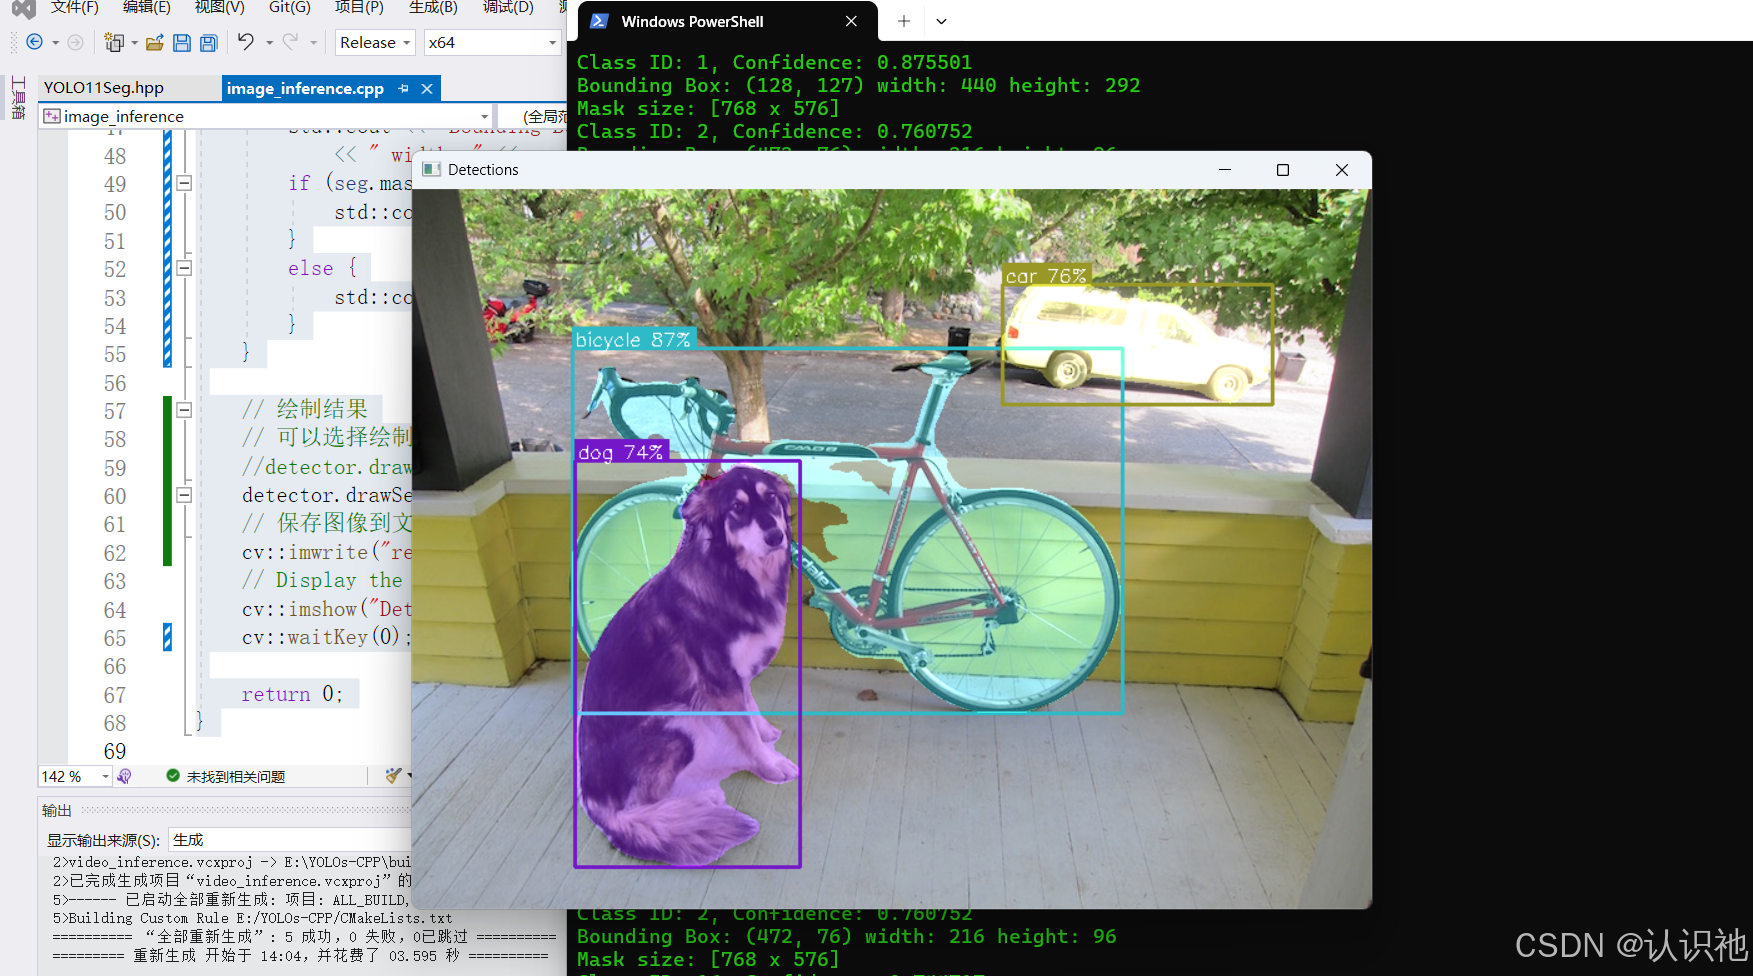
因此,我们的目标就定位在了我们的模型上,我们需要重新导出一个新的onnx模型,才能跑通。
导出模型
参考链接:模型导出参考
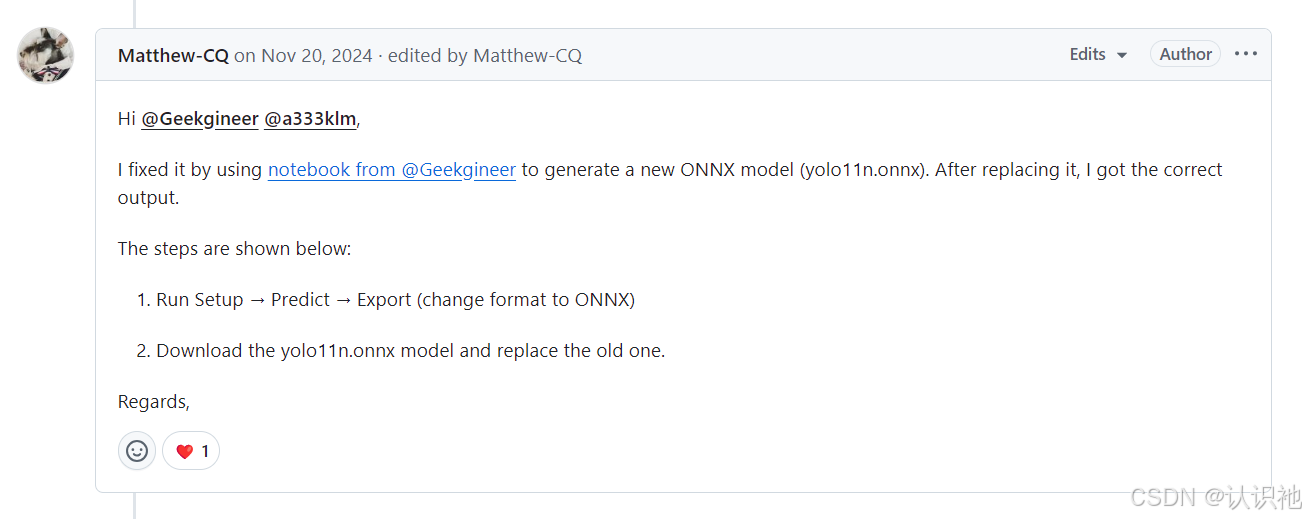
这给了我灵感,我需要通过官方代码,进行导出模型。
因此,我依次进行了如下操作:
拉取最新代码
git clone https://github.com/ultralytics/ultralytics.git进入官网ultralytics
复制代码,然后,配置环境【按照官方文档】,将训练好的best.pt放到适当位置,进行模型导出。
使用导出后的模型进行预测。就会得到如下结果:
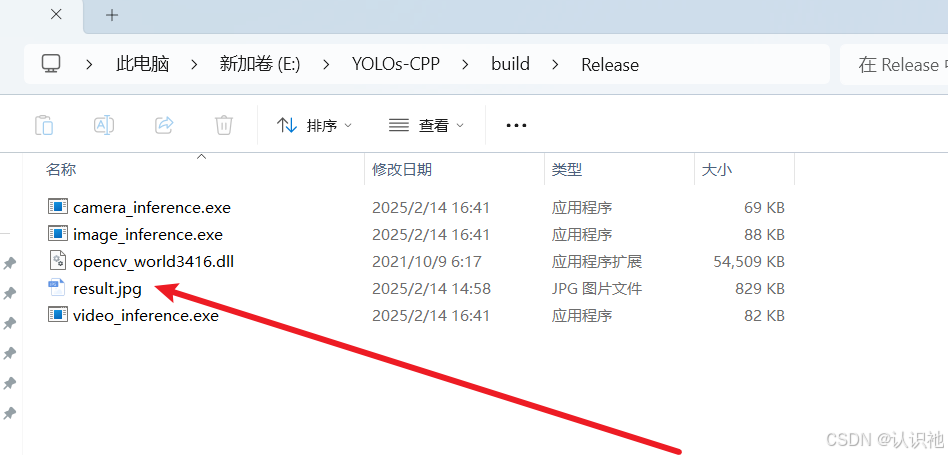
可以看到,生成了最后的预测结果!
开心,终于跑通了!
具体的cpp代码如下:
/*** @file image_inference.cpp*/// Include necessary headers
#include <opencv2/highgui/highgui.hpp>
#include <iostream>
#include <string>
#include "YOLO11Seg.hpp" // 确保包含实例分割的头文件int main()
{// Paths to the model, labels, and test imageconst std::string labelsPath = "../../models/coco.names";const std::string imagePath = "../../data/4.jpg";           // Primary image path// Model paths for different YOLO versions// Uncomment the desired model path for testing// const std::string modelPath = "../quantized_models/yolo10n_uint8.onnx"; // Quantized YOLOv10 const std::string modelPath = "../../models/best.onnx"; // // Initialize the YOLO detector with the chosen model and labelsbool isGPU = false; // Set to false for CPU processingYOLOv11SegDetector detector(modelPath, labelsPath, isGPU);// Load an imagecv::Mat image = cv::imread(imagePath);if (image.empty()){std::cerr << "Error: Could not open or find the image!\n";return -1;}// 执行实例分割auto start = std::chrono::high_resolution_clock::now();std::vector<Segmentation> results = detector.segment(image, 0.0f, 0.05f);auto duration = std::chrono::duration_cast<std::chrono::milliseconds>(std::chrono::high_resolution_clock::now() - start);std::cout << "Segmentation completed in: " << duration.count() << " ms" << std::endl;// 打印推理结果std::cout << "Number of detected objects: " << results.size() << std::endl;for (const auto& seg : results) {std::cout << "Class ID: " << seg.classId << ", Confidence: " << seg.conf << std::endl;std::cout << "Bounding Box: (" << seg.box.x << ", " << seg.box.y << ")"<< " width: " << seg.box.width << " height: " << seg.box.height << std::endl;if (seg.mask.empty()) {std::cout << "Mask is empty!" << std::endl;}else {std::cout << "Mask size: " << seg.mask.size() << std::endl;}}// 绘制结果// 可以选择绘制带掩码的检测框或仅绘制掩码//detector.drawSegmentations(image, results); // 仅绘制掩码detector.drawSegmentationsAndBoxes(image, results); //drawSegmentationsAndBoxes// 保存图像到文件cv::imwrite("result.jpg", image);// Display the imagecv::imshow("Detections", image);cv::waitKey(0); // 按任意键关闭窗口return 0;
}