苍穹外卖资源点整理+个人错误解析-Day06-微信登陆、商品浏览
一.HttpClient
介绍

可以理解为zaijava程序中通过httopclient这个工具包可以来构造http请求,并且可以来发送http请求。
使用的话需要导入maven坐标:

核心API
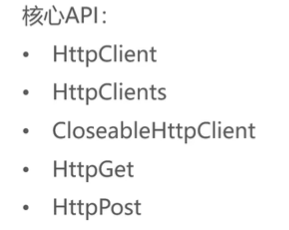
发送请求步骤:
创建httpclient对象
创建htp请求对象
调用httpclient的execute方法发送请求
入门案例
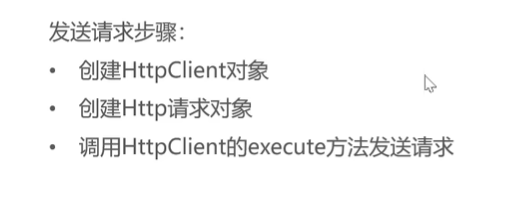
注意的是如图,即使不装配httpclientmaven坐标也可以使用的原因就是这个。因为阿里云的oss就是基于httpclient
发送GET请求
分为以下几步:
1.创建HttpClient对象
2.创建请求对象
3.发送请求
4.获取服务端返回的状态码判断请求成没成功
5.获得响应回来的数据
6.因为数据封装成了HttpEntity,需要使用工具类进行解析
7.关闭资源
public void  testGET() throws IOException {//创建HttpClient对象:HttpClients.createDefault().varCloseableHttpClient httpClient= HttpClients.createDefault();////创建请求对象:ew HttpGet().var,()写请求的地址HttpGet httpGet = new HttpGet("http://localhost:8080/user/shou/status");//发送请求:httpClient.execute(httpGet).varCloseableHttpResponse response = httpClient.execute(httpGet);//获取服务端返回的状态码判断请求成没成功int statusCode =response.getStatusLine().getStatusCode();System.out.println("服务端返回的状态码为:"+statusCode);//获得响应回来的数据:response.getEntity().varHttpEntity entity = response.getEntity();//因为数据封装成了HttpEntity,需要使用工具类进行解析:String body = EntityUtils.toString(entity);System.out.println("服务端返回的数据为:"+body);//关闭资源response.close();httpClient.close();
}
进行测试运行后可能会报错,报500的话先试着启动redis。

发送POST请求
步骤如下
1.创建HttpClient对象
2.创建请求对象
3.因为post请求需要提交请求参数,还是json形式,所以需要封装参数
3.1.设置请求参数
httpPost.setEntity(entity);
3.2.由于setentity方法需要HttpEntity这么一个对象,但是HttpEntity是一个接口类,所以需要使用实现类:StringEntity,进行构造StringEntity对象:
StringEntity entity = new StringEntity("");
3.3. new StringEntity("");需要传入一个字符串对象,而这个字符串应该是一个json,需要构造json字符串:可以写成”username:‘’,password:''“,但不推荐
3.4通过jsonobject进行json字符串构建:
JSONObject jsonObject =new JSONObject();
jsonObject.put("username","admin");
jsonObject.put("password", "123456");
3.5.指定传入字符串格式以及编码
//指定编码方式
entity.setContentEncoding("utf-8");
//指定数据格式
entity.setContentType("application/json");
4.发送POST请求
5.解析返回结果
6.guan'bi'zi'yuan
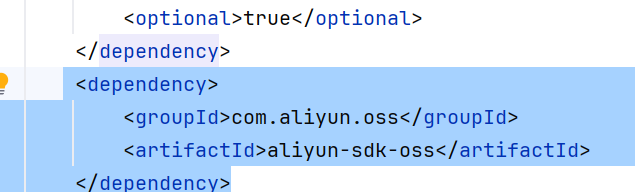
完整代码:
@Test
public void testPOST() throws Exception {//创建HttpClient对象CloseableHttpClient httpClient= HttpClients.createDefault();//创建请求对象HttpPost httpPost = new HttpPost("http://localhost:8080/admin/employee/login");//因为post请求需要提交请求参数,还是json形式,所以需要封装参数JSONObject jsonObject =new JSONObject();jsonObject.put("username","admin");jsonObject.put("password", "123456");StringEntity entity = new StringEntity(jsonObject.toString());//指定编码方式entity.setContentEncoding("utf-8");//指定数据格式entity.setContentType("application/json");httpPost.setEntity(entity);//发送POST请求CloseableHttpResponse response = httpClient.execute(httpPost);//解析返回结果int statusCode = response.getStatusLine().getStatusCode();System.out.println("响应码为:"+statusCode);HttpEntity entity1 = response.getEntity();String body = EntityUtils.toString(entity1);System.out.println("响应结果为"+body);//关闭资源response.close();httpClient.close();
}
二.微信小程序开发
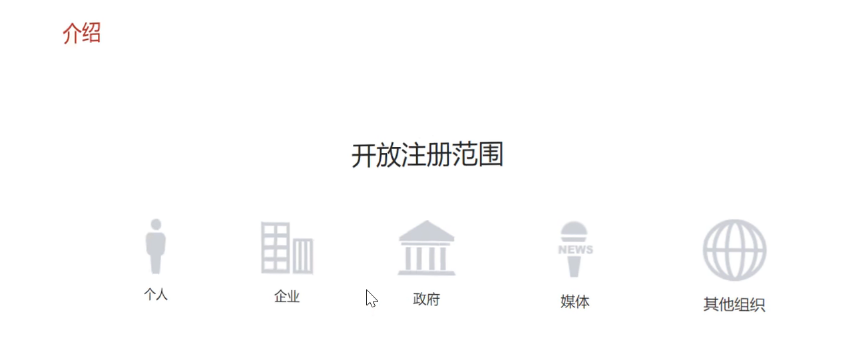
1.微信小程序介绍
网址:https://mp.weixin.qq.com/cgi-bin/wx
注册范围:
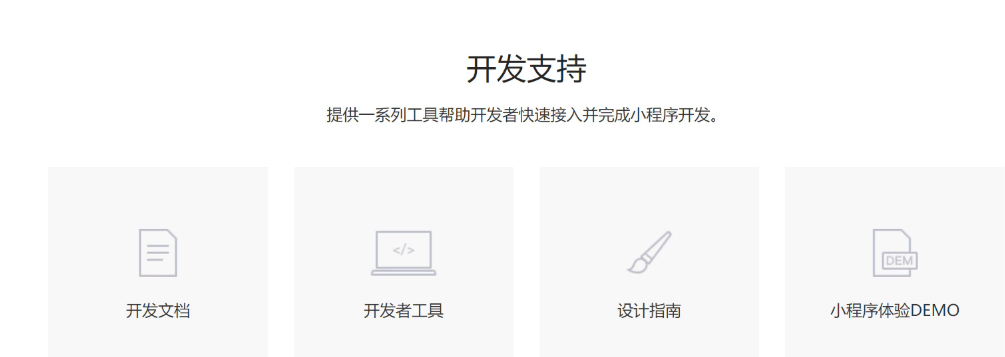
开发支持:
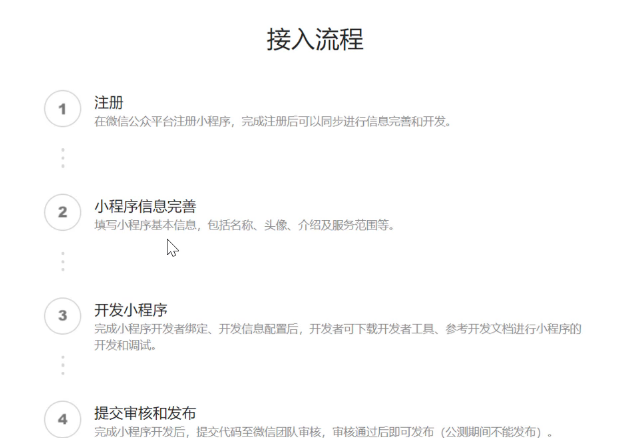
接入流程:
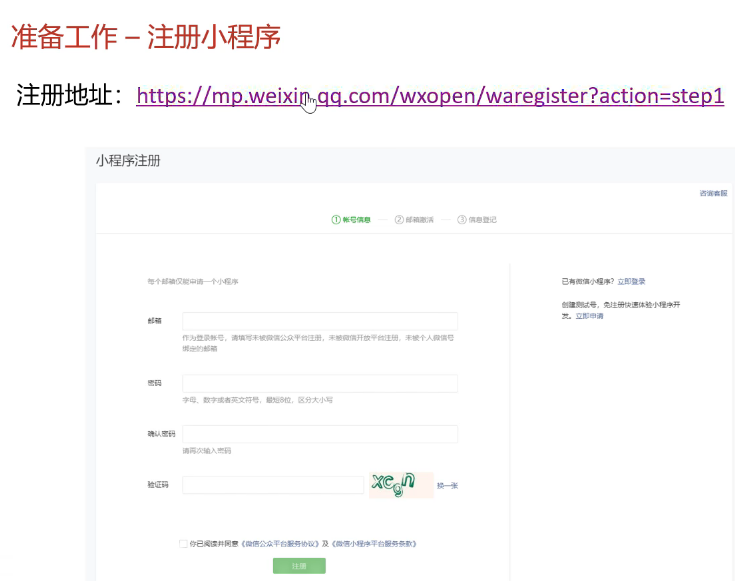
2.准备工作

注册
注册完毕后进行填写:

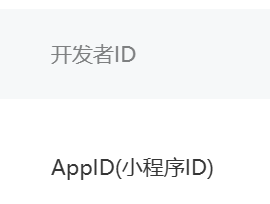
左侧找到开发管理——开发设置
找到APPID与小程序密钥:
下载微信小程序开发的开发者工具:
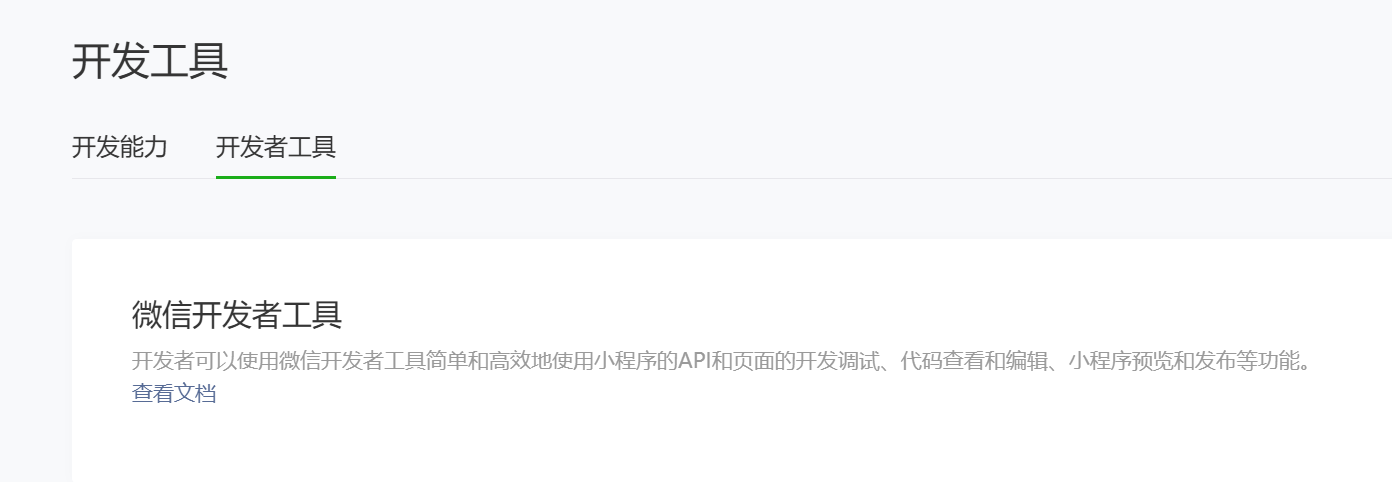
在微信开发者工具中编辑代码
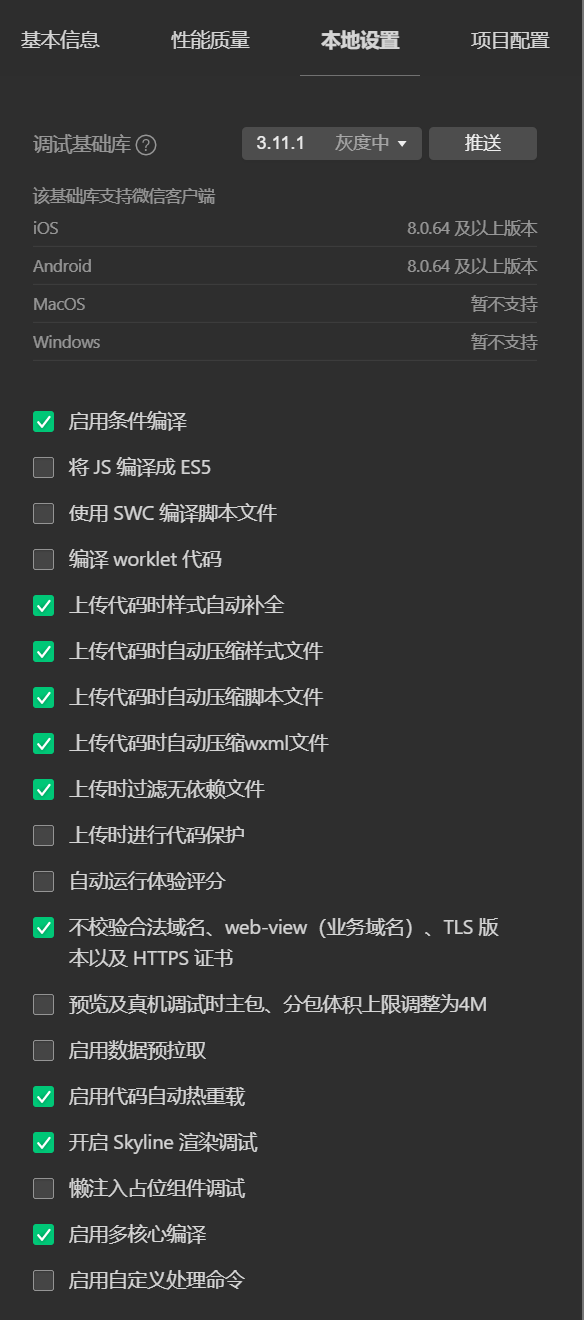
3.入门案例(本地设置将本地调试库版本修改到2.27及以下)
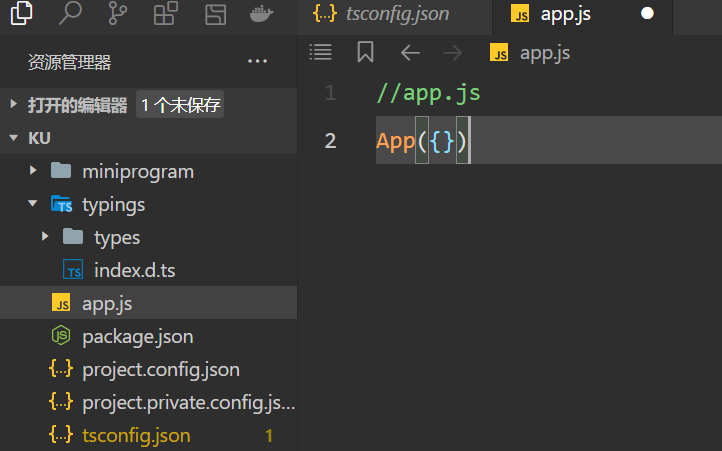
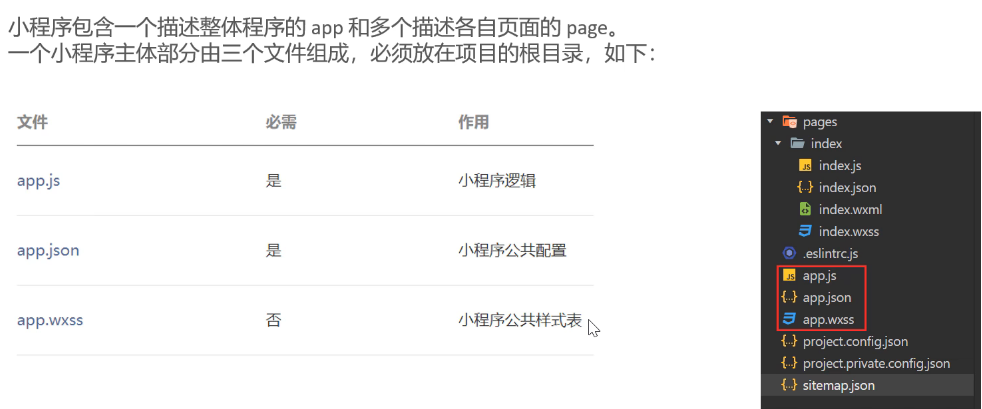
了解小程序目录结构
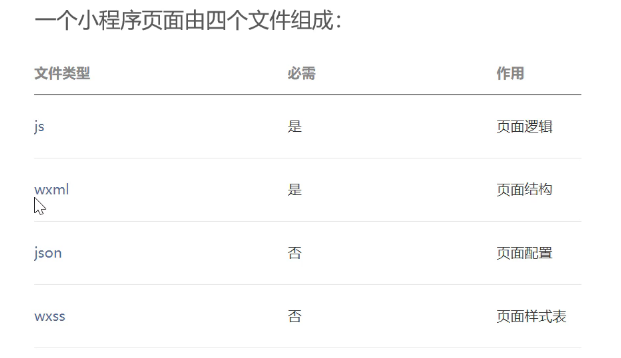
而每个界面的组成:
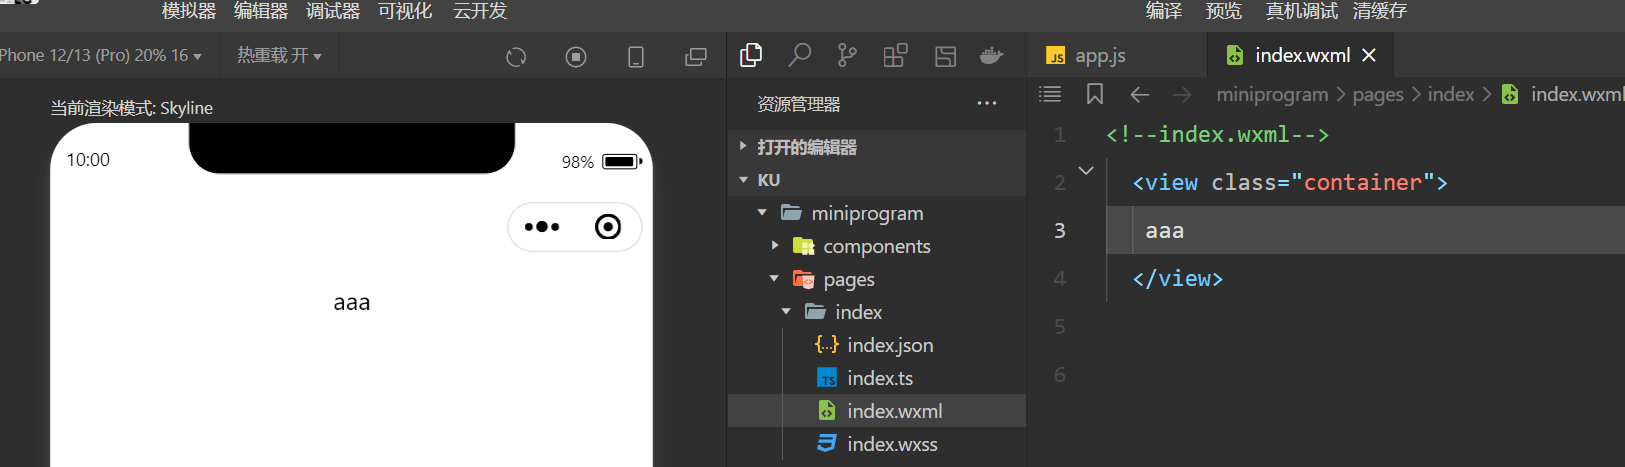
编写小程序代码
index.wxml中显示:
动态显示数据:

index.wxml:
<view class="container">
<view>
<!-- 插值表达式{{}}。动态显示界面 msg这个变量需要声明,在index.js文件中声明-->
{{msg}}
</view>
</view>
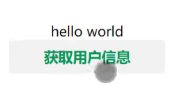
获取当前微信用户头像,昵称:
<view>
<button type="default">获取用户信息</button>
</view>
会出现按钮:
 但这个是没有 type="default的显示效果,有default:
type=primary:![]()
type=warm:![]()
获取用户信息:
在index中写出代码:
//获取微信用户头像以及昵称
getUserInfo(){
//这个方法是获取用户信息
wx.getUserProfile({
desc: '获取用户信息',
//回调函数
success :(res)=>{
//打印一下,在调试器的console进行输出
console.loge(res.userInfo)
}
})
index.xwml:
{{msg}}
</view>
<view>
<button bindtap="getUserInfo" type="default">获取用户信息</button>
</view>
接下来将获取的用户信息(头像昵称)输出到小程序开头显示:
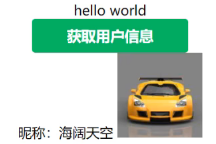
index.wxml:
<view class="container">
<view>
{{msg}}
</view>
<view>
<button bindtap="getUserInfo" type="default">获取用户信息</button>
昵称:{{nickName}}
<image style="width: 100px;height: 100px;" src="{{url}}"></image>
</view>
</view>
index.js:
Page({
data:{
msg:'hello',
nickName:'',
url:''
},
//获取微信用户头像昵称
getUserInfo(){
wx.getUserProfile({
desc: '获取微信用户信息',
//回调函数
success:(res) =>{
console.log(res.userInfo)
//为数据赋值
this.setData({
nickName:res.userInfo.nickName
url:res.userInfo.avatarUrl
})
}
})
}
})
接下来就是获取微信登录用户的唯一标识(openid):
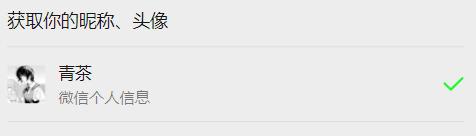
获取用户授权码:
![]()
index.wxml:
<view>
<button bind:tap="wxLogin" type="warn">微信登陆</button>
授权码:{{code}}
</view>
index.js:
wxlogin({
wx.login({
success: (res) => {
console.log(res.code)
this.setData({
code:res.code
})
在小程序中如何发布异步请求:
<view>
<button bind:tap="sendRequest" type="default">发送请求</button>
//发送请求
sendRequest(){
wx.request({
url: 'http://localhost:8080/user/status',
method:'GET'
success:(res)=>{
console.log(res.data)//这里的data是固定写法,代表的是后端响应回来的整个json数据,数据格式为{code:'',msg:'',data:{}}
}
})
}

后端也成功进行响应:
![]()
编译小程序
三.微信登陆
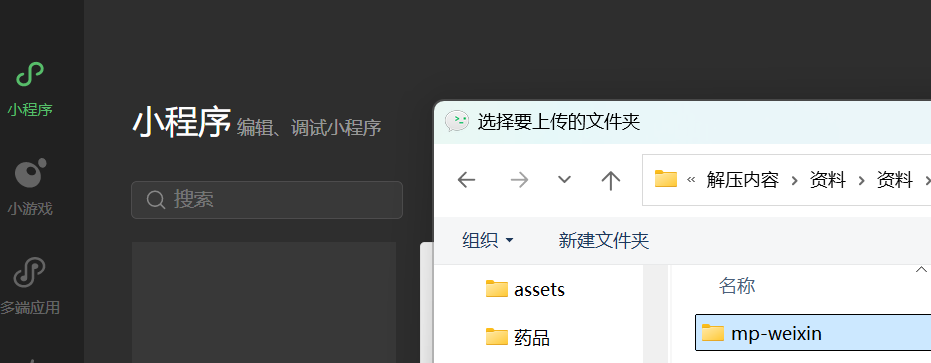
导入小程序代码
微信开发者工具中找到导入,进行项目导入:
微信登录流程
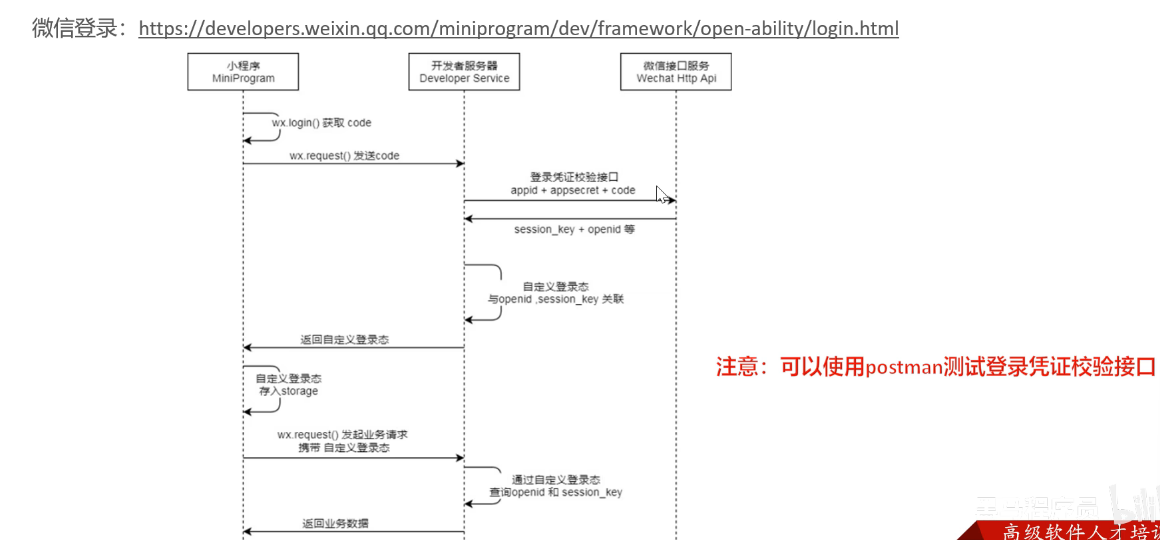
想要实现微信登录,首先是在小程序端调用wx.login方法进行登录,并获得一个code(授权码),随机调用wx.request方法发送code,并对后端服务层进行请求,请求内容为自己编写的后端服务。
后端服务获得code,并调用微信接口服务,在调用时需要传输appid+appsercet+code这三个参数。
那么如何做到从后端调用微信接口服务?
使用HttpClient发送http请求并传输参数,最终可以调用为微信接口服务。
然后微信接口服务给后端服务器传输session_key+openid(微信用户唯一标识)等参数。
并且拿到openid之后,我们可以自定义登录状态,即记录当前微信用户的一些信息,比如将用户的openid存进数据库,并给用户产生一个token.
后端将自定义登录状态再传输给小程序,小程序也可以对传进来的数据(token)进行存储即storage中.
后续发起的各种业务请求携带的token再发送给服务端,服务端解析token,允许进行业务操作。
 进行小程序操作前,先启动项目以及redis.
在重新编译小程序,进行登录时报错:

报错原因:可能是基础库版本太高,我调成了2.26再进行尝试:
成功弹出登录:
进行接口测试:请求网址:
https://api.weixin.qq.com/sns/jscode2session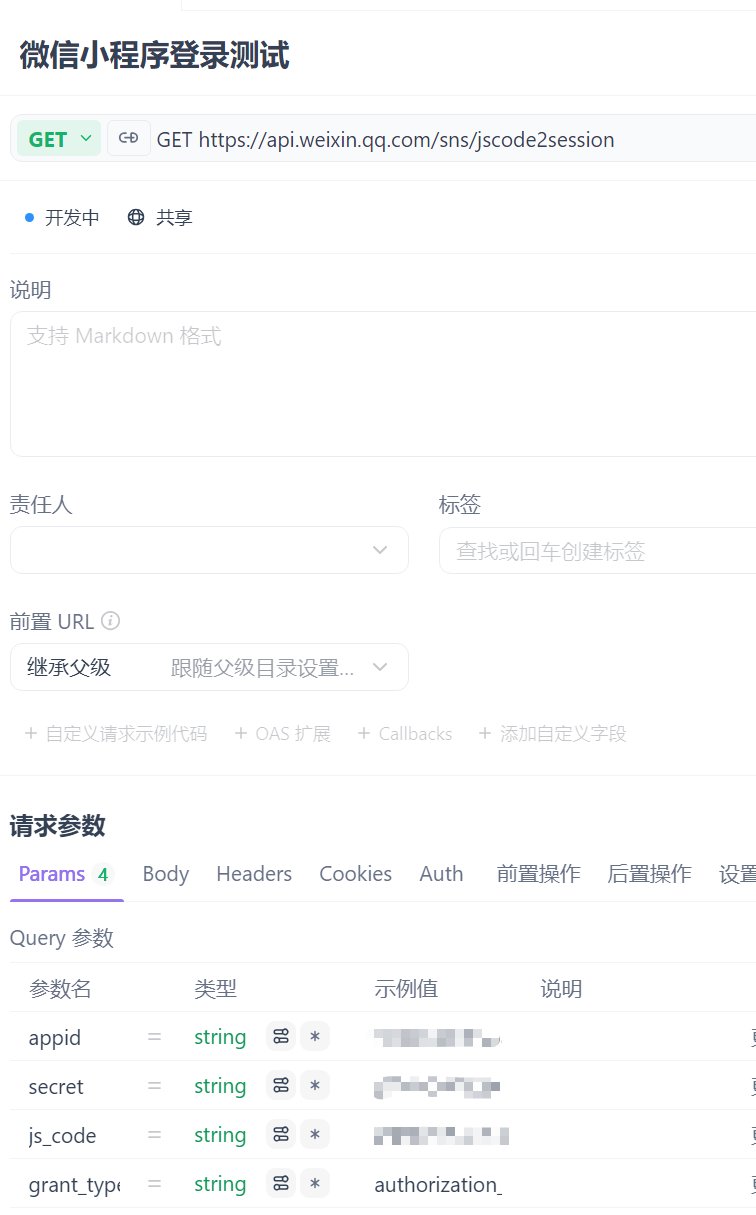
成功:

分析
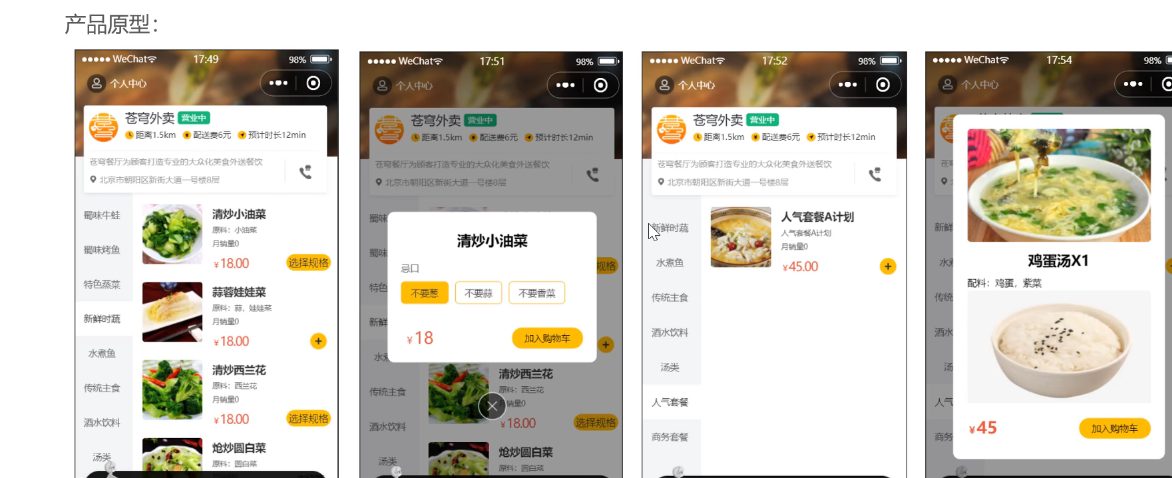
产品原型:
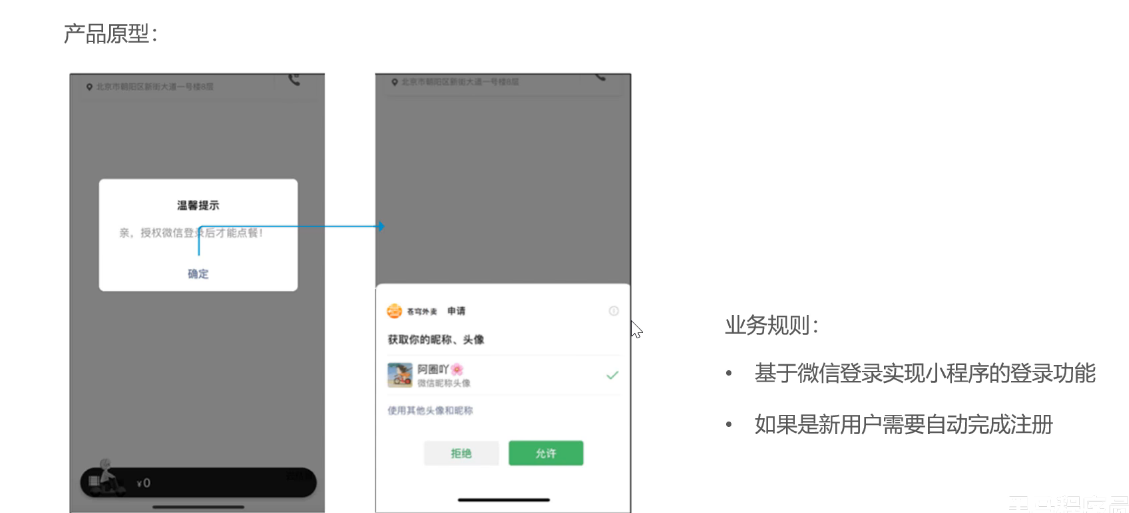
因为是微信登录,直接进行微信登录。通过获得微信用户的唯一标识来确认用户。新用户不需要自己注册,自动完成注册。
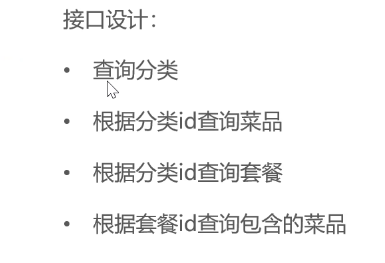
接口设计:
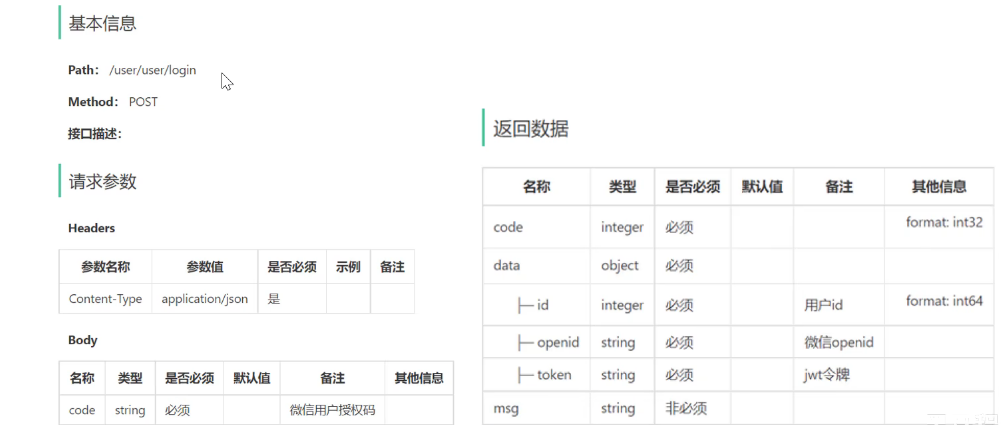
发现路径是/user/user/login。
为什么会有两个user:
第一个user代表的是用户端发送过来的请求
第二个user代表的是用户模块
代码开发
先在服务端进行配置微信登录所需配置项:

为什么要进行配置,是因为要实现微信登录的话,就需要在程序中去调用微信的接口服务,而调用接口服务就需要将appid以及sercet作为参数传过去。
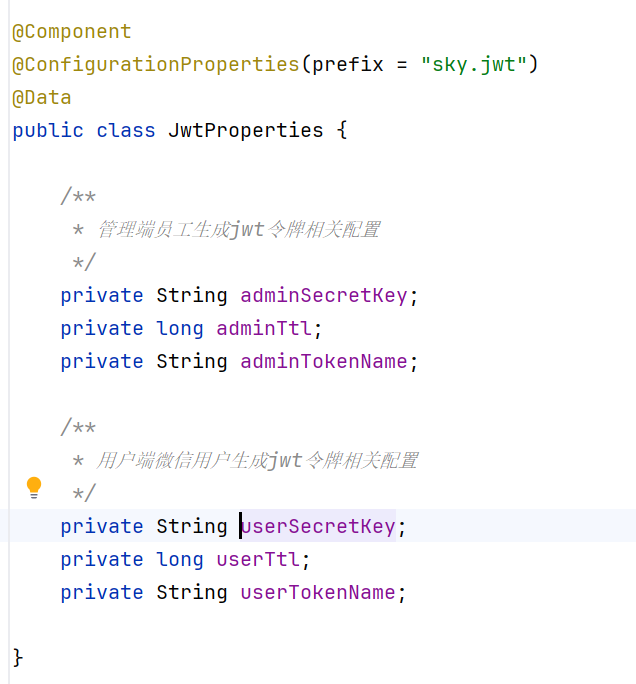
然后配置为微信用户生成jwt令牌的配置:
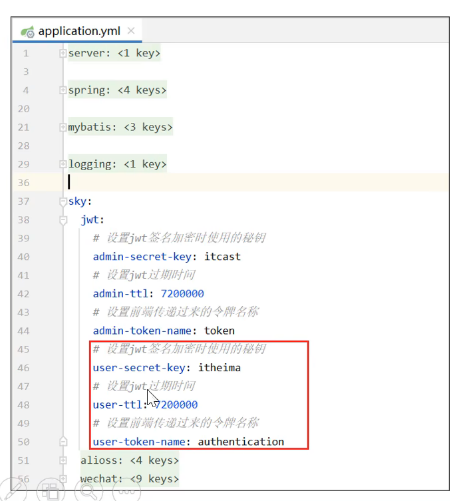
管理端生分令牌与为用户端的这些微信用户生成令牌是分开算的:
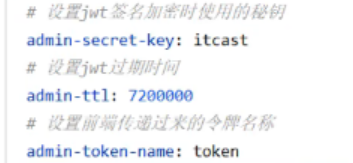 这是管理端
这是管理端
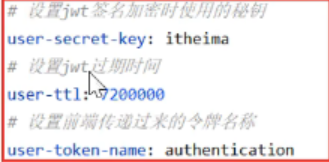 这是微信用户端
设计接口所对应的dto以及vo:
dto:
@Data
public class UserLoginDTO implements Serializable {private String code;}
vo:
public class UserLoginVO implements Serializable {private Long id;private String openid;private String token;}
进行控制层开发:
  @PostMapping("login")@ApiOperation("微信登录")public Result<UserLoginDTO> login(@RequestBody UserLoginDTO userLoginDTO){log.info("微信登录:{}",userLoginDTO);
User user=service.wxlogin(userLoginDTO);
代码中为什么泛型使用的是userloginvo,而接收参数使用的是dto
首先明确VO,DTO定义上的区别。
1. DTO (Data Transfer Object) - 数据传输对象
定义: DTO 是一个专门用来在不同层(比如前端和后端)之间传输数据的简单对象。它只包含需要传输的字段,不包含业务逻辑。
2. VO (View Object) - 视图对象
定义: VO 是一个专门用来封装后端返回给前端界面展示的数据的简单对象。它是为了满足前端“视图”(页面)的展示需求而设计的。
而接收参数使用的是dto,dto中只有一个属性code,即微信唯一标识码。根据接口分析,前端会传递一个code的字符串,所以我们使用dto接收。
通过接收到的code,我们最终要返回给前端的数据就是vo类型(查看接口设计)
然后需要生成jwt令牌,但是生成令牌的前提是需要使用微信用户的相关信息,所以提供登录方法并返回用户对象:
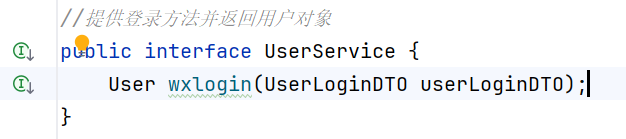
User user=service.wxlogin(userLoginDTO);
为什么要封装成user类:
1.输入参数 UserLoginDTO 只包含一个简单的 code 字段,而微信登录过程需要获取和处理更多用户信息,所以wxlogin方法内部需要调用微信API,将临时授权码(code)转换为包含openid等信息的完整用户数据。
2.User 实体类包含了用户的完整信息(id、openid、姓名、手机号等),便于后续业务处理,便于后续操作,如保存到数据库或从中提取必要字段生成令牌
3. 后续处理需要,控制器后续需要从User对象中提取 id 字段来生成JWT令牌,并且最终需要根据User对象构建 UserLoginVO 返回给前端,包含id、openid和token信息。
紧接为微信用户生成jwt令牌,使用的是jwtutils工具包的createJWT方法:

而前面两个参数已经配置到配置文件了,现在需要获取值

而这两个参数被封装进了JwtProperties类中并且被componnent注解,说明可以自动注入:
控制层代码:
JwtUtil.createJWT(jwtProperties.getUserSecretKey(),jwtProperties.getUserTtl(),claims)
没有claim对象,进行局部创建:
//为微信用户生成令牌Map<String, Object> claims = new HashMap<>();claims.put("userId",user.getId());JwtUtil.createJWT(jwtProperties.getUserSecretKey(),jwtProperties.getUserTtl(),claims)
}
claims.put的作用:
- Claims(声明) :是JWT(JSON Web Token)中的核心部分,用于存储自定义的用户信息
- 在代码中, claims 是一个 Map<String, Object> 对象,用于存储键值对形式的用户信息
- claims.put(key, value) 方法用于向这个Map中添加一条声明信息
具体作用分析
- 存储用户标识 :将用户的唯一ID( user.getId() )以键名 "userId" 存入claims中
- 关联用户身份 :这使得生成的JWT令牌与特定用户绑定
- 便于后续验证 :当用户后续请求需要身份验证时,可以从令牌中提取这个用户ID
以上步骤我们获得了前端传入code的id,openid,以及token,可以将这些封装到vo类并返回给前端:
String token= JwtUtil.createJWT(jwtProperties.getUserSecretKey(),jwtProperties.getUserTtl(),claims);
UserLoginVO userLoginVO = UserLoginVO.builder().id(user.getId()).openid(user.getOpenid()).token(token).build();
return Result.success(userLoginVO);
controller完整代码:
@Autowired
private UserService service;
@Autowired
private JwtProperties jwtProperties;//微信登录@PostMapping("login")@ApiOperation("微信登录")public Result<UserLoginVO> login(@RequestBody UserLoginDTO userLoginDTO){log.info("微信登录:{}",userLoginDTO);
User user=service.wxlogin(userLoginDTO);//为微信用户生成令牌Map<String, Object> claims = new HashMap<>();claims.put("userId",user.getId());String token= JwtUtil.createJWT(jwtProperties.getUserSecretKey(),jwtProperties.getUserTtl(),claims);UserLoginVO userLoginVO = UserLoginVO.builder().id(user.getId()).openid(user.getOpenid()).token(token).build();return Result.success(userLoginVO);}
进行实现类开发:
首先,我要实现微信登录,如果是新用户还得自动注册。
与之前用户名密码的登录逻辑不一样,之前的登录逻辑是用户名密码登录,查询自己的用户表检查用户密码是否正确,并且新用户需要自己注册。
而这个微信登录,需要调用微信服务器的接口来获得当前微信用户的openid。
1.调用微信接口获取openid:
微信接口为:https://api.weixin.qq.com/sns/jscode2session
那么如何调用接口?
使用HttpClient向接口发送get请求,起哄httpclient被封装成了工具类:HttpClient。

第二个参数为map,其实就是我们请求的参数,创建map的局部变量:
Map<String, String> map=new HashMap<>();
根据微信开发者工具接口文档一共需要四个参数:
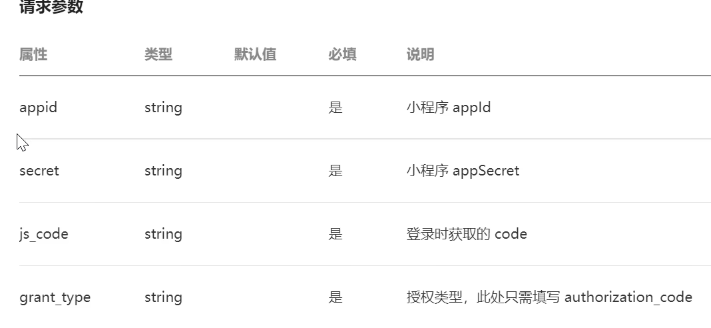
然后将需要给map集合传入这几个请求参数,其中appid与secret被封装进配置属性类,直接注入即可:
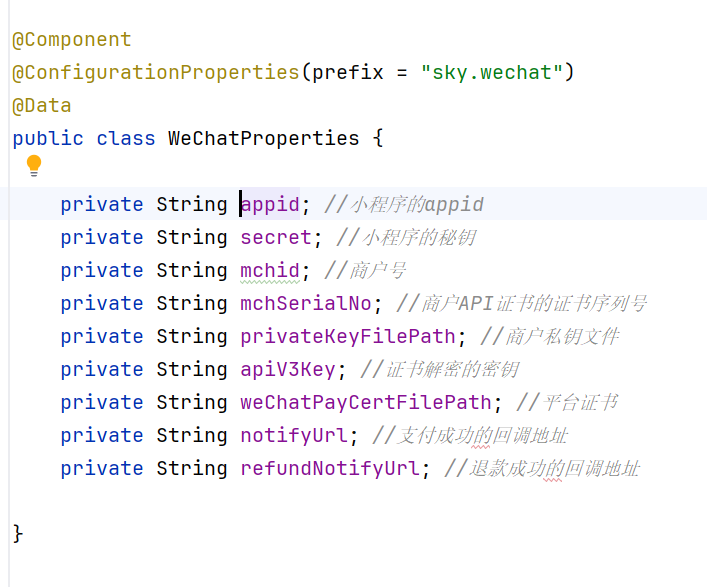
@Autowired
private WeChatProperties weChatProperties;
map.put("appid",weChatProperties.getAppid());
map.put("secret",weChatProperties.getSecret());
map.put("js_code",userLoginDTO.getCode());
map.put("grant_type","authorization_code");
请求发送出去之后需要接收它的返回结果:
String json=HttpClientUtil.doGet(WX_LOGIN,map);
而返回结果是返回的json数据包(文档里明确写了),我们需要数据包中的openid,需要从json字符串中解析出。
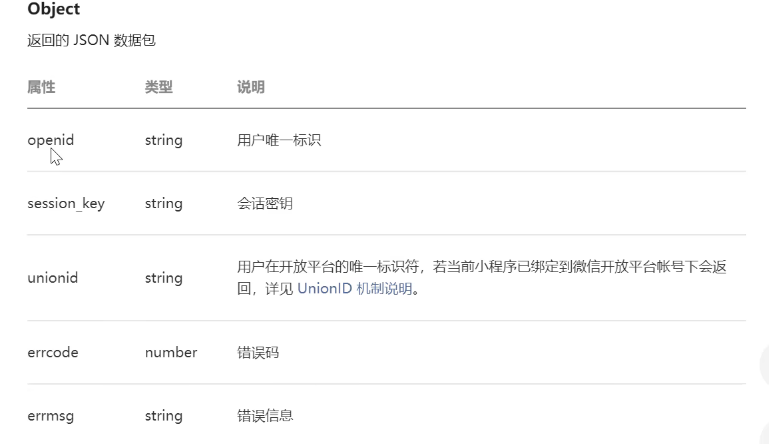
如何解析出来?使用JSON:

//将json中的openid对象解析出
JSONObject jsonObject = JSON.parseObject(json);
String openid = jsonObject.getString("openid");
2.判断openid是否为空,为空表示登录失败抛出登录异常:
if (openid==null){throw new LoginFailedException(MessageConstant.LOGIN_FAILED);
}
3.判断当前用户是否是新用户
需要创建UserMapper类:
进行判断查询是否为新用户就是查询库内有无openid:
//根据openid查询用户
@Select("select * from user where openid = #{openid}")
User getByOpenid(String openid);
User user = userMapper.getByOpenid(openid);
if (user==null){//如果是则自动完成注册user = User.builder().openid(openid).createTime(LocalDateTime.now()).build();//此处注册其他的都没有这没关系,性别什么的可以去个人中心写,不用在代码实现
userMapper.insert(user);
}
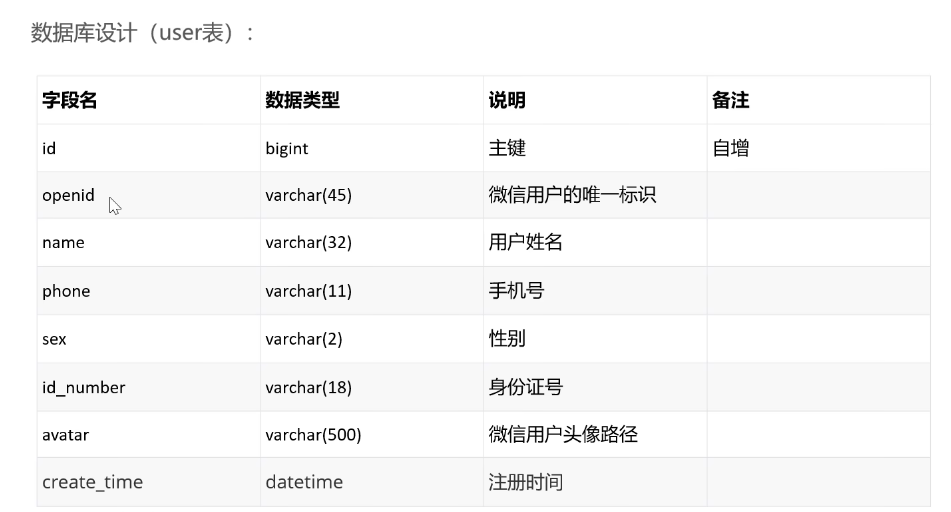
insertxml语句:
<insert id="insert"  useGeneratedKeys="true" keyProperty="id">insert into user (openid, name, phone, sex, id_number, avatar, create_time)values (#{openid}, #{name}, #{phone}, #{sex}, #{idNumber}, #{avatar}, #{createTime})
</insert>
4.返回这个用户对象
return user;
写完之后其实发现第一部分代码模块相对来说是比较独立的,可以单独抽一个方法出来:
private String getOpenid(String code) {//1.将小程序发送的code发送给微信,得到一个access_token和openidMap<String, String> map=new HashMap<>();map.put("appid",weChatProperties.getAppid());map.put("secret",weChatProperties.getSecret());map.put("js_code",code);map.put("grant_type","authorization_code");String json=HttpClientUtil.doGet(WX_LOGIN,map);JSONObject jsonObject = JSON.parseObject(json);String openid = jsonObject.getString("openid");return openid;
}
然后再引用这个方法即可:
  @Overridepublic User wxlogin(UserLoginDTO userLoginDTO) {
String openid = getOpenid(userLoginDTO.getCode());
完整userserviceimpl代码:
public class UserServiceImpl implements UserService {public static final String WX_LOGIN= "https://api.weixin.qq.com/sns/jscode2session";@Autowiredprivate WeChatProperties weChatProperties;@Autowiredprivate UserMapper userMapper;//微信登录@Overridepublic User wxlogin(UserLoginDTO userLoginDTO) {
String openid = getOpenid(userLoginDTO.getCode());//与之前的登录逻辑不一样。以前是用户名密码登录,需要查询自己的用户表然后检查用户名密码是否正确//而现在这个是微信用户,需要调用微信服务器的接口来获得当前微信用户的openid//        //1.调用微信接口服务,获取当前微信用户的openid
//        Map<String, String> map=new HashMap<>();
//        map.put("appid",weChatProperties.getAppid());
//        map.put("secret",weChatProperties.getSecret());
//        map.put("js_code",userLoginDTO.getCode());
//        map.put("grant_type","authorization_code");
//        String json=HttpClientUtil.doGet(WX_LOGIN,map);
//        //将json中的openid对象解析出
//        JSONObject jsonObject = JSON.parseObject(json);
//        String openid = jsonObject.getString("openid");//2.判断当前openid是否为空,为空则登陆失败抛出登录异常if (openid==null){throw new LoginFailedException(MessageConstant.LOGIN_FAILED);}//3.判断是不是新用户,拿openid去自己的用户表进行查询//进行查询是不是新用户就得需要一个usermapperUser user = userMapper.getByOpenid(openid);if (user==null){//如果是则自动完成注册user = User.builder().openid(openid).createTime(LocalDateTime.now()).build();//此处注册其他的都没有这没关系,性别什么的可以去个人中心写,不用在代码实现userMapper.insert(user);}//4.返回这个用户对象return user;}private String getOpenid(String code) {//1.将小程序发送的code发送给微信,得到一个access_token和openidMap<String, String> map=new HashMap<>();map.put("appid",weChatProperties.getAppid());map.put("secret",weChatProperties.getSecret());map.put("js_code",code);map.put("grant_type","authorization_code");String json=HttpClientUtil.doGet(WX_LOGIN,map);JSONObject jsonObject = JSON.parseObject(json);String openid = jsonObject.getString("openid");return openid;}
}
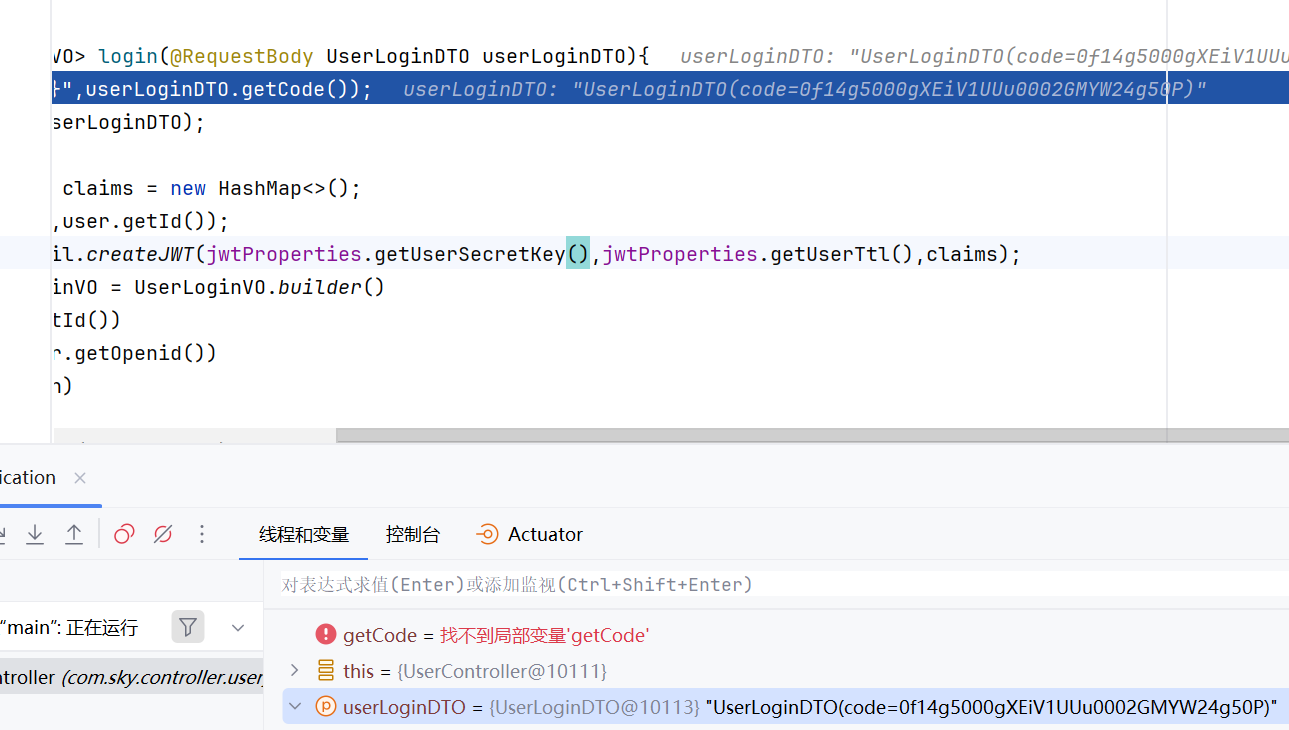
测试
点击debug运行代码,打开redis,运行微信小程序,加入断点发现:
四.导入商品浏览功能代码
分析
分析一下,需要分类接口,查询菜品接口,查询套餐接口,根据套餐id查询套餐接口
代码导入
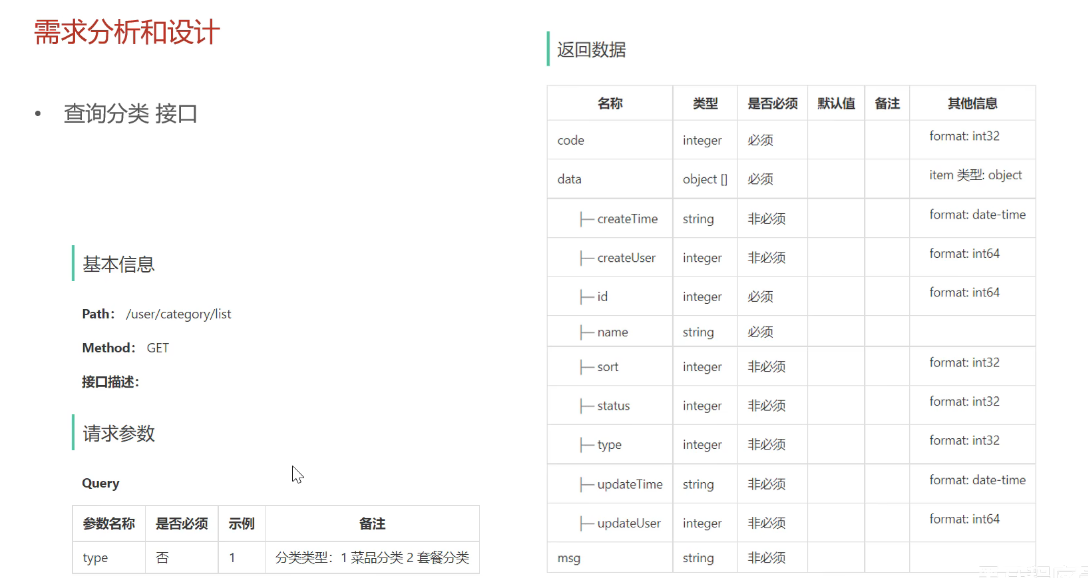
查询分类:
/*** 查询分类* @param type* @return*/
//type为012分别可以查询不同的分类
@GetMapping("/list")
@ApiOperation("查询分类")
public Result<List<Category>> list(Integer type) {List<Category> list = categoryService.list(type);return Result.success(list);
}
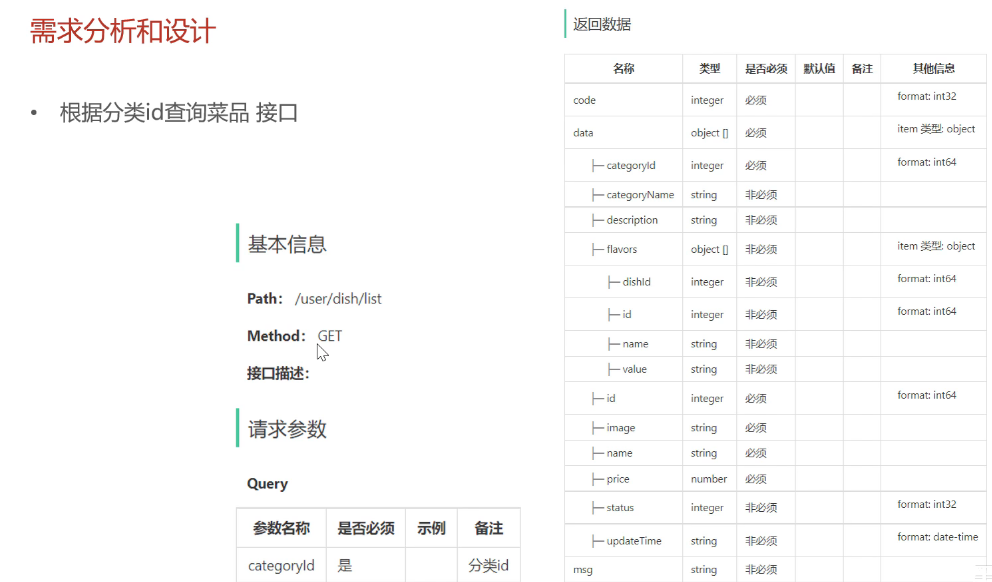
根据分类id查询菜品
@RestController("userDishController")
@RequestMapping("/user/dish")
@Slf4j
@Api(tags = "C端-菜品浏览接口")
public class DishController {@Autowiredprivate DishService dishService;public Result<List<DishVO>> list(Long categoryId){//在用户端,根据id查询菜品不仅仅是要查询出菜品,还得将口味查询出Dish dish=new Dish();dish.setCategoryId(categoryId);dish.setStatus(StatusConstant.ENABLE);List<DishVO> list =dishService.listWithFlavor(dish);return Result.success(list);}
//serviceList<DishVO> listWithFlavor(Dish dish);
在这段代码中,数据被添加到dishVOList的过程分为以下几个关键步骤:
1. 获取原始数据 :通过 dishMapper.list(dish) 查询得到原始的Dish对象列表dishList
2. 创建目标容器 : List<DishVO> dishVOList = new ArrayList<>() 创建一个空的DishVO列表,用于存储最终结果
3. 遍历转换过程 :通过增强for循环 for (Dish d : dishList) 遍历每个原始Dish对象:
为每个Dish对象创建对应的DishVO对象: DishVO dishVO = new DishVO()
使用 BeanUtils.copyProperties(d, dishVO) 将Dish对象的所有属性复制到DishVO对象中
查询与当前菜品关联的口味数据: List<DishFlavor> flavors =dishFlavorMapper.getByDishId(d.getId())
将口味数据设置到DishVO对象中: dishVO.setFlavors(flavors)
4. 添加到结果列表 :通过 dishVOList.add(dishVO) 将转换好的DishVO对象添加到dishVOList中
5. 返回完整结果 :循环结束后, return dishVOList 返回包含所有转换后数据的列表
//条件查询菜品以及口味,serviceimpl@Overridepublic List<DishVO> listWithFlavor(Dish dish) {//这一行代码的作用-// 调用Mapper层的 list() 方法,根据条件查询符合要求的菜品数据//- dish 对象作为查询条件,包含了过滤条件//- 返回的是数据库实体类 Dish 的列表,这些对象直接对应数据库表结构List<Dish> dishList = dishMapper.list(dish);//这一行代码作用是:  创建一个新的 DishVO 类型的列表,用于存储转换后的视图对象List<DishVO> dishVOList=new ArrayList<>();for (Dish d:dishList){DishVO dishVO = new DishVO();BeanUtils.copyProperties(d,dishVO);//根据菜品id查询对应的口味List<DishFlavor> flavors = dishFlavorMapper.getByDishId(d.getId());dishVO.setFlavors(flavors);dishVOList.add(dishVO);}return dishVOList;}
}
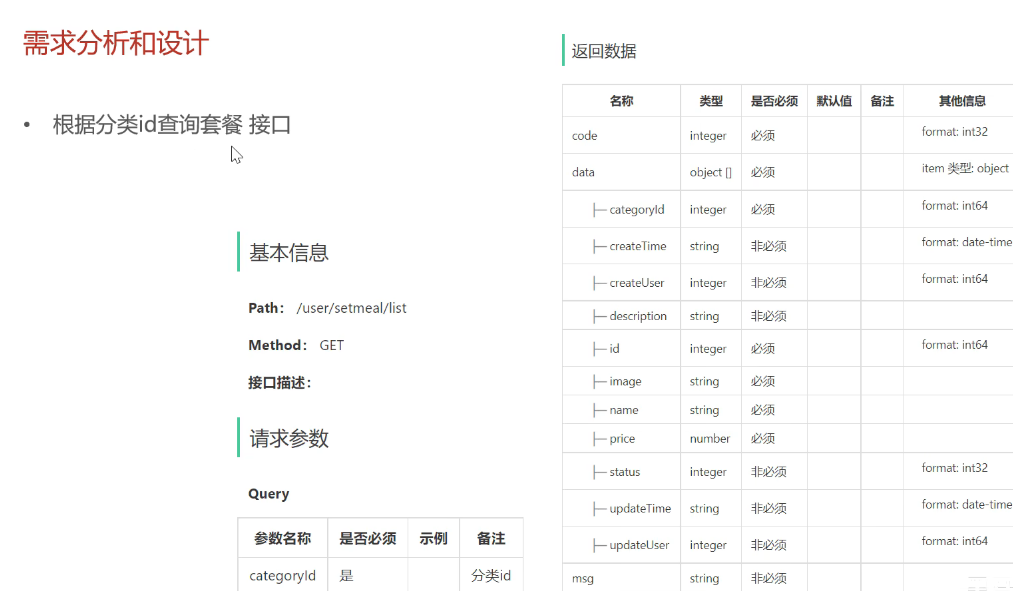
根据分类id查询套餐接口
//controller
@GetMapping("/list")
@ApiOperation("根据分类id查询套餐")
public Result<List<Setmeal>> list(Long categoryId) {Setmeal setmeal = new Setmeal();setmeal.setCategoryId(categoryId);setmeal.setStatus(StatusConstant.ENABLE);List<Setmeal> list = setmealService.list(setmeal);return Result.success(list);
}
/*** 条件查询* @param setmeal* @return*/
public List<Setmeal> list(Setmeal setmeal) {List<Setmeal> list = setmealMapper.list(setmeal);return list;
}
xml:
<select id="list" parameterType="Setmeal" resultType="Setmeal">select * from setmeal<where><if test="name != null">and name like concat('%',#{name},'%')</if><if test="categoryId != null">and category_id = #{categoryId}</if><if test="status != null">and status = #{status}</if></where>
</select>
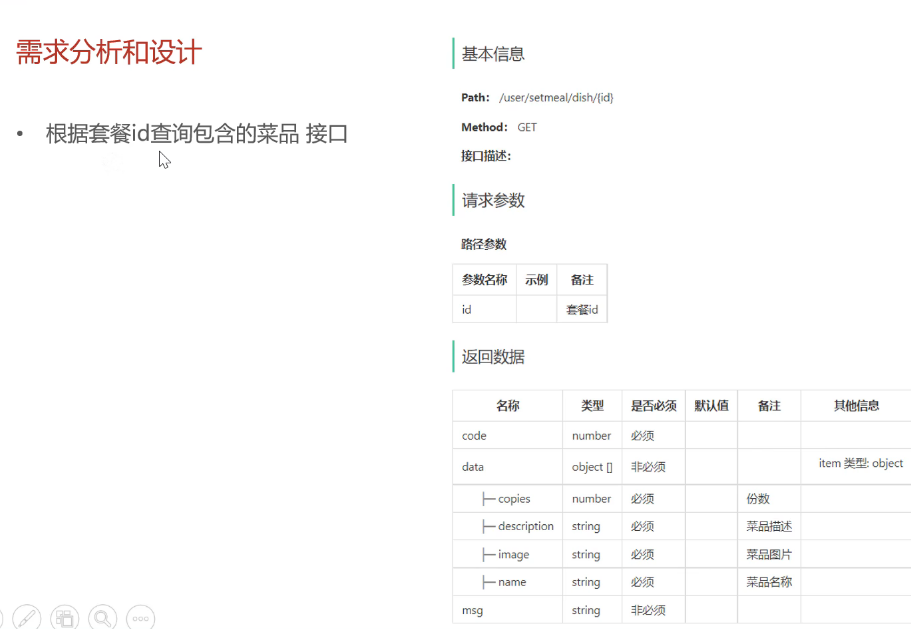
根据套餐id查询关联的菜品接口
/*** 根据套餐id查询包含的菜品列表** @param id* @return*/
@GetMapping("/dish/{id}")
@ApiOperation("根据套餐id查询包含的菜品列表")
public Result<List<DishItemVO>> dishList(@PathVariable("id") Long id) {List<DishItemVO> list = setmealService.getDishItemById(id);return Result.success(list);
}
/*** 根据id查询菜品选项* @param id* @return*/
public List<DishItemVO> getDishItemById(Long id) {return setmealMapper.getDishItemBySetmealId(id);
}
/*** 根据套餐id查询菜品选项* @param setmealId* @return*/
@Select("select sd.name, sd.copies, d.image, d.description " +"from setmeal_dish sd left join dish d on sd.dish_id = d.id " +"where sd.setmeal_id = #{setmealId}")
List<DishItemVO> getDishItemBySetmealId(Long setmealId);