Linux操作系统母盘便捷持久化部署方案
Linux操作系统母盘便捷持久化部署
以RHEL 7.9与RHEL 9.3为例:
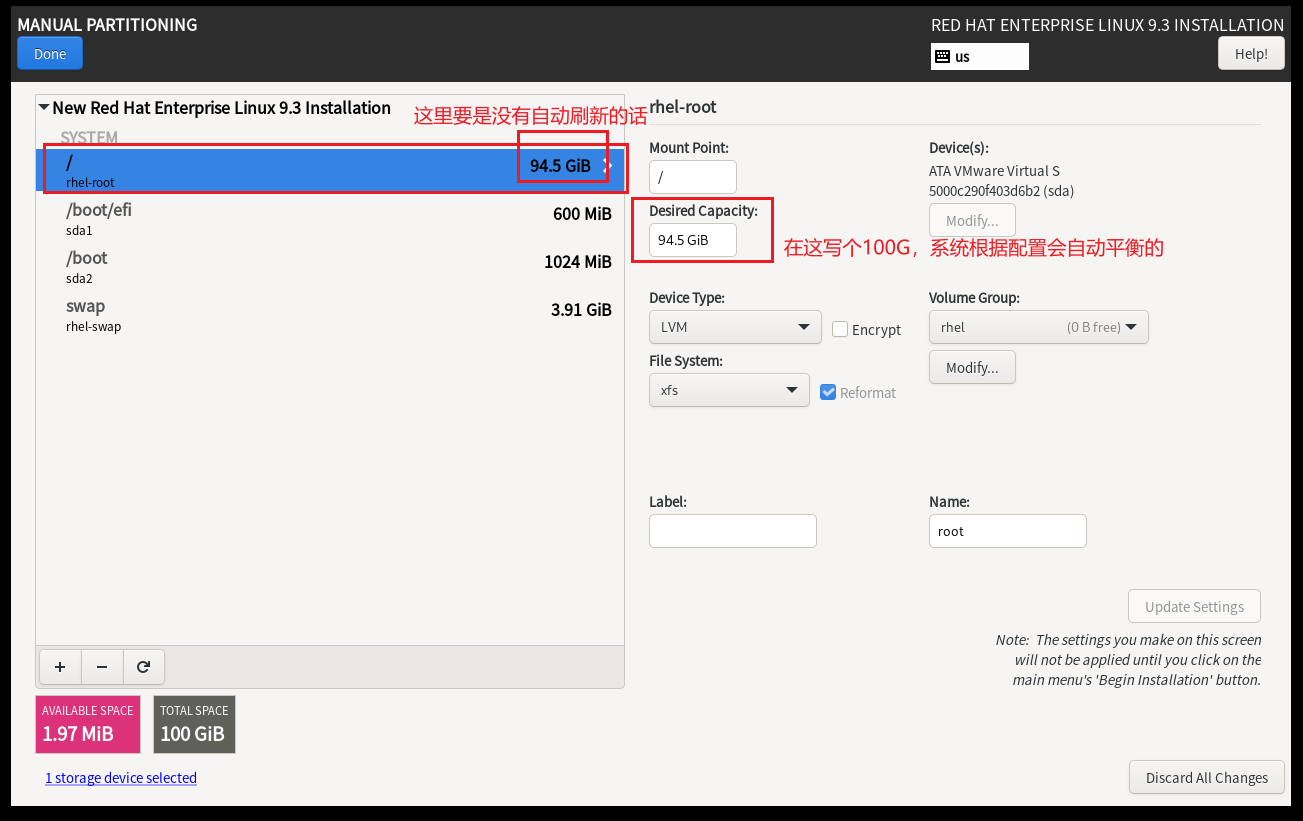
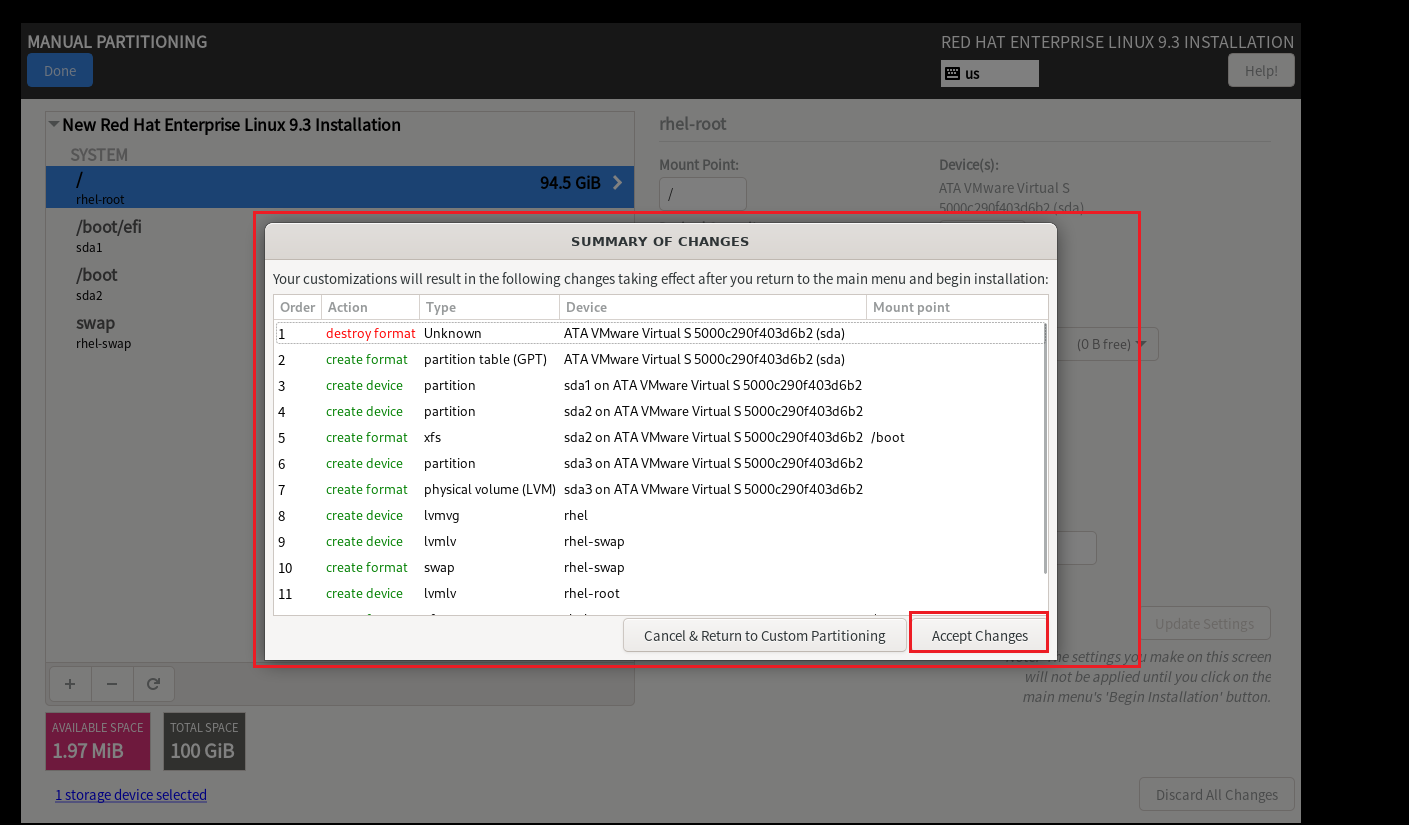
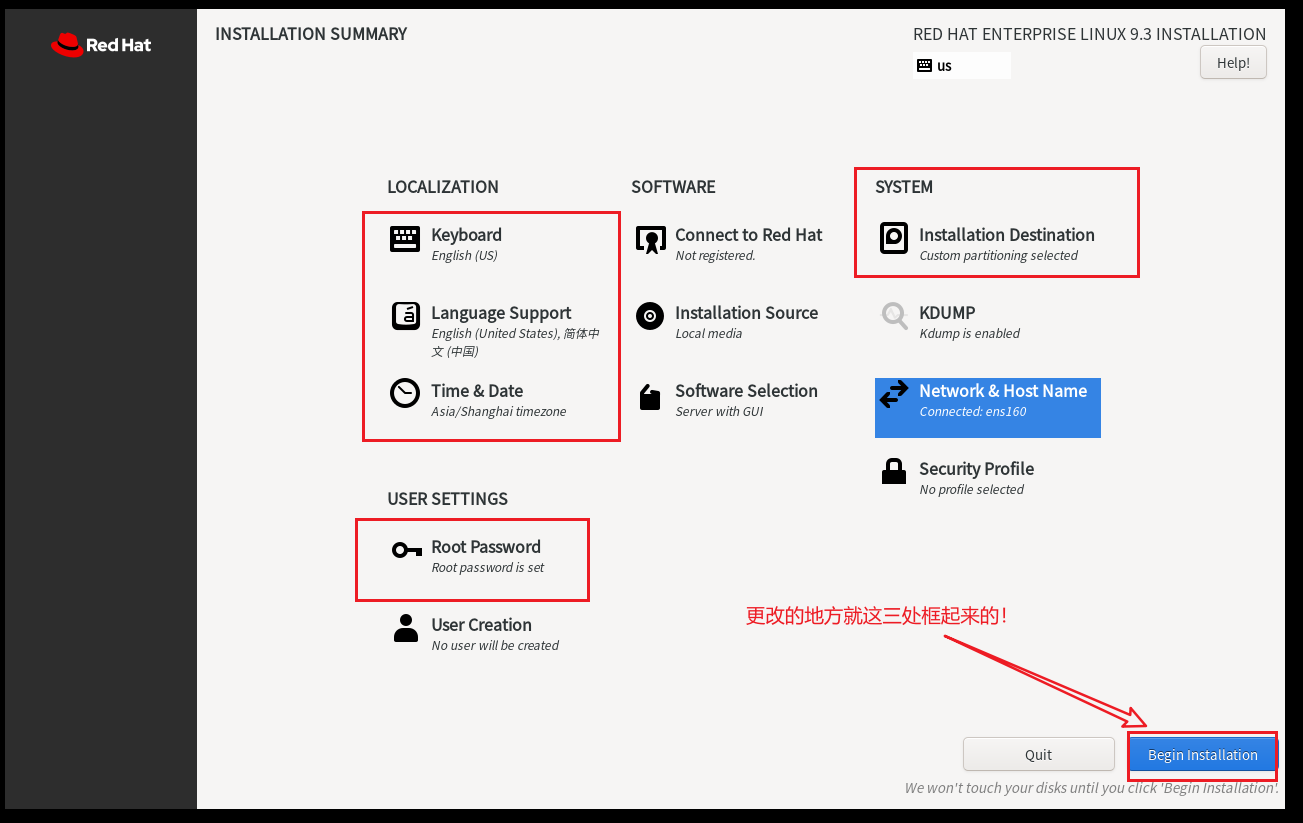
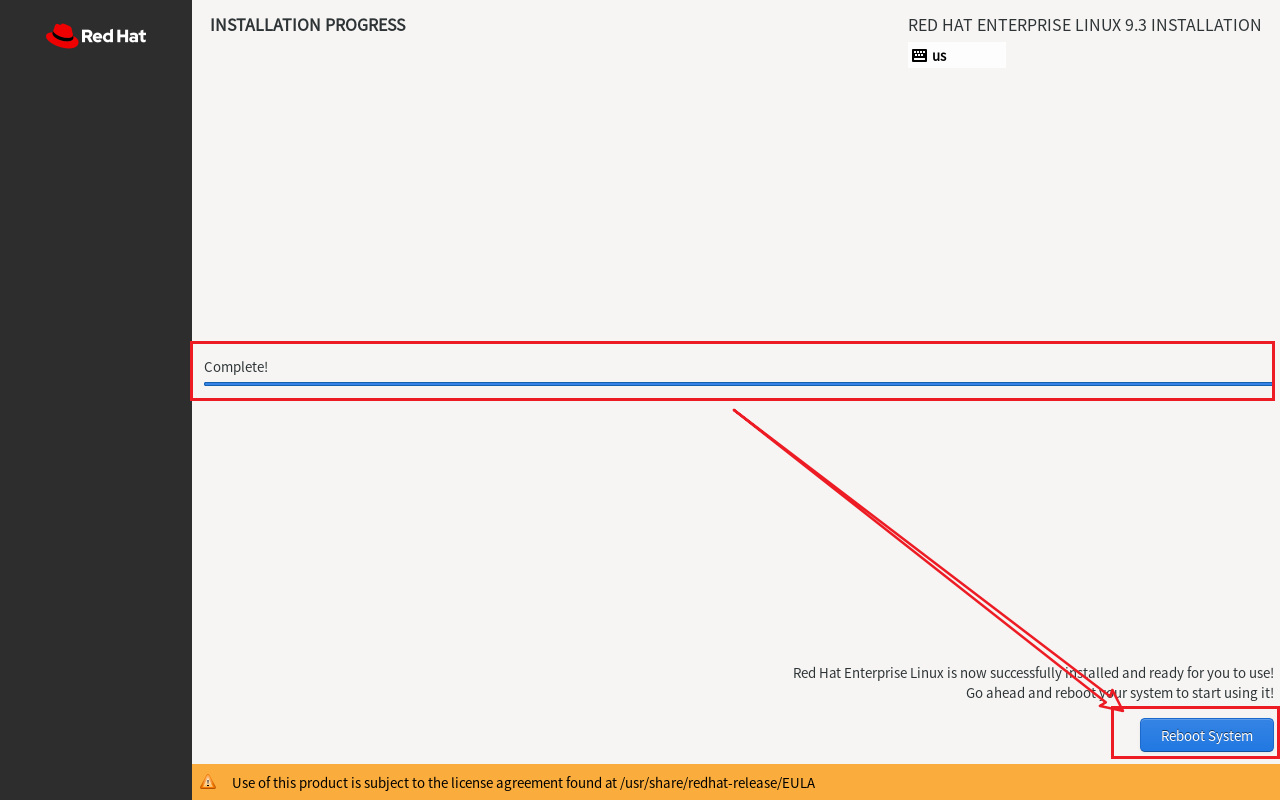
1.系统安装部署重要部分
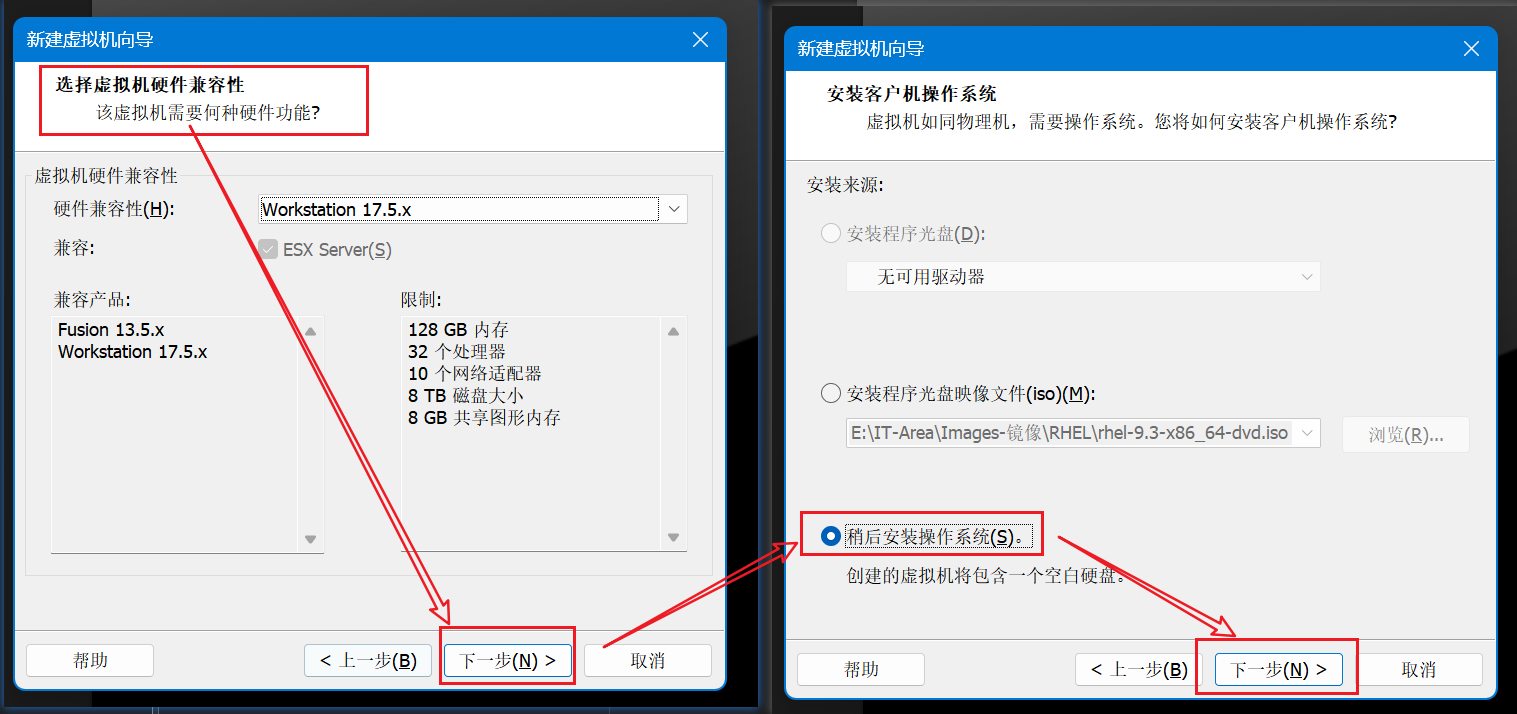
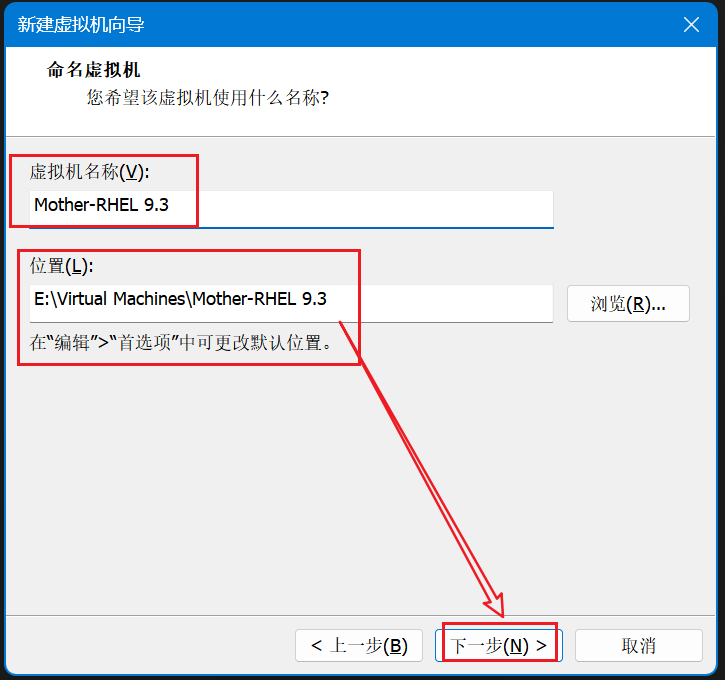
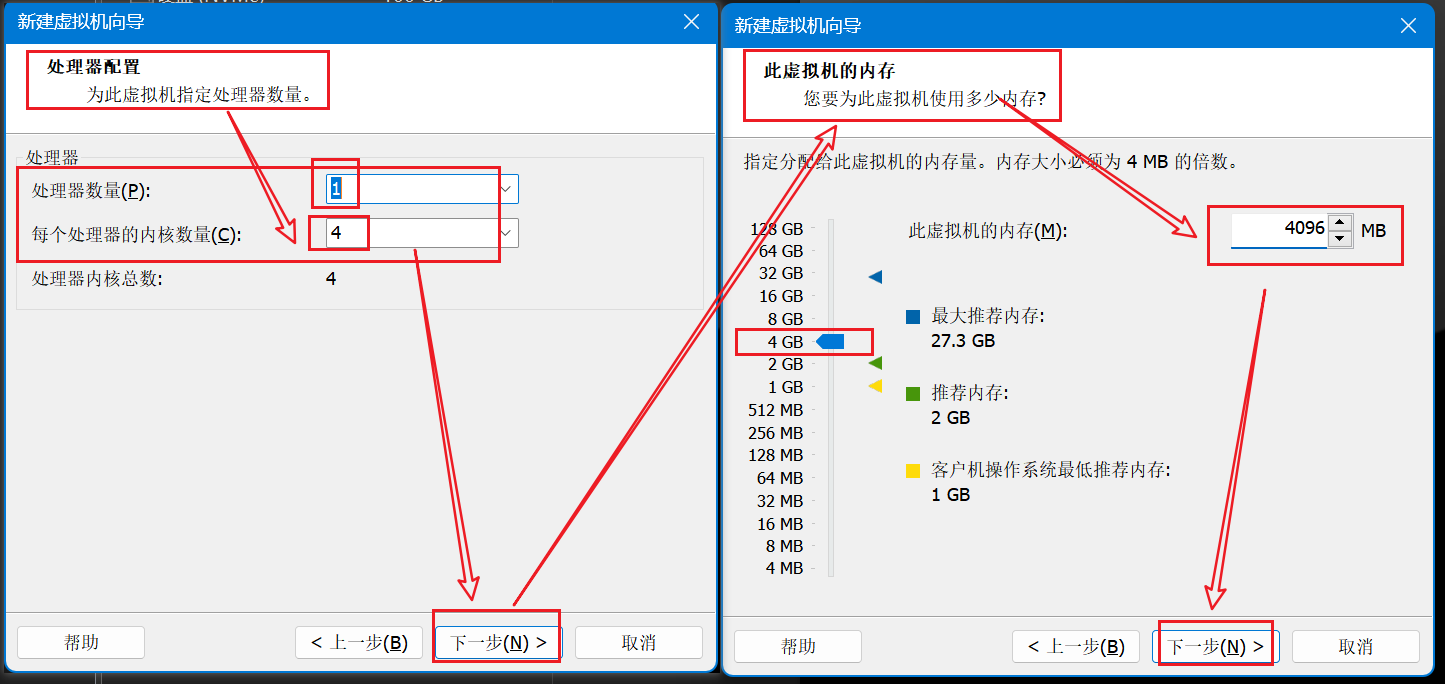
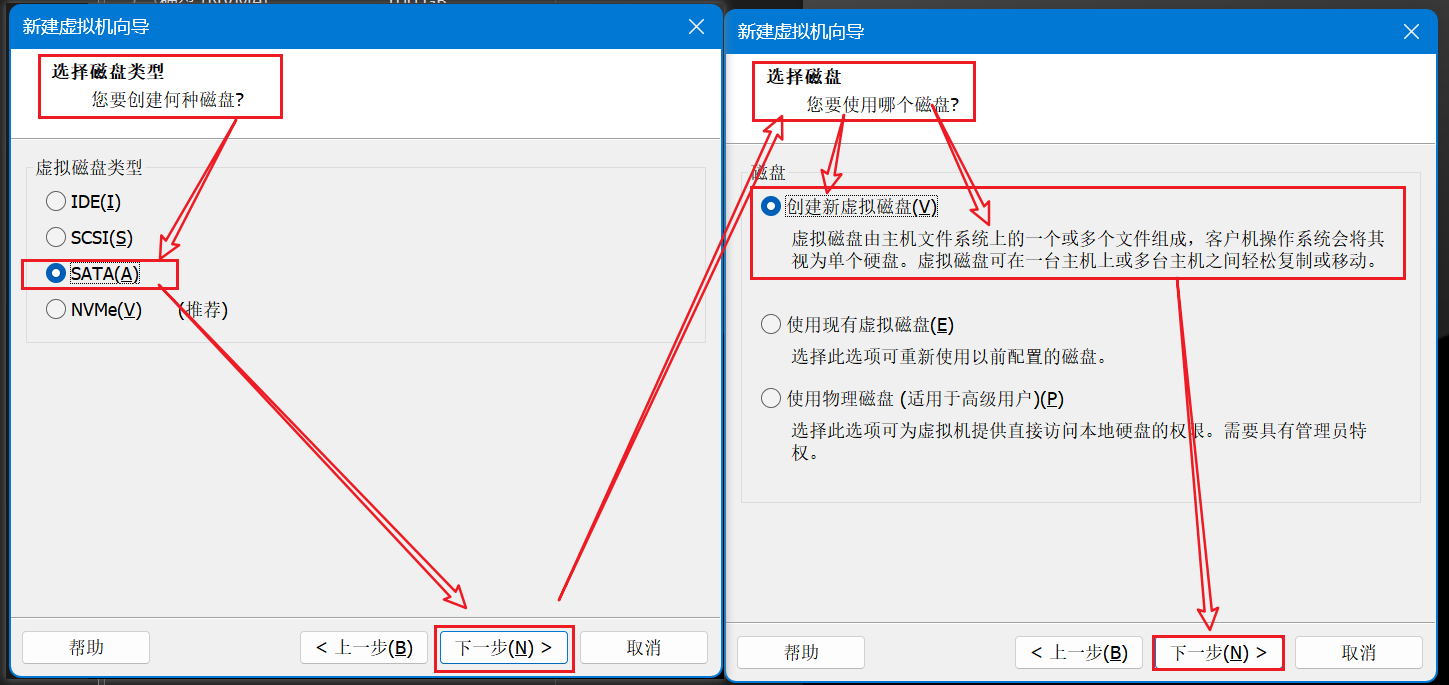
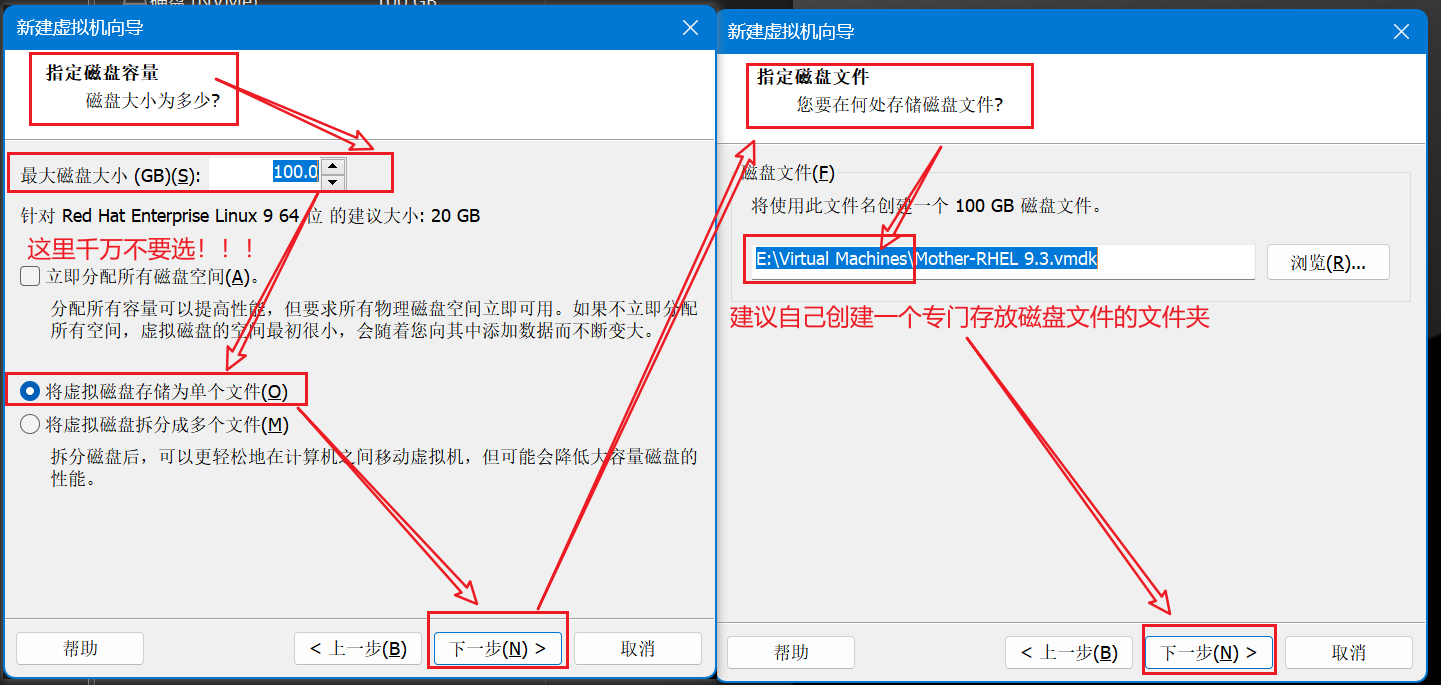
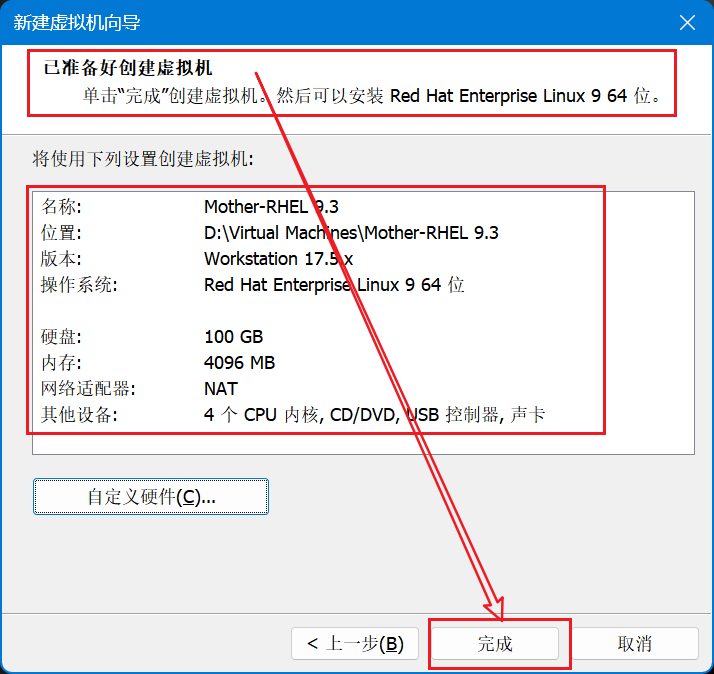
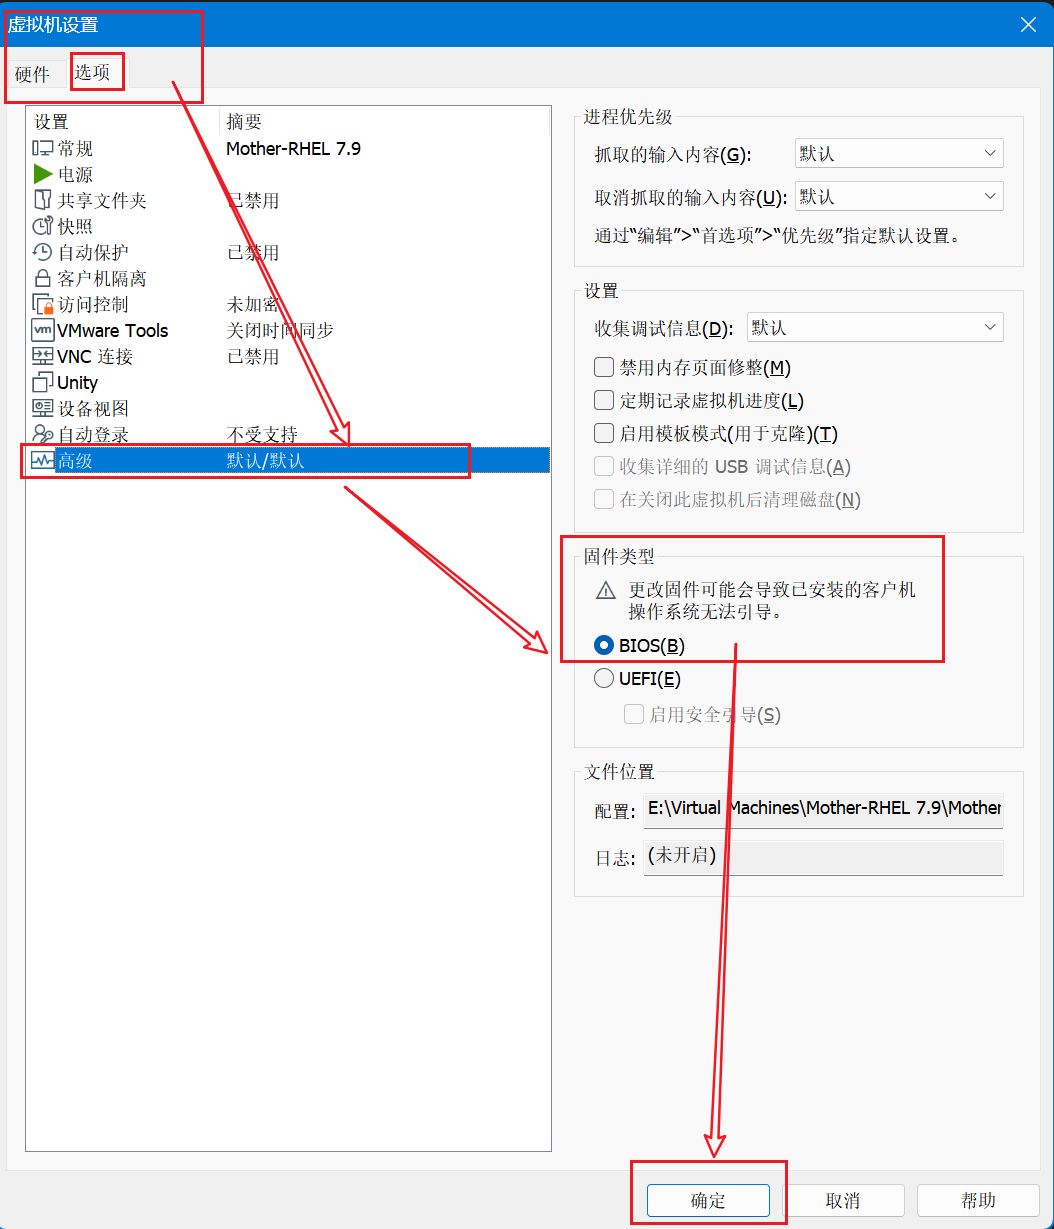
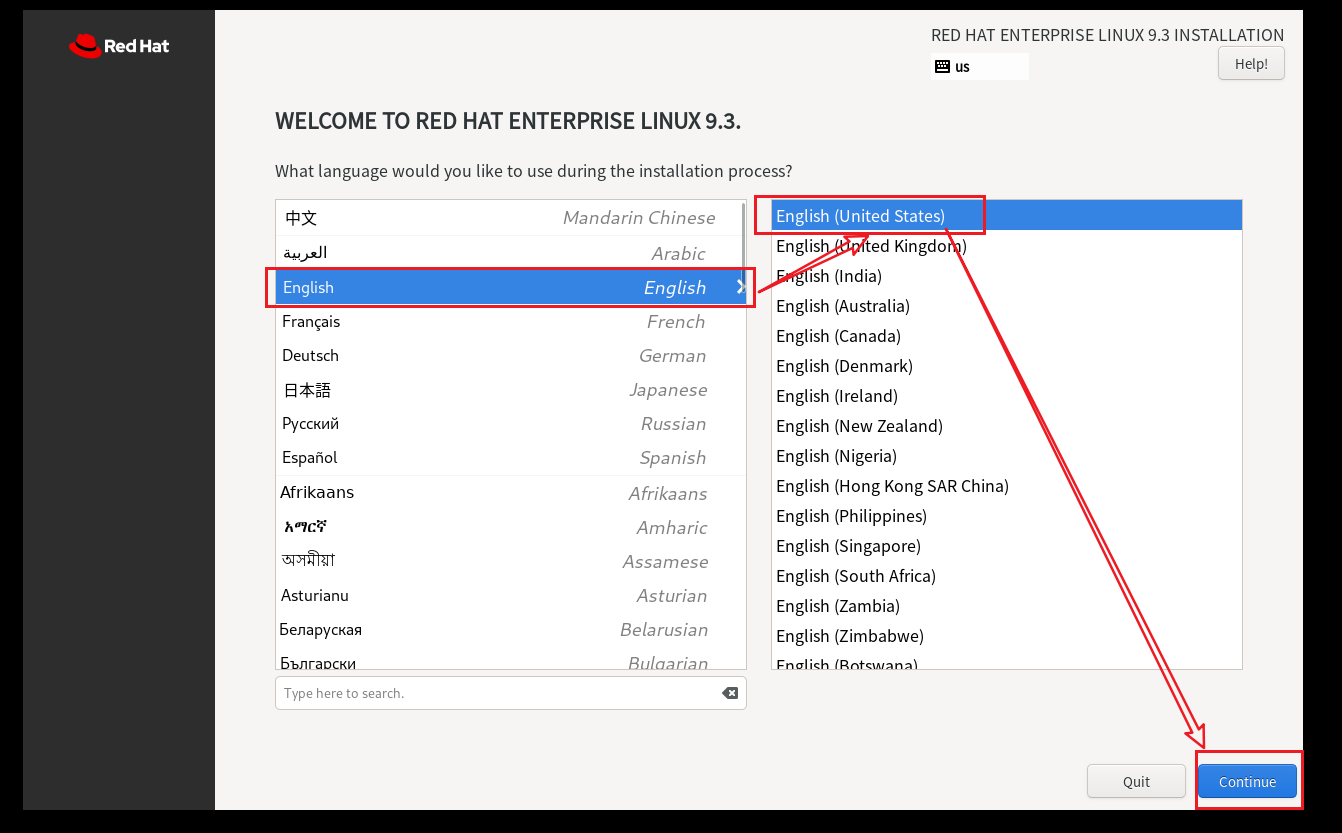
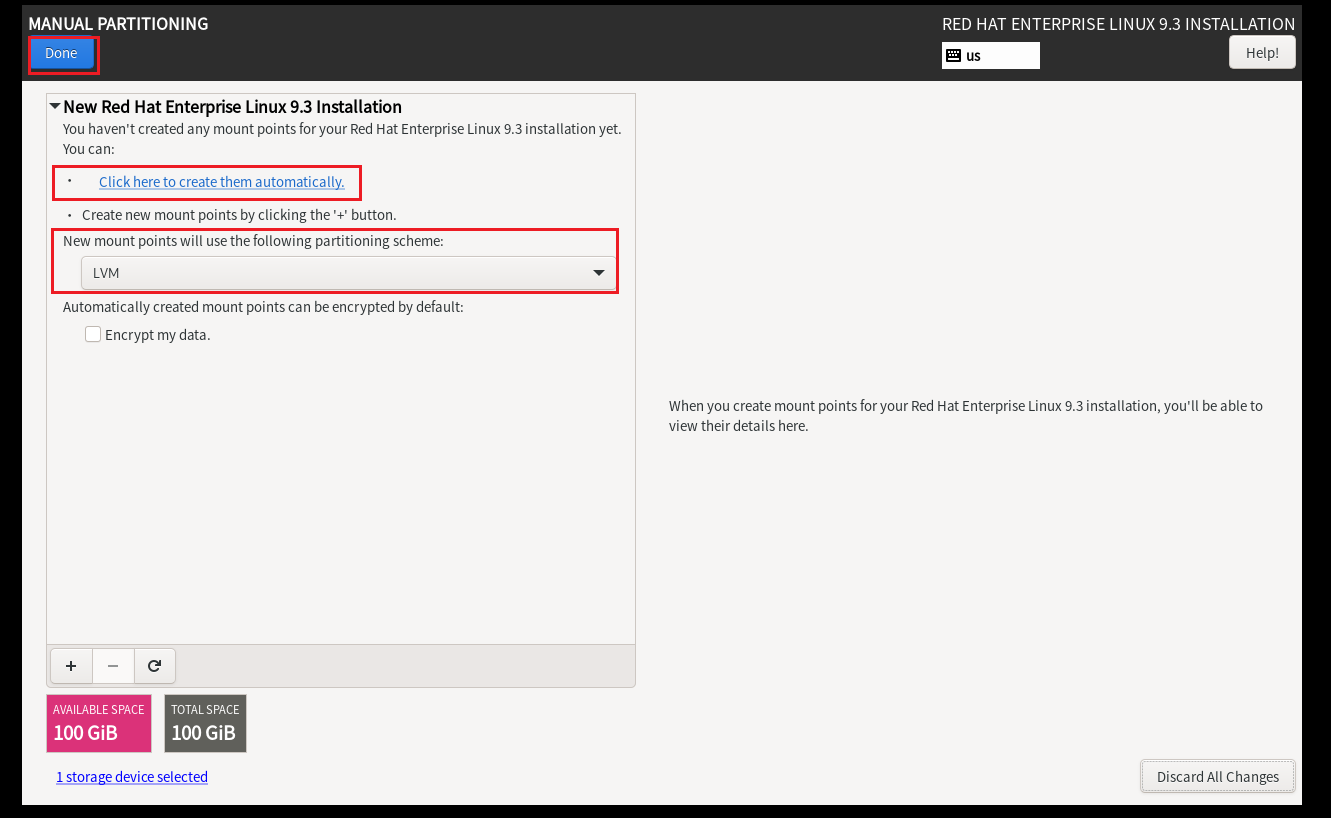
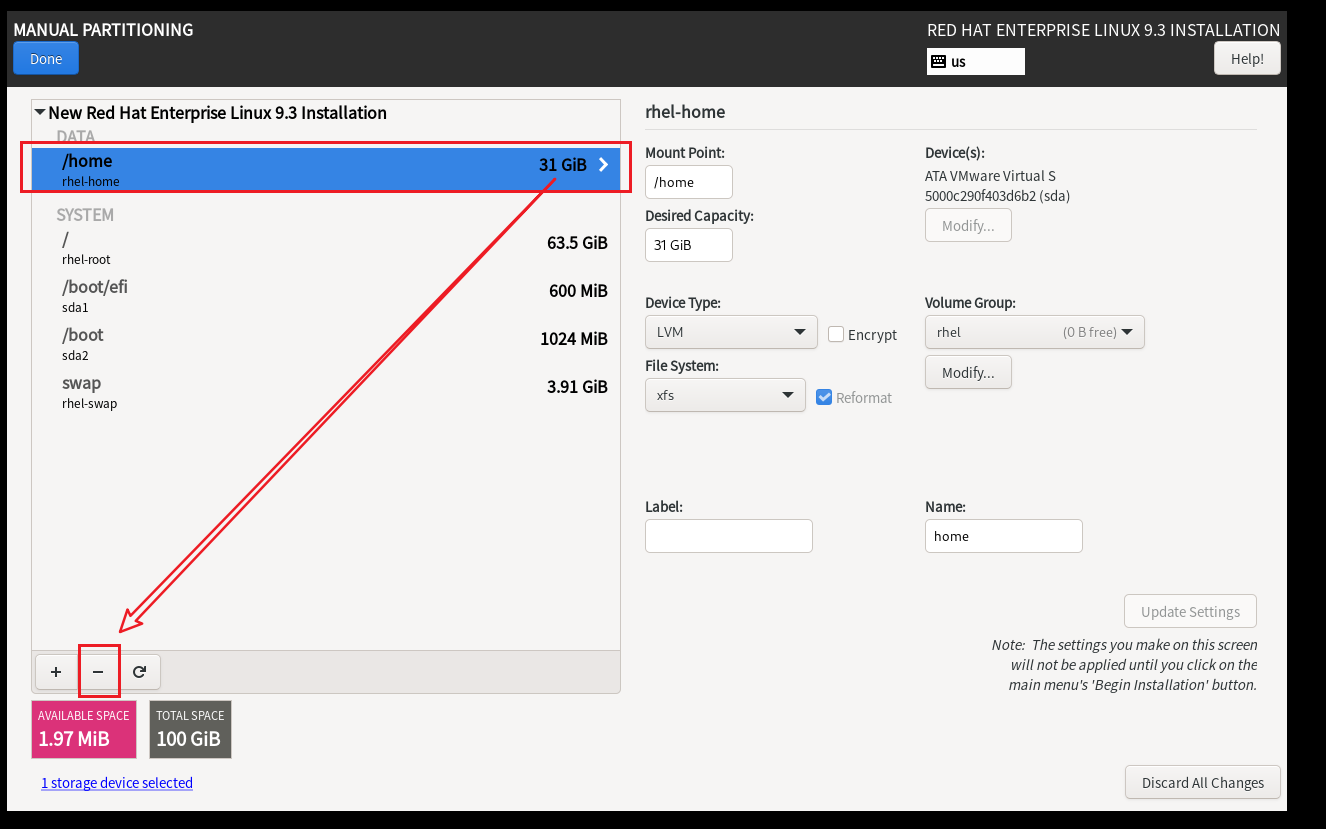
以下创建虚拟机部分大体上使用的RHEL 9.3 进行介绍(都是建议配置信息,根据自己电脑性能来定)


# 红帽7不建议将网卡配置文件打开
# 打开的话,记得删除网卡配置文件
第一次登录可能登录到普通用户,Logout之后,使用root用户登录即可
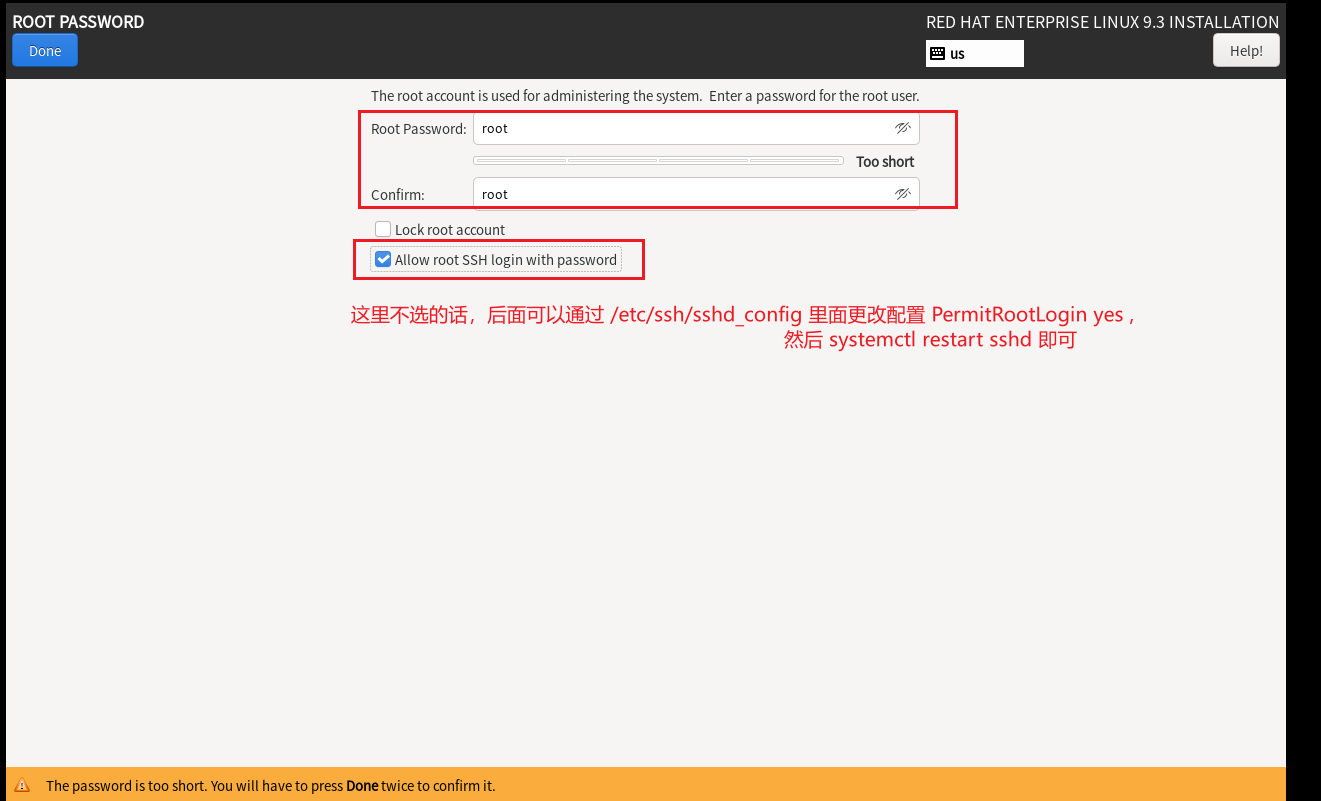
2 检查是否允许SSH远程登录
[root@localhost ~]# vim /etc/ssh/sshd_config
PermitRootLogin yes[root@localhost ~]# systemctl restart sshd
[root@localhost ~]# systemctl enable --now sshd
# 如果没有显示为yes,将其1改为yes即可 --> 链接远程登录工具
3.配置本地仓库
3.1 RHEL-9
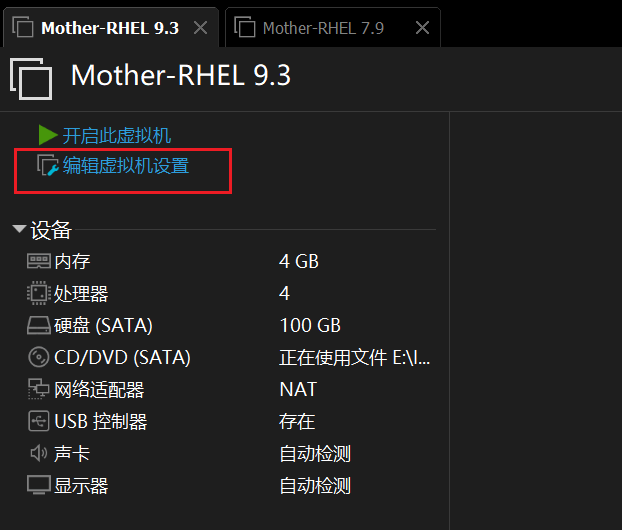
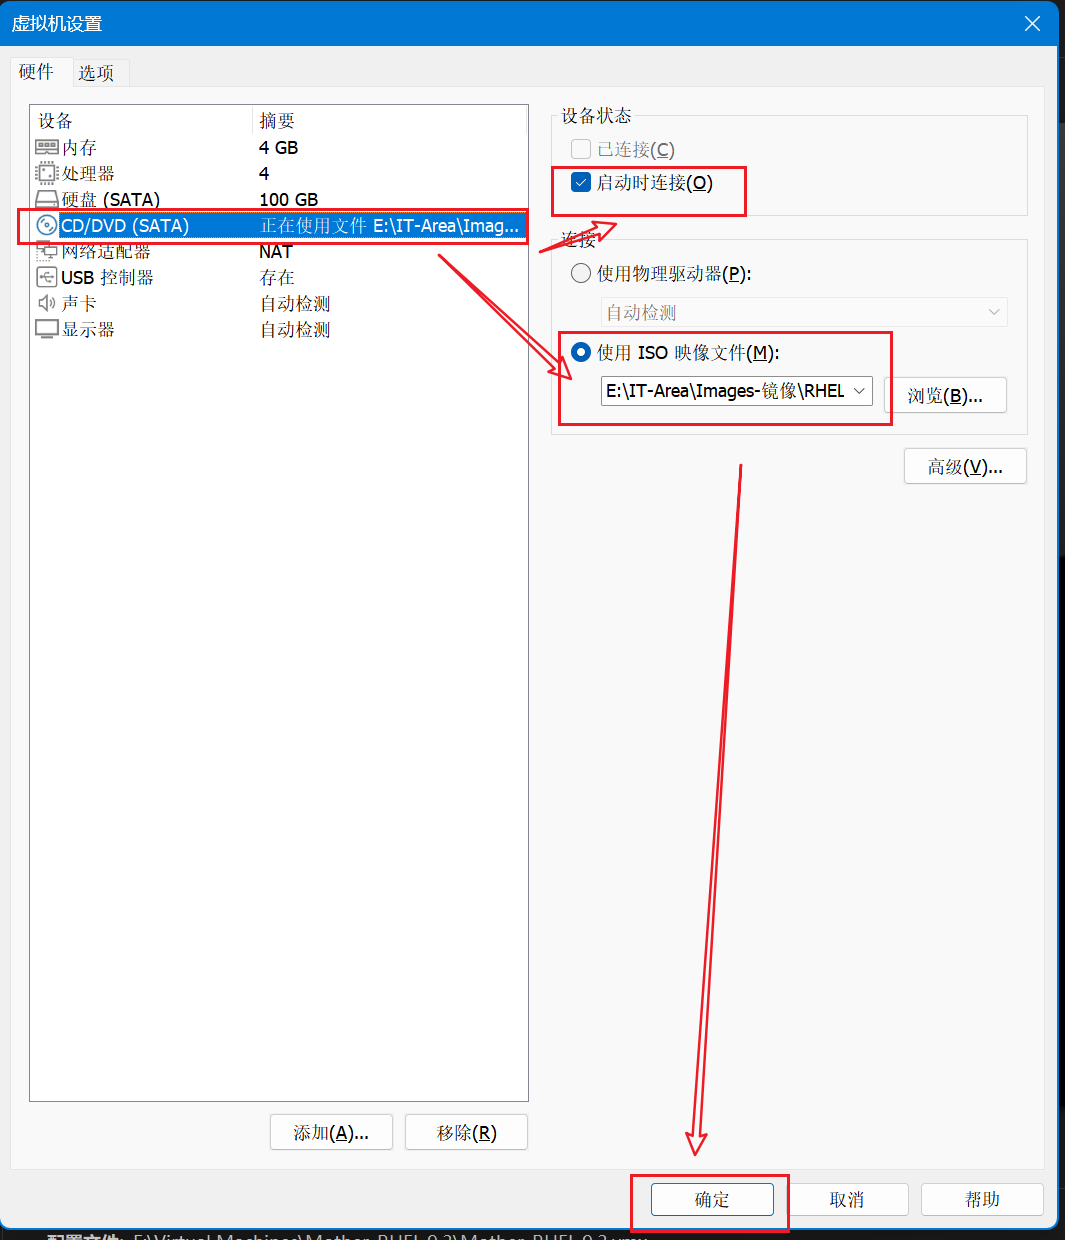
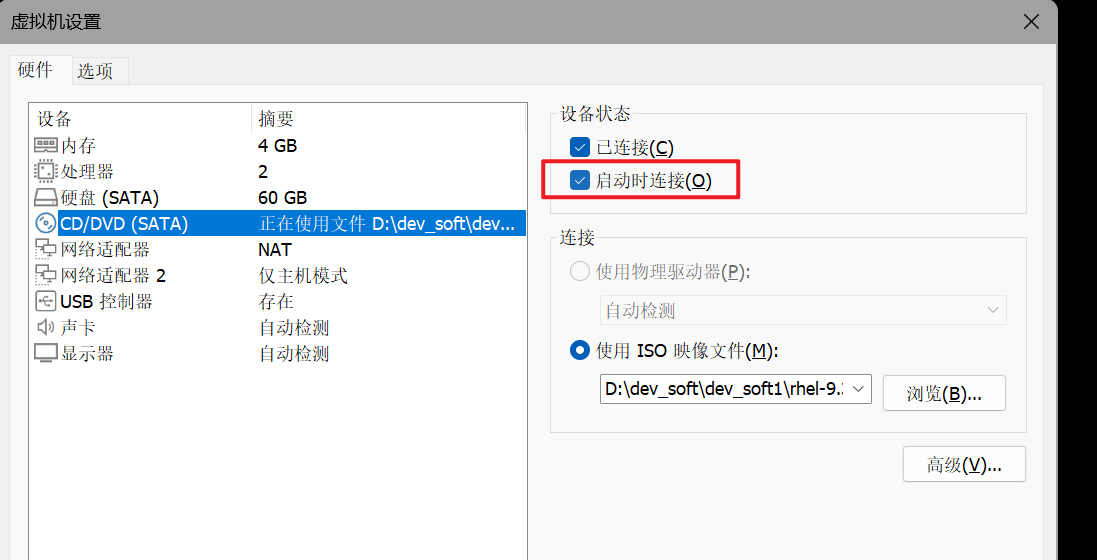
1.在vmware中加载系统镜像,并设定虚拟光驱开机启动
如下图1所示:2.挂载光驱到系统目录
[root@RHEL-9 ~]# mkdir /local
[root@RHEL-9 ~]# mount /dev/cdrom /local3.设置光驱开机自动挂载
[root@RHEL-9 ~]# vim /etc/rc.d/rc.local         # 添加一条开机自运行脚本(就是把 mount /dev/cdrom /rhel9.3 命令添加一行即可!)[root@RHEL-9 ~]# more /etc/rc.d/rc.local        # 查看是否增添
mount /dev/cdrom  /local[root@RHEL-9 ~]# chmod +x /etc/rc.d/rc.local    # 加执行权限4.配置仓库
[root@rhel-9 ~]# cd /etc/yum.repos.d/
[root@rhel-9 yum.repos.d]# vim /etc/yum.repos.d/local.repo
[AppStream]
name=AppStream
baseurl=file:///local/AppStream
gpgcheck=1      # 这里也可以填写为0,后面也就可以不用加了,AppStream 下面同理
gpgkey=file:///local/RPM-GPG-KEY-redhat-release
enabled=1[BaseOS]
name=BaseOS
baseurl=file:///local/BaseOS
gpgcheck=1
gpgkey=file:///local/RPM-GPG-KEY-redhat-release
enabled=15.测试
[root@RHEL-9 yum.repos.d]# dnf search nginx     # 测试本地仓库是否成功
3.2 RHEL-7
# 同理知:rhel-7的配置与步骤大差不差
root@localhost yum.repos.d]# vim rhel7.repo     # 下面写的太简陋了,但是也是可以的,还是推荐上面的写法
[local]
name = local
baseurl = file:///local
gpgcheck = 0root@localhost yum.repos.d]# yum list httpd     # 测试本地仓库是否成功
4.编写自动化配置脚本vmset.sh
4.1 RHEL-9
[root@rhel-9 ~]# vim /usr/bin/vmset.sh
#!/bin/bash
ifconfig $1 &> /dev/null || {echo "net device $1 is not exist"exit
}ping -c1 -w1 $2 &> /dev/null && {echo "$2 is exist"exit
}grep $1 -r /etc/NetworkManager/system-connections/ | awk -F : '{system("rm -rf " $1)}'cat >/etc/NetworkManager/system-connections/$1.nmconnection <<EOF
[connection]
id=$1
type=ethernet
interface-name=$1[ipv4]
address1=$2/24,172.25.254.2
dns=114.114.114.114;
method=manual
EOFchmod 600 /etc/NetworkManager/system-connections/$1.nmconnection
nmcli connection reload
nmcli connection up $1hostnamectl hostname $3grep -e "$2\t$3" /etc/hosts || {echo -e "$2\t$3"  >> /etc/hosts
}[root@rhel-9 ~]# chmod +x /usr/bin/vmset.sh# 编写之前可以将原有的网卡配置文件删除!
4.2 RHEL-7
[root@rhel-7 ~]# vim /usr/bin/vmset.sh
#!/bin/bash
ifconfig $1 &> /dev/null || {echo "net device $1 is not exist"exit
}ping -c1 -w1 $2 &> /dev/null && {echo "$2 is exist"exit
}grep $1 -r /etc/sysconfig/network-scripts/ | awk -F : '{system("rm -rf " $1)}'cat >/etc/sysconfig/network-scripts/ifcfg-$1 <<EOF
DEVICE=$1
NAME=$1
BOOTPROTO=none
IPADDR0=$2
PREFIX0=24
GATEWAY0=172.25.254.2
DNS1=114.114.114.114
ONBOOT=yes
EOFnmcli connection reload
nmcli connection up $1hostnamectl set-hostname $3grep -e "$2\t$3" /etc/hosts || {echo -e "$2\t$3"  >> /etc/hosts
}[root@rhel-7 ~]# chmod +x /usr/bin/vmset.sh# 编写之前可以将原有的网卡配置文件删除!
5.网卡名称调整及禁用SELinux
5.1 RHEL-9
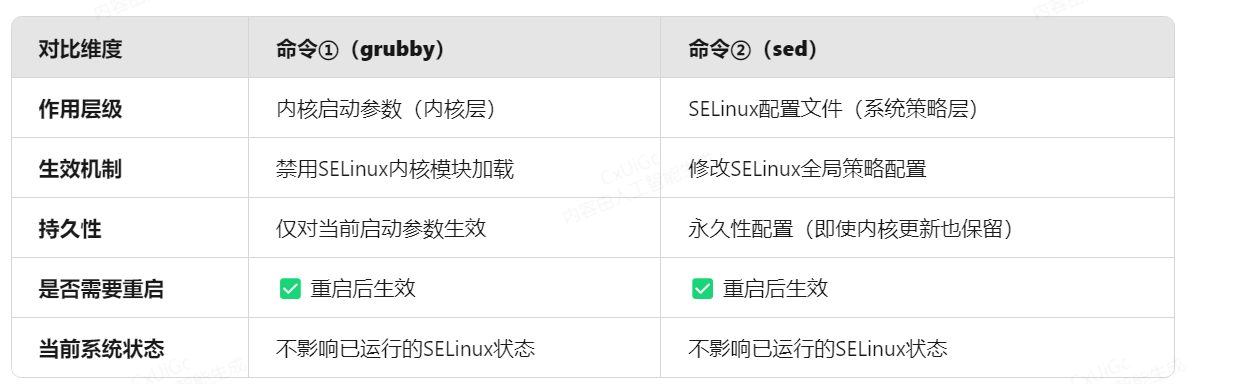
[root@RHEL-9 ~]# grubby --update-kernel  ALL --args net.ifnames=0   # reboot之后生效
# 永久修改Linux系统的内核启动参数,具体作用是禁用可预测的网络接口命名规则,强制系统使用传统的eth0, eth1等命名方式# 在内核启动参数中注入selinux=0,阻止内核加载SELinux安全模块
[root@RHEL-9 ~]# grubby --update-kernel  ALL --args selinux=0
# 或者使用下面的命令
# 系统启动时仍加载SELinux模块,但立即将其设为禁用状态
[root@RHEL-9 ~]# sed -i '/^SELINUX=/ c SELINUX=disabled' /etc/selinux/config
5.2 RHEL-7
[root@rhel-7 ~]# grubby --update-kernel  ALL --args net.ifnames=0   # reboot之后生效[root@rhel-7 ~]# grubby --update-kernel  ALL --args selinux=0
# 或者使用下面的命令
# 系统启动时仍加载SELinux模块,但立即将其设为禁用状态
[root@rhel-7 ~]# sed -i '/^SELINUX=/ c SELINUX=disabled' /etc/selinux/config
6.火墙的关闭
]# systemctl disable --now firewalld
]# reboot
7.reboot 测试 + Poweroff 永久关闭-母盘制作完毕
vmset.sh 网卡名 IP地址 主机名# 以后需要虚拟机,直接从母盘克隆出子盘即可!
# 示例如下:
8.克隆母盘-子盘的使用方法
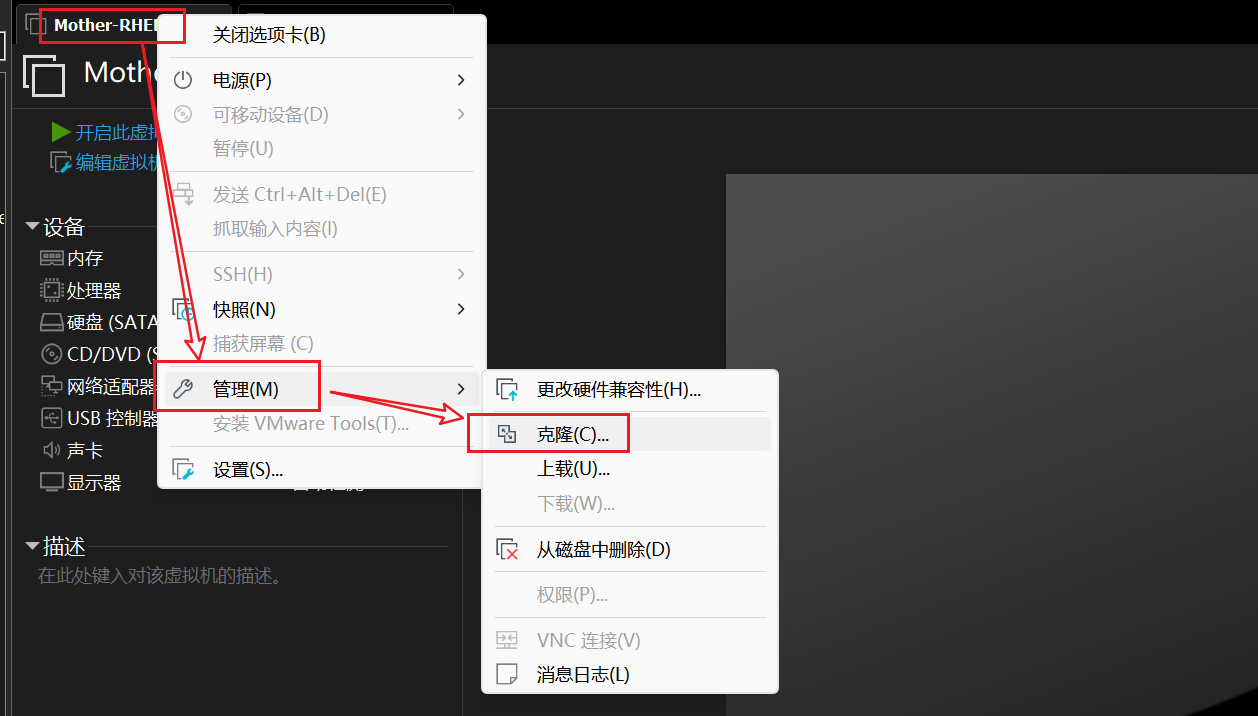
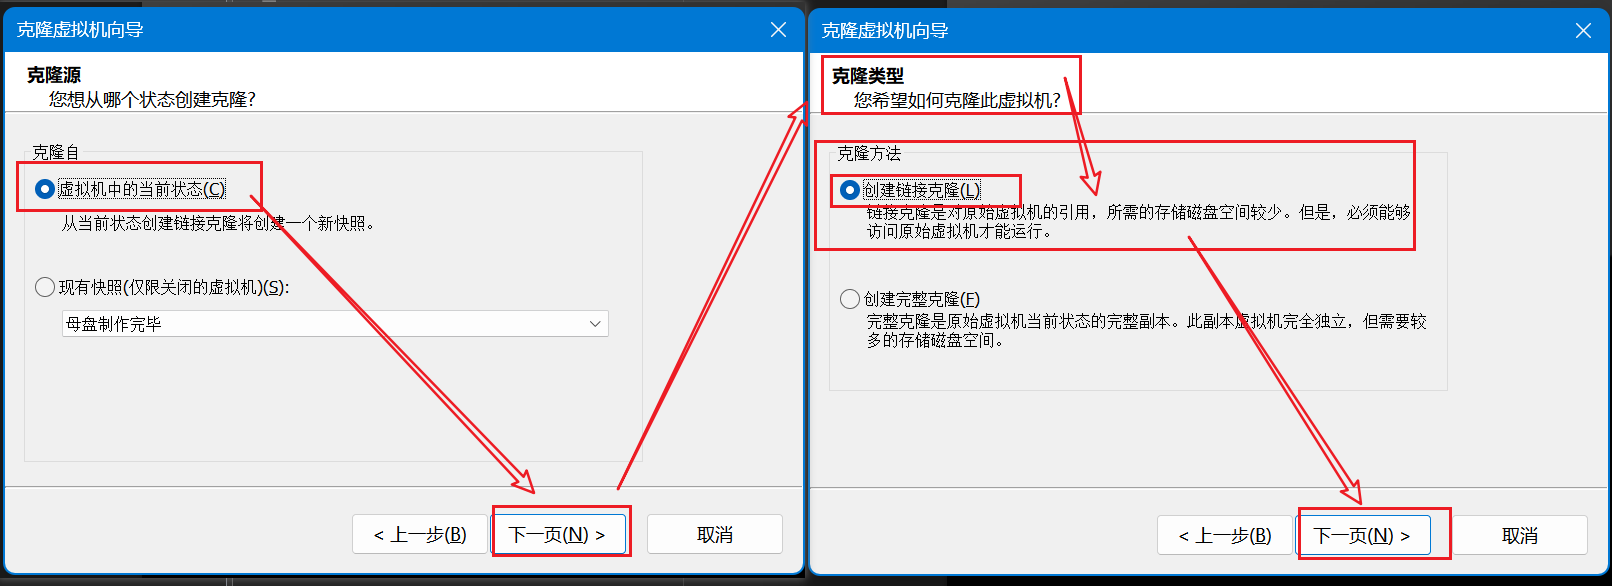
这里建议使用"创建链接克隆"
# 以后克隆出来开机之后直接执行即可 vmset.sh 网卡名 IP地址 主机名
[root@localhost ~]# vmset.sh eth0 172.25.254.10 R9-node1.cyber4k.org[root@R9-node1 ~]# hostname
R9-node1.cyber4k.org[root@R9-node1 ~]# more /etc/NetworkManager/system-connections/eth0.nmconnection
[connection]
id=eth0
type=ethernet
interface-name=eth0[ipv4]
address1=172.25.254.10/24,172.25.254.2
dns=114.114.114.114;
method=manual[root@R9-node1 ~]# cat /etc/resolv.conf
nameserver 114.114.114.114[root@R9-node1 ~]# route -n
Destination     Gateway         Genmask         Flags Metric Ref    Use Iface
0.0.0.0         172.25.254.2    0.0.0.0         UG    100    0        0 eth0
172.25.254.0    0.0.0.0         255.255.255.0   U     100    0        0 eth0
[root@localhost ~]# vmset.sh eth0 172.25.254.100 R7-node1.cyber4k.org[root@localhost ~]# hostname
r7-node1.cyber4k.org[root@localhost ~]# more /etc/sysconfig/network-scripts/ifcfg-eth0
DEVICE=eth0
NAME=eth0
BOOTPROTO=none
IPADDR0=172.25.254.100
PREFIX0=24
GATEWAY0=172.25.254.2
DNS1=114.114.114.114
ONBOOT=yes[root@localhost ~]# cat /etc/resolv.conf
search cyber4k.org
nameserver 114.114.114.114
[root@localhost ~]# route -n
Destination     Gateway         Genmask         Flags Metric Ref    Use Iface
0.0.0.0         172.25.254.2    0.0.0.0         UG    100    0        0 eth0
172.25.254.0    0.0.0.0         255.255.255.0   U     100    0        0 eth0
192.168.122.0   0.0.0.0         255.255.255.0   U     0      0        0 virbr0