《Linux 环境下 NTP 时间同步与 SSH 免密登录配置实战》
1.配置ntp时间服务器,确保客户端主机能和服务主机同步时间
-
搭建本地时间同步服务器
-
架构
| 性质 | IP地址 | 同步对象 |
|---|---|---|
| 服务端master | 192.168.2.130 | ntp.aliyun.com |
| 客户端node1 | 192.168.2.131 | 192.168.2.130 |
- 要求
- 服务端master向阿里时间服务器进行时间同步,
- 客户端node1向服务端server进行时间同步
1.1定位服务端server
[root@master ~]# vim /etc/chrony.conf
定位第3行,删除后添加阿里的时间同步服务地址
server ntp.aliyun.com iburst
也可以先清空chrony.conf内容,将阿里开源提供的时间服务器推荐配置复制粘贴到该文件中
server ntp.aliyun.com iburst
stratumweight 0
driftfile /var/lib/chrony/drift
rtcsync
makestep 10 3
bindcmdaddress 127.0.0.1
bindcmdaddress ::1
keyfile /etc/chrony.keys
commandkey 1
generatecommandkey
logchange 0.5
logdir /var/log/chrony
1.2 重启服务
[root@master ~]# systemctl restart chronyd
1.3 时间同步
[root@master ~]# chronyc sources -v.-- Source mode  '^' = server, '=' = peer, '#' = local clock./ .- Source state '*' = current best, '+' = combined, '-' = not combined,
| /             'x' = may be in error, '~' = too variable, '?' = unusable.
||                                                 .- xxxx [ yyyy ] +/- zzzz
||      Reachability register (octal) -.           |  xxxx = adjusted offset,
||      Log2(Polling interval) --.      |          |  yyyy = measured offset,
||                                \     |          |  zzzz = estimated error.
||                                 |    |           \
MS Name/IP address         Stratum Poll Reach LastRx Last sample
===============================================================================
^* 203.107.6.88                  2   6    17    56   +721us[ +851us] +/-   31ms
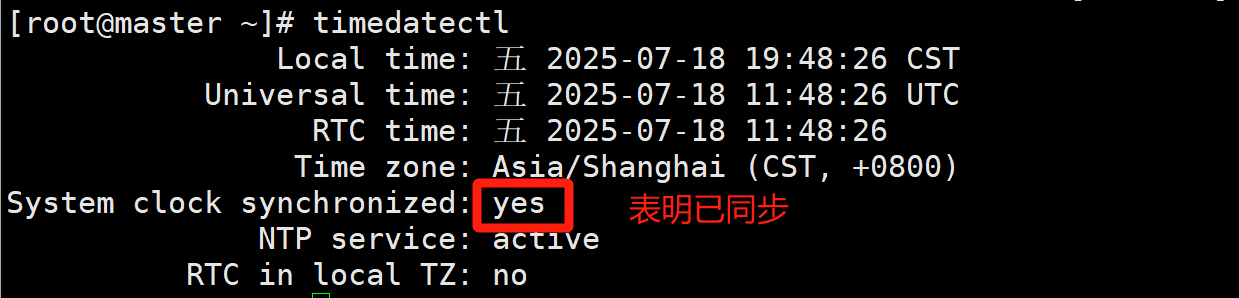
[root@master ~]# timedatectlLocal time: 五 2025-07-18 19:48:26 CSTUniversal time: 五 2025-07-18 11:48:26 UTCRTC time: 五 2025-07-18 11:48:26Time zone: Asia/Shanghai (CST, +0800)
System clock synchronized: yes    # yes  表明已同步NTP service: activeRTC in local TZ: no
1.4 设置允许客户端时间同步:
[root@master ~]# vim /etc/chrony.conf
在配置文件中加入客户端的ip:
allow 192.168.2.131
重启服务:
[root@master ~]# systemctl restart chronyd
1.5 定位客户端node1
[root@node1 ~]# vim /etc/chrony.co
修改第3行为server的地址 写入服务端ip:

# 重启服务
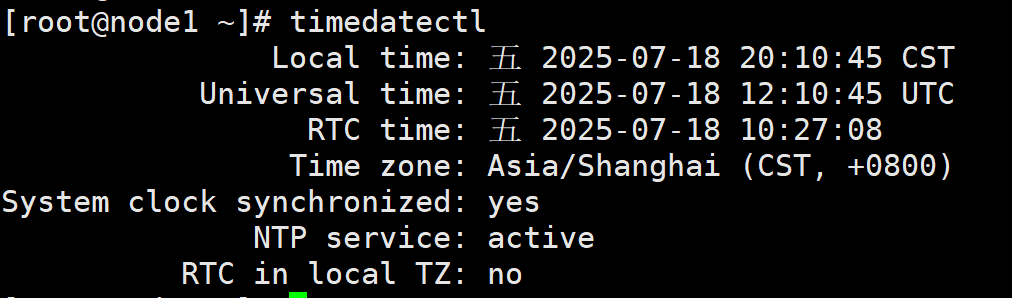
[root@node1 ~]# systemctl restart chronyd# 测试
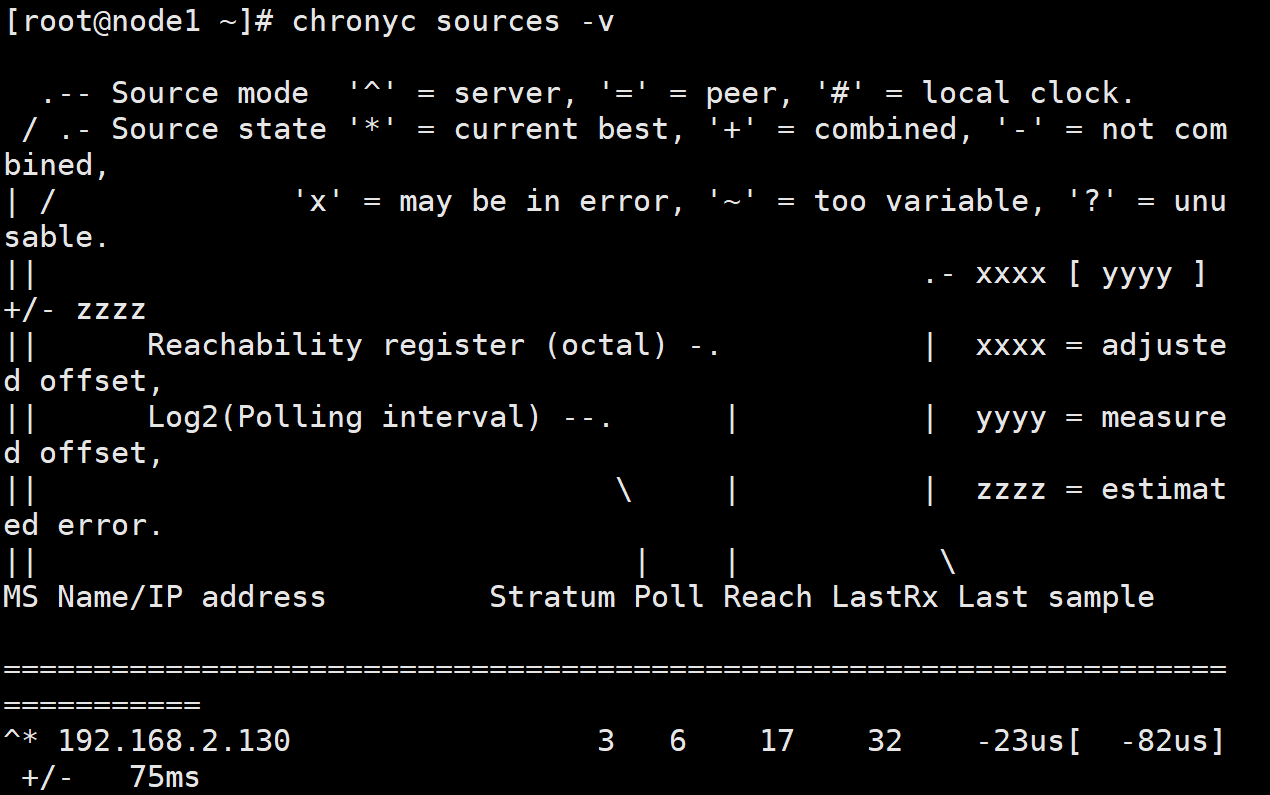
[root@node1 ~]# chronyc sources -v
2.配置ssh免密登陆,能够实现客户端主机通过服务器端的redhat账户进行基于公钥验证方式的远程连接
2.1 服务器端建立新用户redhat:
[root@master ~]# useradd redhat
[root@master ~]# passwd redhat
更改用户 redhat 的密码 。
新的密码:
无效的密码: 密码少于 8 个字符
重新输入新的密码:
passwd:所有的身份验证令牌已经成功更新。
2.2 定位客户端,制作公私钥对
[root@node1 ~]# ssh-keygen -t rsa
2.3 将公钥上传到服务器端
[root@node1 ~]# ssh-copy-id redhat@192.168.2.130
/usr/bin/ssh-copy-id: INFO: Source of key(s) to be installed: "/root/.ssh/id_rsa.pub"
The authenticity of host '192.168.2.130 (192.168.2.130)' can't be established.
ED25519 key fingerprint is SHA256:foqOUPPQppKAyt20/fcDdpD6hdL8inF9oBxEJEpt0VM.
This host key is known by the following other names/addresses:~/.ssh/known_hosts:1: [192.168.2.134]:2222~/.ssh/known_hosts:3: 192.168.2.134
Are you sure you want to continue connecting (yes/no/[fingerprint])? yes
/usr/bin/ssh-copy-id: INFO: attempting to log in with the new key(s), to filter out any that are already installed
/usr/bin/ssh-copy-id: INFO: 1 key(s) remain to be installed -- if you are prompted now it is to install the new keysAuthorized users only. All activities may be monitored and reported.
redhat@192.168.2.130's password: Number of key(s) added: 1Now try logging into the machine, with:   "ssh 'redhat@192.168.2.130'"
and check to make sure that only the key(s) you wanted were added.
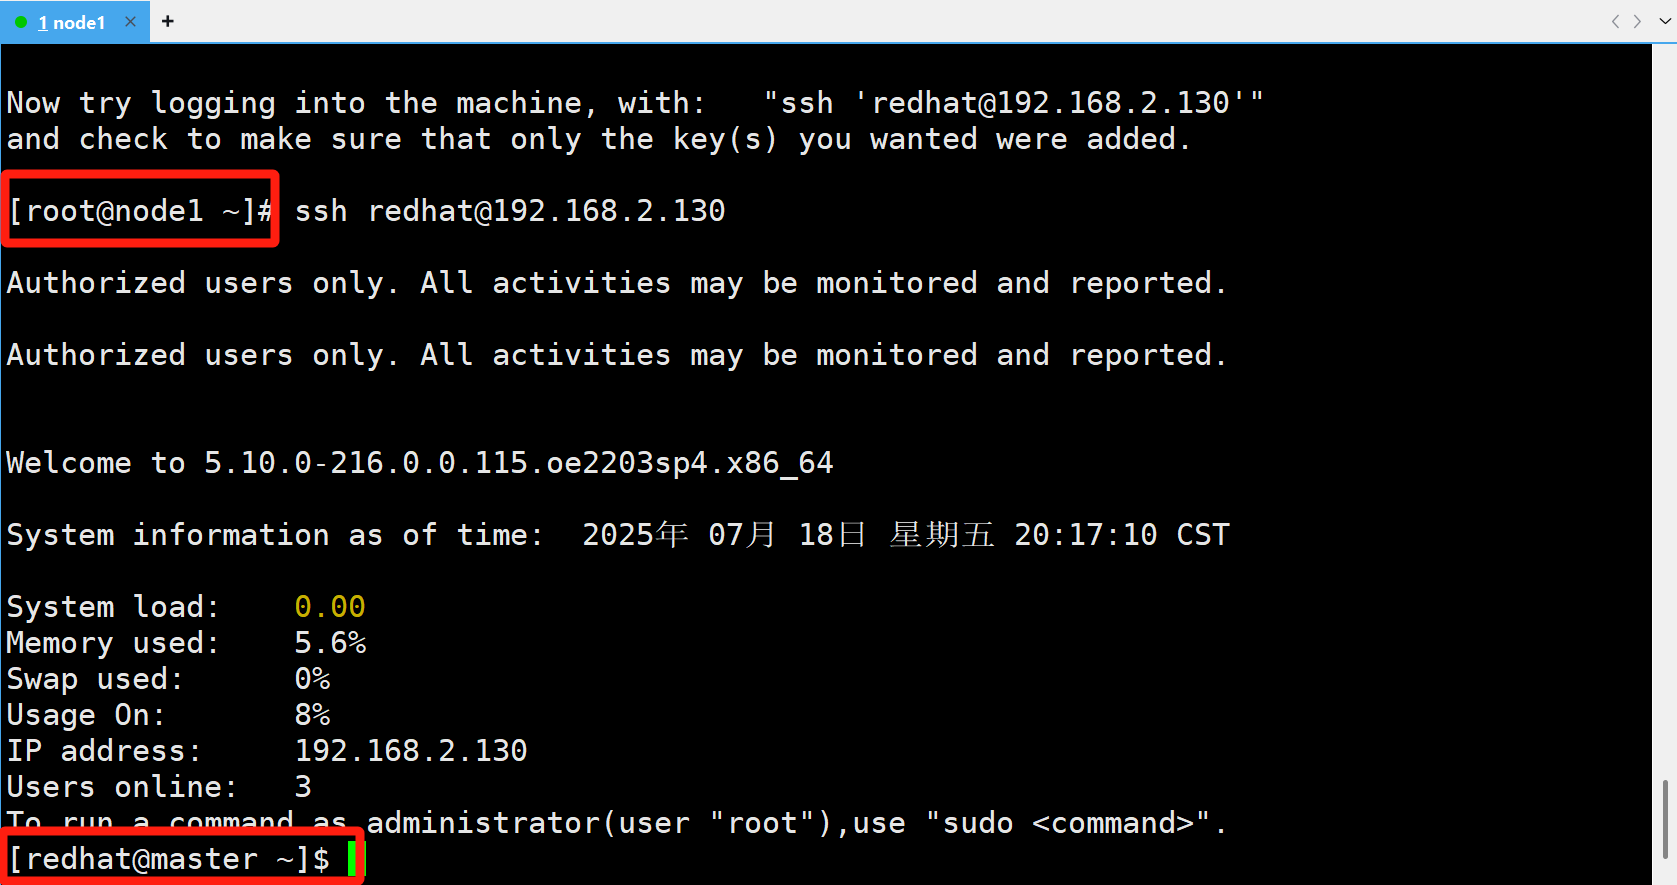
2.4 客户端测试
[root@node1 ~]# ssh redhat@192.168.2.130Authorized users only. All activities may be monitored and reported.Authorized users only. All activities may be monitored and reported.Welcome to 5.10.0-216.0.0.115.oe2203sp4.x86_64System information as of time: 	2025年 07月 18日 星期五 20:17:10 CSTSystem load: 	0.00
Memory used: 	5.6%
Swap used: 	0%
Usage On: 	8%
IP address: 	192.168.2.130
Users online: 	3
To run a command as administrator(user "root"),use "sudo <command>".
[redhat@master ~]$
结果展示: