QT动态加载动态库 QLibrary
qt中加载动态库有两种方式,一种跟在vs中一样,使用生成的 xxx.dll(linux下是 xxx.so)和xxx.h。第二种方式是使用QLibray动态加载,此种方式只需要dll文件(linux下是so文件)即可。
这里介绍使用QLibray的方式加载动态库:
一、新建一个工程Demo,作为动态库工程。
.pro文件配置如下:
QT       += core guigreaterThan(QT_MAJOR_VERSION, 4): QT += widgets#生成库
TEMPLATE = lib
#shared 动态库
CONFIG += c++17 shared
#生成目录
DESTDIR = $$PWD/binunix{
#linux下生成无版本号链接的so文件
CONFIG+=plugin
}
#导出宏标识
DEFINES += DEMOLL_LIBRARY# You can make your code fail to compile if it uses deprecated APIs.
# In order to do so, uncomment the following line.
#DEFINES += QT_DISABLE_DEPRECATED_BEFORE=0x060000    # disables all the APIs deprecated before Qt 6.0.0SOURCES += \demo.cpp \main.cpp \mainwindow.cppHEADERS += \demo.h \interface.h \mainwindow.h# Default rules for deployment.
qnx: target.path = /tmp/$${TARGET}/bin
else: unix:!android: target.path = /opt/$${TARGET}/bin
!isEmpty(target.path): INSTALLS += target
1.创建接口文件,供库工程和测试工程使用
//interface.h
#ifndef INTERFACE_H
#define INTERFACE_Hclass Interface
{
public:Interface(){}virtual ~Interface(){}virtual void add(int x,int y)=0;
};#endif // INTERFACE_H
2.创建要导出的类 Demo,并继承Interface
除了导出Demo类外,还可以添加全局函数:g_print()
#ifndef DEMO_H
#define DEMO_H
#include <QObject>
#include "interface.h"//DEMOLL_LIBRARY 宏已经在pro文件中定义,所以是导出类/函数
#if defined(DEMOLL_LIBRARY)
# define MYAPI Q_DECL_EXPORT
#else
# define MYAPI Q_DECL_IMPORT
#endifclass MYAPI Demo :public Interface
{
public:Demo();virtual ~Demo();void add(int x,int y)override;
};extern "C"
{//类导出MYAPI Interface* createDemo();MYAPI void destoryDemo(Interface *obj);//全局函数导出MYAPI void g_print(QString str);
}#endif // DEMO_H#include "demo.h"
#include <QDebug>Demo::Demo()
{
}
Demo::~Demo()
{
}
void Demo::add(int x, int y)
{qDebug()<<x+y;
}//类导出
MYAPI Interface* createDemo()
{return new Demo;
}
MYAPI void destoryDemo(Interface *obj)
{delete obj;
}
//全局函数导出
MYAPI void g_print(QString str)
{qDebug()<<__FUNCTION__<<"@:"<<str;
}
3.构建工程
注意:构建的时候选择MinGW,那么测试工程也要选择MinGW。并且32位或者64位要一一对应。
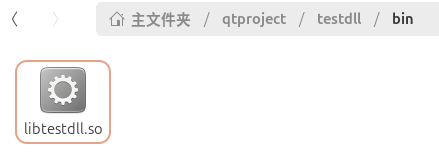
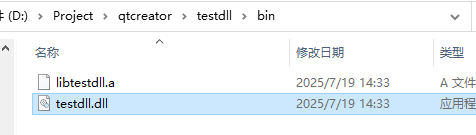
这里构建好之后,可以在bin目录下找到dll文件(linux下是.so文件),这个就是之后要用到的库文件。
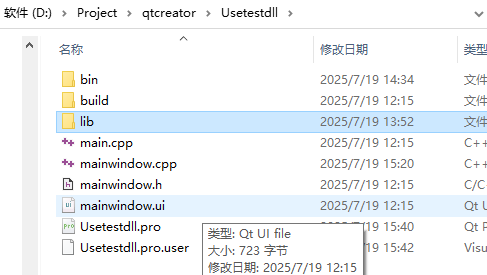
二、新建一个测试工程test(带不带界面都可以)
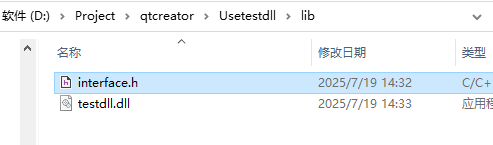
1.将生成的dll文件和接口文件(interface.h)拷贝到测试工程.pro目录下,新建一个lib文件夹放进去。
 2.
2.
2.在测试工程的.pro文件配置 动态库目录,和头文件目录
QT       += core guigreaterThan(QT_MAJOR_VERSION, 4): QT += widgetsCONFIG += c++17
#生成目录
DESTDIR =$$PWD/bin# You can make your code fail to compile if it uses deprecated APIs.
# In order to do so, uncomment the following line.
#DEFINES += QT_DISABLE_DEPRECATED_BEFORE=0x060000    # disables all the APIs deprecated before Qt 6.0.0SOURCES += \main.cpp \mainwindow.cppHEADERS += \mainwindow.hFORMS += \mainwindow.ui#dll目录
win32{
LIBS += -L$$PWD/lib
}unix{
LIBS += -L$$PWD/lib
}
#头文件目录
INCLUDEPATH +=$$PWD/lib
# Default rules for deployment.
qnx: target.path = /tmp/$${TARGET}/bin
else: unix:!android: target.path = /opt/$${TARGET}/bin
!isEmpty(target.path): INSTALLS += target#include "mainwindow.h"
#include "ui_mainwindow.h"
#include <QLibrary>
#include <QDebug>
#define lld qDebug()//引入接口头文件
#include "interface.h"
//函数指针
typedef Interface*(*CreateDemoFunc)();
typedef void(*DestoryDemoFunc)(Interface*);
typedef void(*GprintFunc)(QString str);MainWindow::MainWindow(QWidget *parent): QMainWindow(parent), ui(new Ui::MainWindow)
{ui->setupUi(this);//加载动态库QLibrary lib("testdll");if(!lib.load()){lld<<"加载dll失败";return;}//获取导出的函数指针CreateDemoFunc createDemo = (CreateDemoFunc)lib.resolve("createDemo");//createDemo是demo中要导出的DestoryDemoFunc destoryDemo = (DestoryDemoFunc)lib.resolve("destoryDemo");GprintFunc gPrint = (GprintFunc)lib.resolve("g_print");if(!createDemo||!destoryDemo||!gPrint){lld<<"解析函数失败";return;}//获取导出的类Interface *demo = createDemo();if(!demo){lld<<"创建失败";}demo->add(1,2);//全局函数gPrint("2333");
}
3.运行测试程序,可以在控制台看到输出

三、如果要在linux下测试,只需要拷贝对应的so文件即可