人工智能--AI换脸
本文实现了一个简易的人脸交换程序,主要功能包括:1)检查所需的模型文件是否存在;2)使用预训练的Caffe模型检测图像中的人脸;3)将源图像的人脸区域通过泊松融合无缝地替换到目标图像上。程序通过OpenCV的DNN模块加载人脸检测模型,处理图像后输出换脸结果。使用前需准备prototxt和caffemodel模型文件,并确保输入图像路径正确。最终结果显示三张图片(源图像标图像和换脸结果),并将结果保存为result.jpg文件。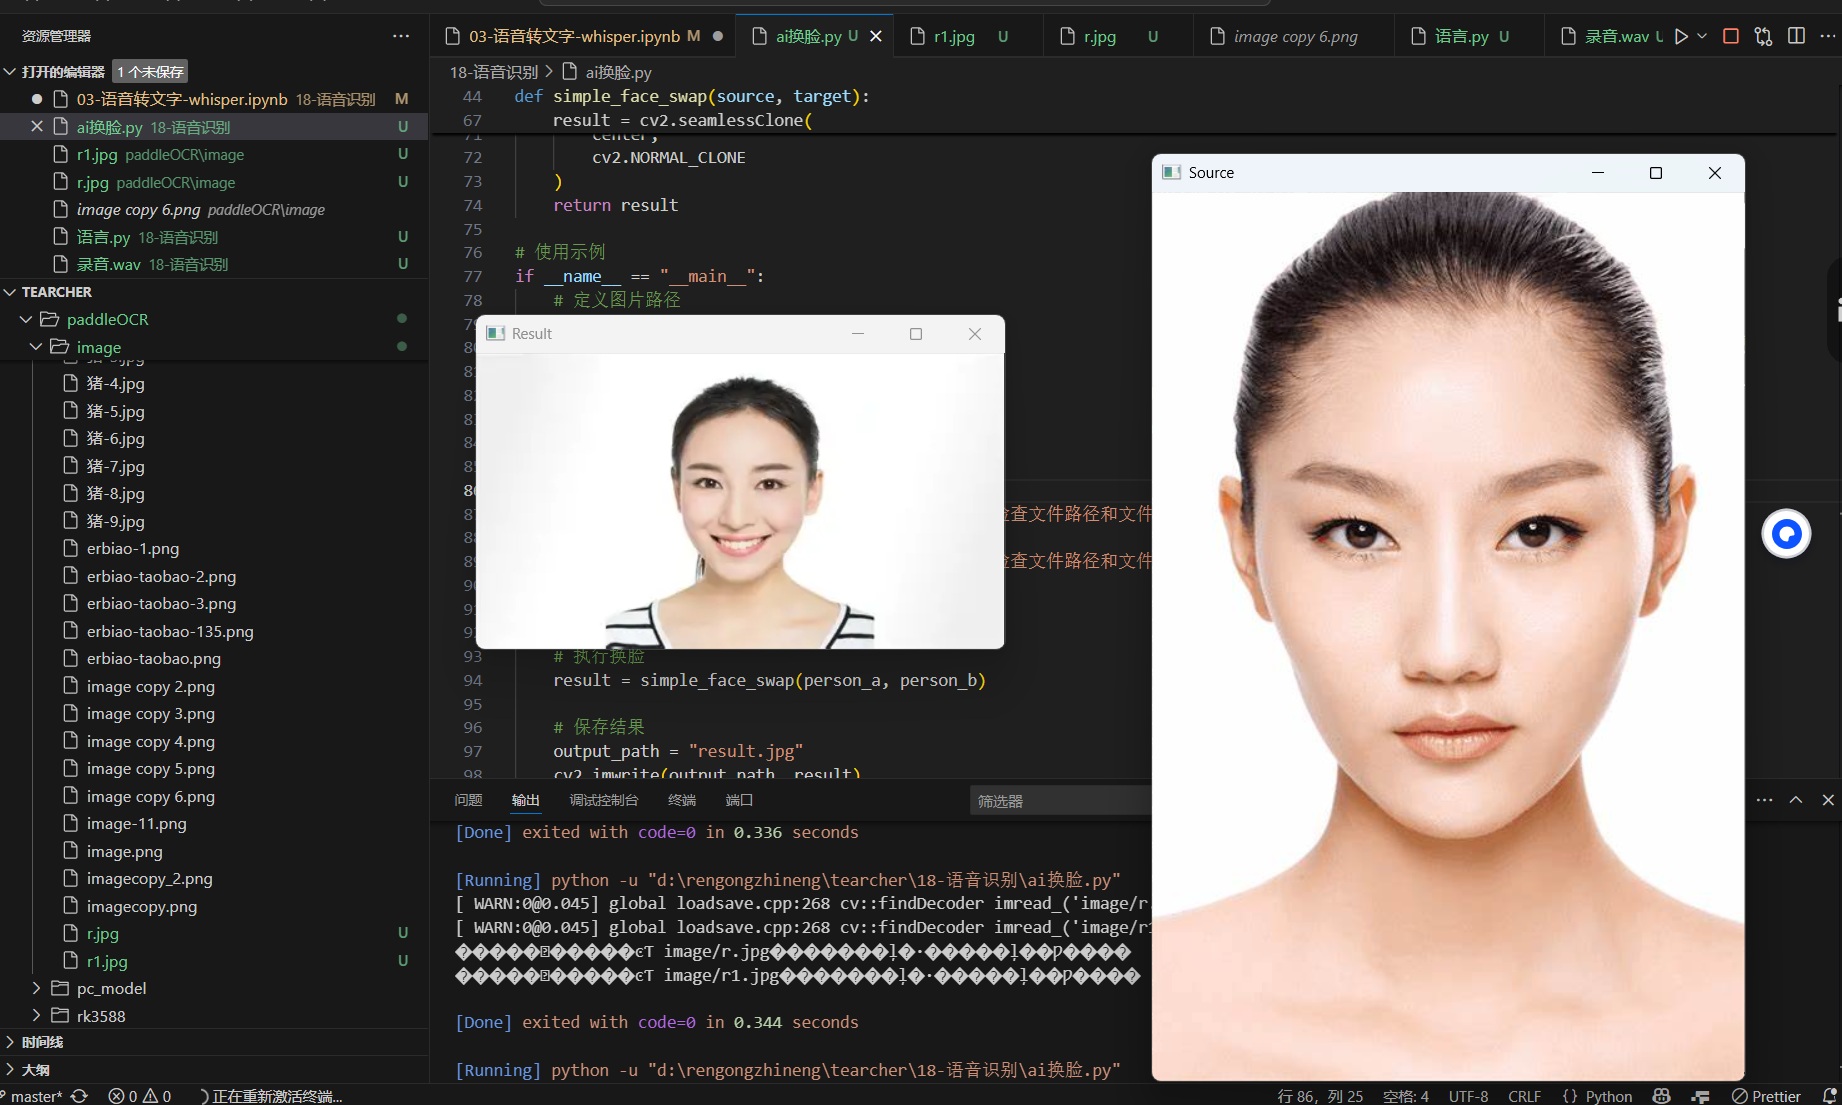
import cv2
import numpy as np
import os
# 检查模型文件是否存在
def check_model_files():
required_files = ["deploy.prototxt", "res10_300x300_ssd_iter_140000.caffemodel"]
missing = []
for file in required_files:
if not os.path.exists(file):
missing.append(file)
return missing
# 人脸检测函数
def detect_faces(image):
# 检查模型文件是否存在
missing_files = check_model_files()
if missing_files:
print(f"错误:缺少必要的模型文件 {missing_files}")
return []
# 加载预训练的人脸检测模型
net = cv2.dnn.readNetFromCaffe("deploy.prototxt", "res10_300x300_ssd_iter_140000.caffemodel")
(h, w) = image.shape[:2]
# 预处理图像
blob = cv2.dnn.blobFromImage(cv2.resize(image, (300, 300)), 1.0, (300, 300), (104.0, 177.0, 123.0))
net.setInput(blob)
# 执行人脸检测
detections = net.forward()
faces = []
# 处理检测结果
for i in range(detections.shape[2]):
confidence = detections[0, 0, i, 2]
if confidence > 0.5: # 置信度阈值
box = detections[0, 0, i, 3:7] * np.array([w, h, w, h])
faces.append(box.astype("int"))
return faces
# 简易人脸交换
def simple_face_swap(source, target):
# 检测源图像和目标图像中的人脸
src_faces = detect_faces(source)
dst_faces = detect_faces(target)
if not src_faces or not dst_faces:
print("未检测到人脸")
return target
# 获取第一张人脸
x, y, x1, y1 = src_faces[0]
src_face = source[y:y1, x:x1]
x, y, x1, y1 = dst_faces[0]
# 调整源人脸大小匹配目标位置
resized_face = cv2.resize(src_face, (x1 - x, y1 - y))
# 创建掩码
mask = np.zeros(resized_face.shape[:2], dtype=np.uint8)
cv2.circle(mask, (mask.shape[1]//2, mask.shape[0]//2), min(mask.shape)//2, 255, -1)
# 泊松融合
center = (x + (x1 - x)//2, y + (y1 - y)//2)
result = cv2.seamlessClone(
resized_face,
target,
mask,
center,
cv2.NORMAL_CLONE
)
return result
# 使用示例
if __name__ == "__main__":
# 定义图片路径
img_path_a = 'paddleOCR\\image\\r.jpg'
img_path_b = 'paddleOCR\\image\\r1.jpg'
# 尝试加载图片
person_a = cv2.imread(img_path_a)
person_b = cv2.imread(img_path_b)
# 详细的错误检查
if person_a is None:
print(f"错误:无法加载图片 {img_path_a},请检查文件路径和文件是否存在")
if person_b is None:
print(f"错误:无法加载图片 {img_path_b},请检查文件路径和文件是否存在")
if person_a is None or person_b is None:
exit()
# 执行换脸
result = simple_face_swap(person_a, person_b)
# 保存结果
output_path = "result.jpg"
cv2.imwrite(output_path, result)
print(f"换脸完成,结果已保存为 {output_path}")
# 显示结果
cv2.imshow("Source", person_a)
cv2.imshow("Target", person_b)
cv2.imshow("Result", result)
cv2.waitKey(0)
cv2.destroyAllWindows()