SAP学习笔记 - 开发20 - 前端Fiori开发 Nest View(嵌套视图) ,Fragment(片段)
上一章讲了Page和Panel,Shell Control(信箱效果),Margin / Padding,自定义CSS。
SAP学习笔记 - 开发19 - 前端Fiori开发 Page和Panel,Shell Control(信箱效果),Margin / Padding,自定义CSS-CSDN博客
本章继续讲 Fiori开发的知识。
目录
1,Nest View(嵌套视图)
1),App.view.xml
2),HelloPanel.view.xml
3),HelloPanel.controller.js
4),App.controller.js
5),运行看效果
2,Dialog 和 Fragments
1),Fragment.view.xml
2),HelloPanel.view.xml
3),HelloPanel.controller.js
4),运行看效果
3,指定Fragment按钮事件
1), HelloPanel.controller.js
2),HelloFragment.view.xml
3),i18n.properties
4),运行看效果
下面是详细内容。
1,Nest View(嵌套视图)
OpenUI5 SDK - Demo Kit
嵌套视图的用途是分割视图的一部分到单独的视图文件里去,
然后把该视图里面的Controller也分割走。
其实就是一个文件里内容太多了不好管理,所以分割成多个文件进行管理这个事儿。
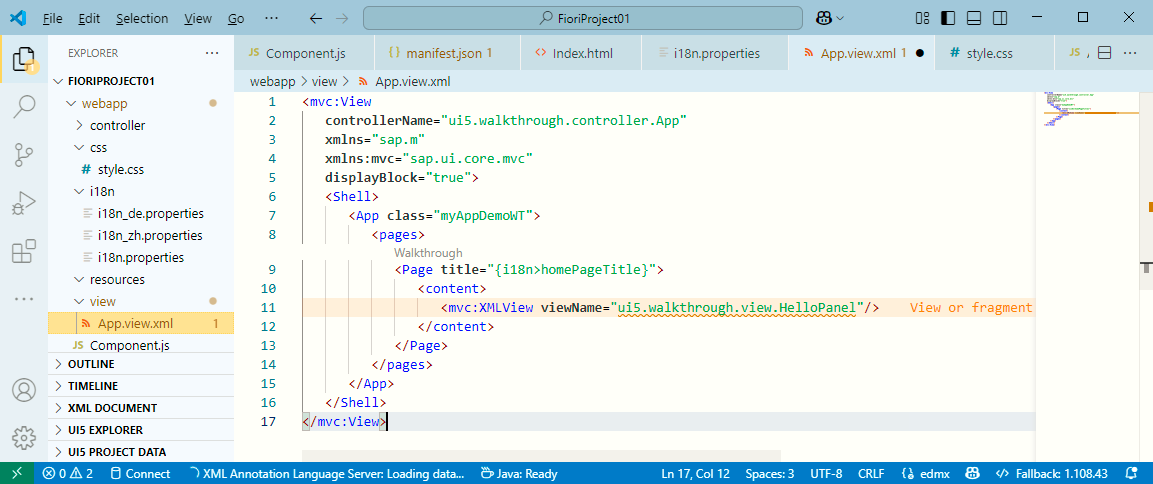
1),App.view.xml
<mvc:ViewcontrollerName="ui5.walkthrough.controller.App"xmlns="sap.m"xmlns:mvc="sap.ui.core.mvc"displayBlock="true"><Shell><App class="myAppDemoWT"><pages><Page title="{i18n>homePageTitle}"><content><mvc:XMLView viewName="ui5.walkthrough.view.HelloPanel"/></content></Page></pages></App></Shell>
</mvc:View>
- <mvc:XMLView viewName="ui5.walkthrough.view.HelloPanel"/>
这句代码的意思就是指向Nest View(嵌套视图) (这里就是 HelloPanel)
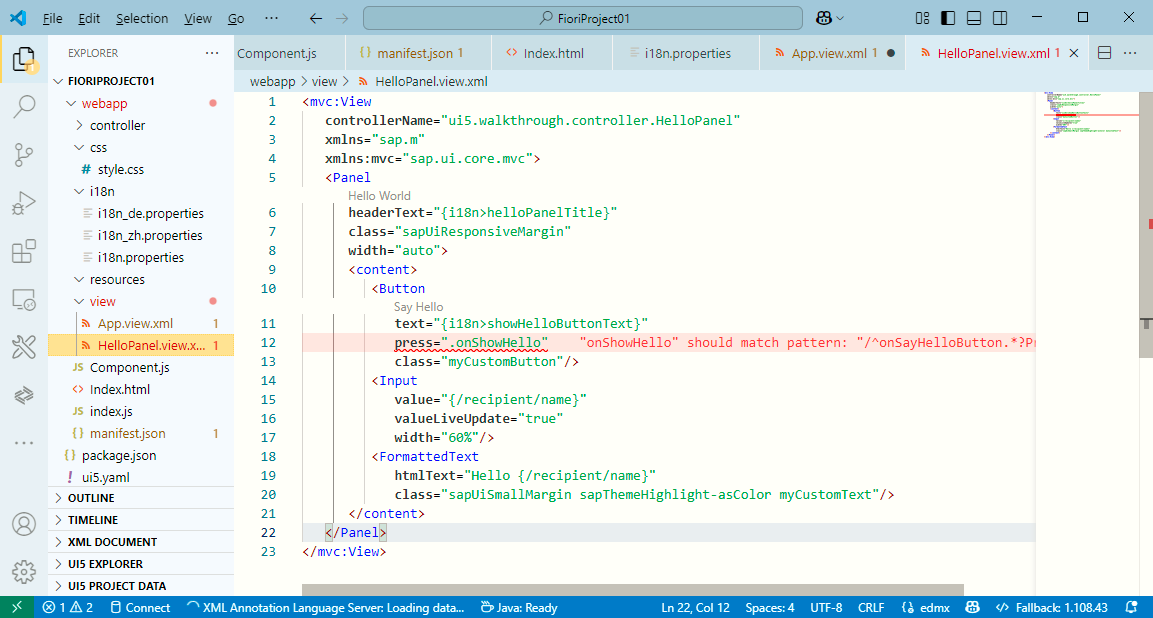
2),HelloPanel.view.xml
<mvc:ViewcontrollerName="ui5.walkthrough.controller.HelloPanel"xmlns="sap.m"xmlns:mvc="sap.ui.core.mvc"><PanelheaderText="{i18n>helloPanelTitle}"class="sapUiResponsiveMargin"width="auto"><content><Buttontext="{i18n>showHelloButtonText}"press=".onShowHello"class="myCustomButton"/><Inputvalue="{/recipient/name}"valueLiveUpdate="true"width="60%"/><FormattedTexthtmlText="Hello {/recipient/name}"class="sapUiSmallMargin sapThemeHighlight-asColor myCustomText"/></content></Panel>
</mvc:View>
可以看到这部分就是上一章里面的App.view.xml 里面切出来的部分
SAP学习笔记 - 开发19 - 前端Fiori开发 Page和Panel,Shell Control(信箱效果),Margin / Padding,自定义CSS-CSDN博客
3),HelloPanel.controller.js
sap.ui.define(["sap/ui/core/mvc/Controller","sap/m/MessageToast"
], (Controller, MessageToast) => {"use strict";return Controller.extend("ui5.walkthrough.controller.HelloPanel", {onShowHello() {// read msg from i18n modelconst oBundle = this.getView().getModel("i18n").getResourceBundle();const sRecipient = this.getView().getModel().getProperty("/recipient/name");const sMsg = oBundle.getText("helloMsg", [sRecipient]);// show messageMessageToast.show(sMsg);}});
});
这部分代码也是从App.controller.js 里切出来的

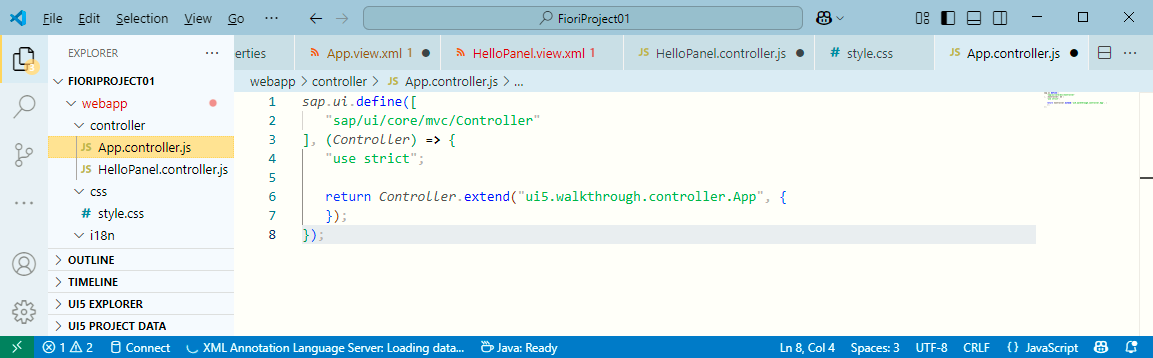
4),App.controller.js
sap.ui.define(["sap/ui/core/mvc/Controller"
], (Controller) => {"use strict";return Controller.extend("ui5.walkthrough.controller.App", {});
});
切走一部分之后,现在App.controller.js 里面的内容就少一些了
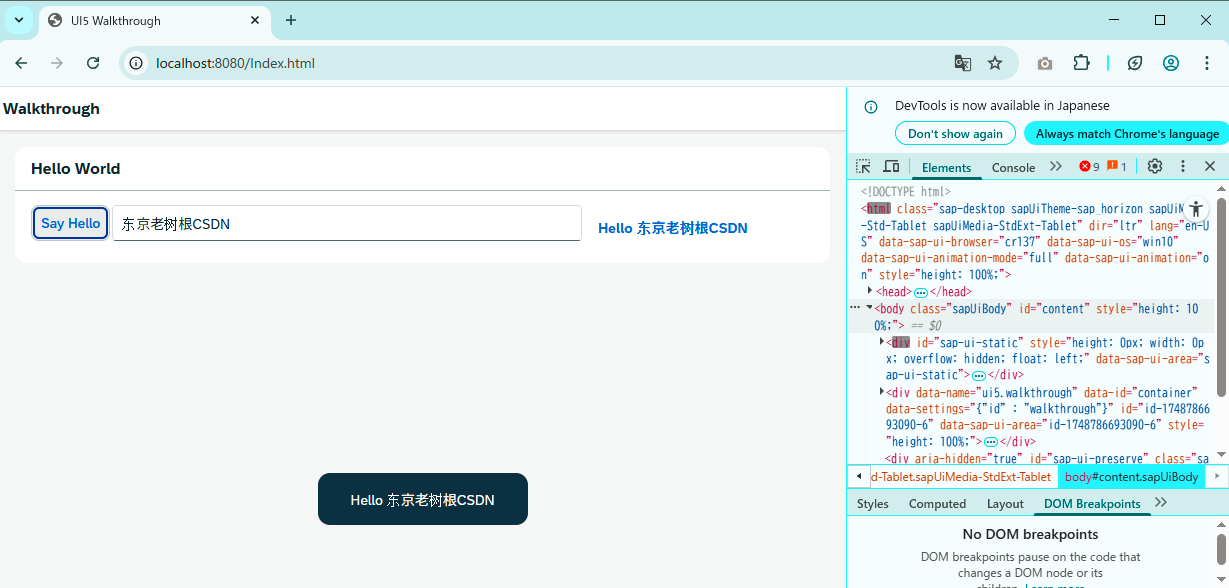
5),运行看效果
和之前的效果是一样的,只是内部代码结构变了。
现在还只是切出来一个Nest View,其实你想,一个项目里面那么多程序,你不分开管理太困难了
2,Dialog 和 Fragments
OpenUI5 SDK - Demo Kit
上面的Nest View目的是切割一部分内容到一个单独的View里面。
其实不仅是View可以切割,还可以切割一部分功能出来,在其他地方复用,这个就叫Fragment。
Fragments 可以认为是轻量级的UI部件,或者简单叫片段也可以。
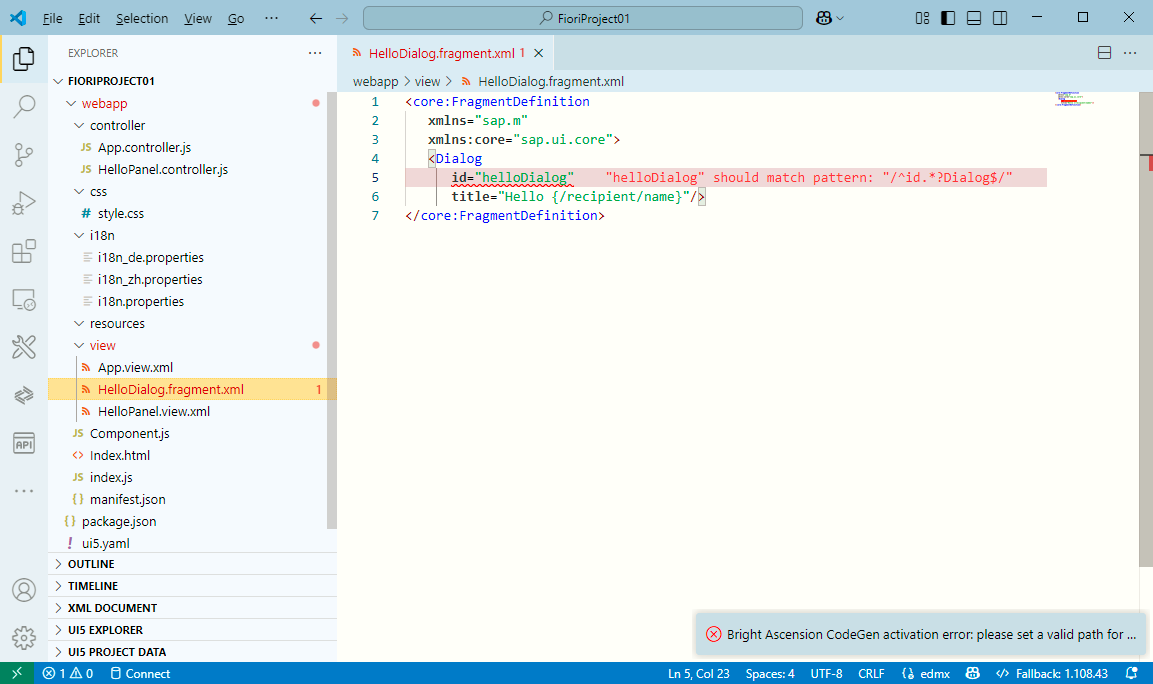
1),Fragment.view.xml
<core:FragmentDefinitionxmlns="sap.m"xmlns:core="sap.ui.core"><Dialogid="helloDialog"title="Hello {/recipient/name}"/>
</core:FragmentDefinition>
这个Fragment本身也是一个view,所以也放在view文件夹下面
看下面的代码,也没个Event,所以暂时该Fragment就是个花瓶,只显示,不能干活
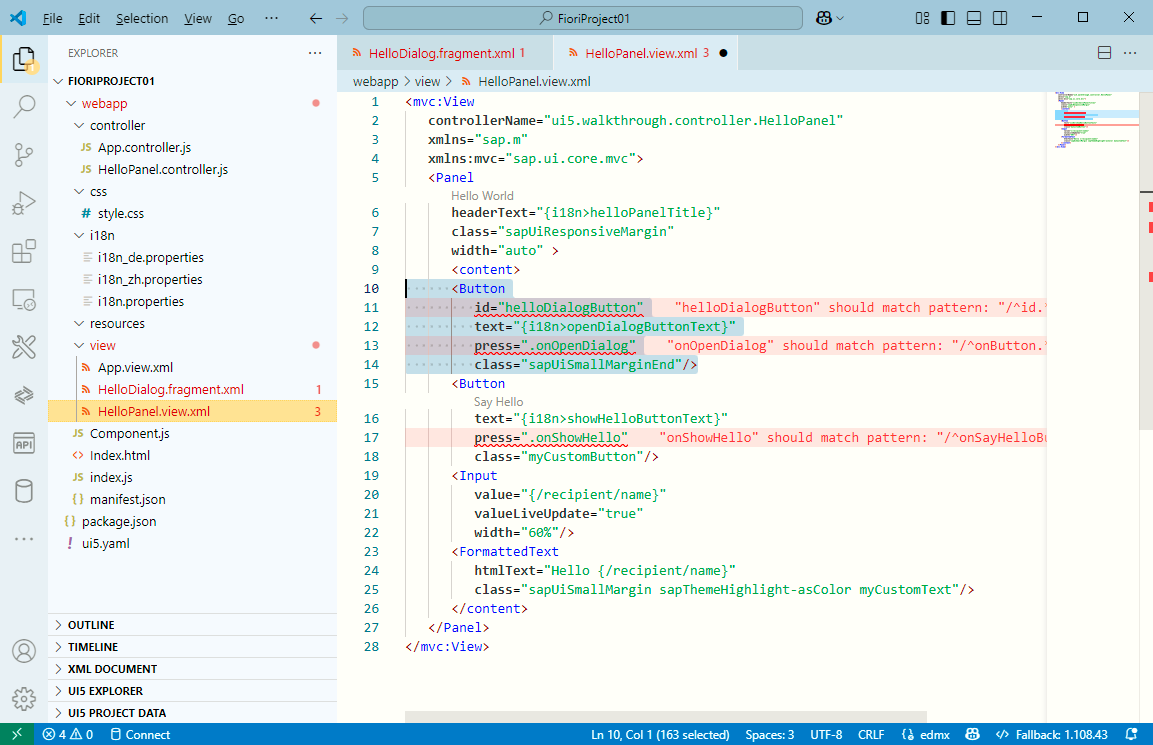
2),HelloPanel.view.xml
<mvc:ViewcontrollerName="ui5.walkthrough.controller.HelloPanel"xmlns="sap.m"xmlns:mvc="sap.ui.core.mvc"><PanelheaderText="{i18n>helloPanelTitle}"class="sapUiResponsiveMargin"width="auto" ><content><Buttonid="helloDialogButton"text="{i18n>openDialogButtonText}"press=".onOpenDialog"class="sapUiSmallMarginEnd"/><Buttontext="{i18n>showHelloButtonText}"press=".onShowHello"class="myCustomButton"/><Inputvalue="{/recipient/name}"valueLiveUpdate="true"width="60%"/><FormattedTexthtmlText="Hello {/recipient/name}"class="sapUiSmallMargin sapThemeHighlight-asColor myCustomText"/></content></Panel>
</mvc:View>
在HelloPanel 里面打算用一下。
这里加个按钮,点击之后调用 本Controller里面的onOpenDialog方法
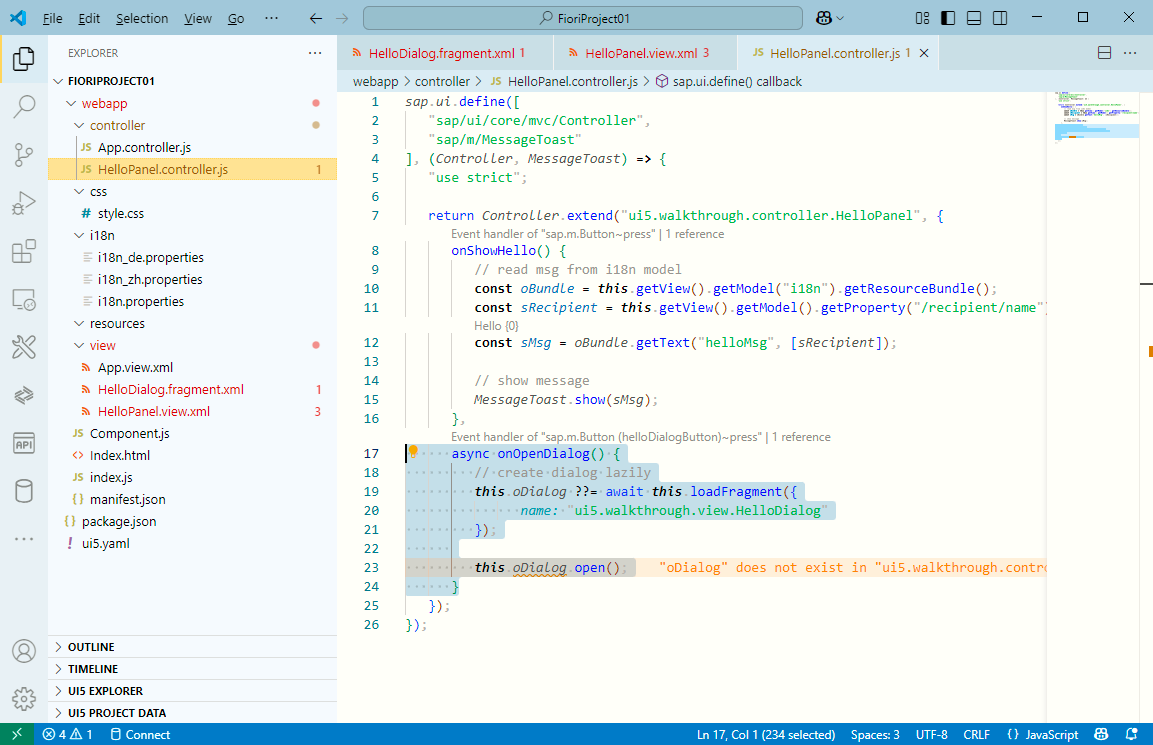
3),HelloPanel.controller.js
sap.ui.define(["sap/ui/core/mvc/Controller","sap/m/MessageToast"
], (Controller, MessageToast) => {"use strict";return Controller.extend("ui5.walkthrough.controller.HelloPanel", {onShowHello() {// read msg from i18n modelconst oBundle = this.getView().getModel("i18n").getResourceBundle();const sRecipient = this.getView().getModel().getProperty("/recipient/name");const sMsg = oBundle.getText("helloMsg", [sRecipient]);// show messageMessageToast.show(sMsg);},async onOpenDialog() {// create dialog lazilythis.oDialog ??= await this.loadFragment({name: "ui5.walkthrough.view.HelloDialog"});this.oDialog.open();}});
});
来看这段代码:
async onOpenDialog() {
// create dialog lazily
this.oDialog ??= await this.loadFragment({
name: "ui5.walkthrough.view.HelloDialog"
});
this.oDialog.open();
}
a),async onOpenDialog()
表示是异步方法,用于处理打开对话框。async 关键字表示该方法内部可以使用 await。
b),
this.oDialog ??= await this.loadFragment({
name: "ui5.walkthrough.view.HelloDialog"
});
这个 this.oDialog ??= ... 是 JavaScript 的逻辑空值赋值运算符,意思是:
- 如果 this.oDialog 已经存在(不是 null 或 undefined),则不做任何操作
- 如果 this.oDialog 不存在,则执行赋值操作
- await this.loadFragment() 异步加载一个 XML 片段
- loadFragment 是 UI5 提供的方法,用于动态加载视图片段
- name: "ui5.walkthrough.view.HelloDialog" 指定要加载的片段路径
- await 会等待片段加载完成后再继续执行
这段代码实现了:
延迟加载:对话框只在第一次需要时加载(懒加载模式),提高初始加载性能
单例模式:使用 ??= 确保对话框只创建一次,后续调用会复用已创建的对话框实例
异步处理:使用 async/await 处理异步加载操作,使代码更清晰
这种模式在 Fiori 开发中很常见,特别是对于不总是显示的弹出内容,可以优化应用性能。
4),运行看效果
这个框框就是咱们切出来的HelloDialog Fragment
你可以按Esc键关掉它

上面弹出来Fragment之后就关不掉了,或者得按Esc键
那么能给这个Fragment加个按钮吗?点一下按钮就把它给关了。当然是可以的
3,指定Fragment按钮事件
OpenUI5 SDK - Demo Kit
由于Fragment是没有自己的Controller的,它的按钮事件要写在哪里呢?答案就是在上级那里。
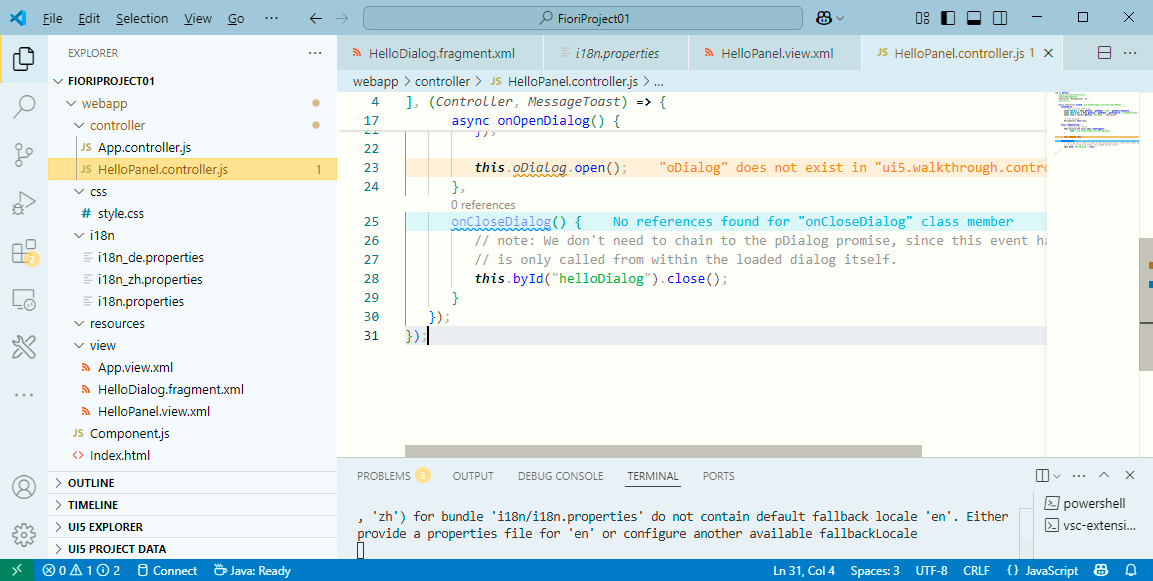
1), HelloPanel.controller.js
sap.ui.define(["sap/ui/core/mvc/Controller","sap/m/MessageToast"
], (Controller, MessageToast) => {"use strict";return Controller.extend("ui5.walkthrough.controller.HelloPanel", {onShowHello() {// read msg from i18n modelconst oBundle = this.getView().getModel("i18n").getResourceBundle();const sRecipient = this.getView().getModel().getProperty("/recipient/name");const sMsg = oBundle.getText("helloMsg", [sRecipient]);// show messageMessageToast.show(sMsg);},async onOpenDialog() {// create dialog lazilythis.oDialog ??= await this.loadFragment({name: "ui5.walkthrough.view.HelloDialog"});this.oDialog.open();},onCloseDialog() {// note: We don't need to chain to the pDialog promise, since this event handler// is only called from within the loaded dialog itself.this.byId("helloDialog").close();}});
});
- this.byId("helloDialog").close();
先要找到给Fragment,然后调用 close 方法就可以关掉了
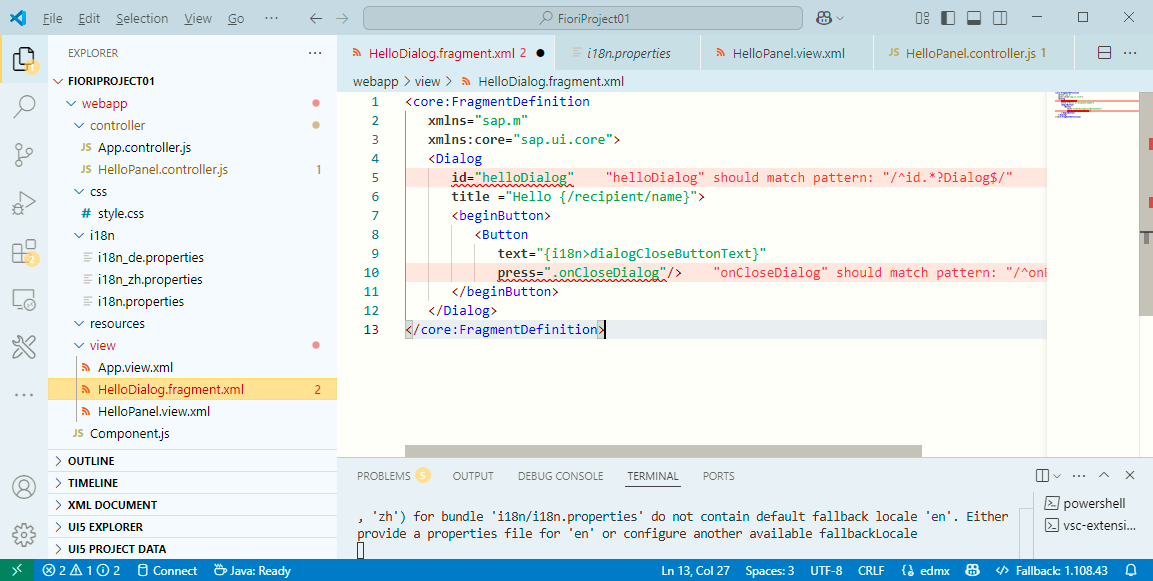
2),HelloFragment.view.xml
在Fragment上面加个按钮,再加个press事件处理代码
<core:FragmentDefinitionxmlns="sap.m"xmlns:core="sap.ui.core"><Dialogid="helloDialog"title ="Hello {/recipient/name}"><beginButton><Buttontext="{i18n>dialogCloseButtonText}"press=".onCloseDialog"/></beginButton></Dialog>
</core:FragmentDefinition>
-<beginButton>
这里是说如果有多个按钮,这个按钮是起头的;所以还有endButton
-press=".onCloseDialog"/>
「.」指的是当前view对应的Controller。在Fragment里,默认指的是上级Controller
当然你要想指定到别的地方,那也是可以的
3),i18n.properties
# App Descriptor
appTitle=Hello World
appDescription=A simple walkthrough app that explains the most important concepts of OpenUI5# Hello Panel
showHelloButtonText=Say Hello
helloMsg=Hello {0}
homePageTitle=Walkthrough
helloPanelTitle=Hello World
openDialogButtonText=Say Hello With Dialog
dialogCloseButtonText=Ok
4),运行看效果
这样就出来一个OK按钮,点了之后,就会关闭了

以上就是本篇的全部内容。
更多SAP顾问业务知识请点击下面目录链接或东京老树根的博客主页
https://blog.csdn.net/shi_ly/category_12216766.html
东京老树根-CSDN博客