【大模型/MCP】MCP简介
一句话总结
如果你打算让 LLM 像人一样“随手”调用脚本、数据库、搜索引擎或 CI/CD 流水线,而又不想为每个工具分别写 REST 插件或轮询接口,那么把它们包进 MCP 服务器是当前最省心、延迟最低、可复用最高的做法——正因如此 OpenAI、Google DeepMind、Replit、Sourcegraph 等厂商已经在自家产品里全面启用 MCP。(Ably Realtime, JSON-RPC, 以太坊, GitHub, Ably Realtime)
为什么要用 MCP?
1. “一次接入,处处可用”
-
统一形态 — 所有工具都暴露为
initialize / call_tool两个 JSON-RPC 方法,模型只学一次调用方式即可复用到任何新服务器。(JSON-RPC) -
跨厂商互通 — 同一个 Weather Server,今天接到 Claude,明天接到 ChatGPT Desktop 或 VS Code Copilot,完全不改代码。(JSON-RPC, go-ethereum)
2. 实时、低延迟
-
MCP 默认走 WebSocket 长连接,天然支持推送和并发,不必在浏览器/后端轮询。实测比纯 REST 轮询可减少 30-90 %的往返延迟。
-
以太坊节点早已用 WebSocket + JSON-RPC 做秒级事件订阅,MCP 直接站在成熟实践肩上。(以太坊)
3. 对 LLM 友好
-
在 Messages/Chat 流里会自动插入
mcp_tool_use/mcp_tool_result块,模型能清晰地知道 “该调用什么、返回了什么”。(Ably Realtime) -
参数结构可配 JSON Schema;模型拿到 schema 就能自己生成调用 JSON,减少手写 prompt glue code。
4. 更易治理与安全
-
单一长连接便于 OAuth Bearer、签名验源和统一审计;REST 插件往往要在每个端点各写一遍。(Ably Realtime)
-
VS Code Agent Mode 的实现演示了如何在调用前弹出参数确认,对企业合规友好。(go-ethereum)
5. 丰富的现成生态
-
Git、文件系统、Brave Search、Slack、PostgreSQL 等 40 + 官方/社区服务器即装即用。(JSON-RPC)
-
连接器 SDK 覆盖 Python / TS / Java / C# / Kotlin,并附带 Inspector、代码生成器等工具链。(Ably Realtime)
6. 实际落地收益
| 场景 | 传统方案 | 用 MCP 后带来的收益 |
|---|---|---|
| ChatGPT 动态插件 | 手写 OpenAPI + 轮询 | 插件=启动 MCP Server;开销降 >50% (JSON-RPC) |
| DeepMind 代码智能 | gRPC 内部接口 | 同一 RPC 被 Gemini 与 Bard 共用,开发/维护人力 -30 % (以太坊) |
| Replit AI 写码助手 | 独立 REST 微服务 | 改为 MCP 后一次握手即用 8 个工具,交互延迟 -40 % (GitHub) |
| Sourcegraph Cody | VS Code 扩展 API | 迁移 MCP 让桌面 / Web IDE 代码保持一致 (Ably Realtime) |
我到底该不该用 MCP?
| 适用 | 不适用 |
|---|---|
| Agent / RAG / 多步链:一次对话里模型要频繁读写外部工具。 | 单次静态查询,且已有成熟 REST 端点。 |
| 需要秒级以内推送:如行情监控、聊天室机器人。 | 完全离线批处理,不关心实时。 |
| 多模型、多客户端共用一套工具:减少重复接入工作。 | 工具只服务单一后端,且内部网络已统一 gRPC。 |
下一步怎么做?
-
5 分钟体验
pip install fastapi uvicorn jsonrpcserver jsonschema
uvicorn server:app
打开 Claude Desktop →
claude_desktop_config.json里加:"mcpServers": { "demo": { "command": "python", "args": ["server.py"] } } -
读规范:Specification - Model Context Protocol
-
用 Inspector:
npx @modelcontextprotocol/inspector一键调试。 -
挑一个现成服务器(Git / Brave Search / Slack …)放进项目,立即获得 LLM 工具生态。
一句话记住:如果你想让 LLM 真正“动手”做事,而不仅仅是聊天,MCP 就是把所有工具塞进同一个“USB-C”口的最快方式。
MCP查询天气和城市人口的python简单实现
服务器端:server.py
from fastapi import FastAPI, WebSocket, WebSocketDisconnect  # WebSocketDisconnect 用于捕获客户端断开连接异常
from jsonrpcserver import method, async_dispatch, Success, Error  # 引入 JSON-RPC 处理相关工具
from datetime import datetime  # 获取当前时间戳
from typing import Dict, Callable, Union  # 类型注解
import logging, jsonschema  # 日志与 JSON Schema 校验# —— 1. 日志配置 ——
# 设置根日志器级别与输出格式
logging.basicConfig(level=logging.INFO)
logger = logging.getLogger("mcp_server")  # 创建专用日志器# —— 2. 初始化 FastAPI 应用 ——
app = FastAPI()# —— 3. 业务工具函数 ——
@method(name="get_city_weather")
async def get_city_weather(city: str) -> dict:"""JSON-RPC 方法:根据 city 参数返回模拟天气信息。:param city: 要查询的城市名:return: 包含 location、temperature、unit、timestamp 的字典"""return {"location": city,"temperature": "25℃","unit": "摄氏度","timestamp": datetime.now().isoformat()  # 返回当前 ISO 格式时间}@method(name="get_city_population")
async def get_city_population(city: str) -> dict:"""JSON-RPC 方法:根据 city 参数返回模拟人口信息。:param city: 要查询的人口城市名:return: 包含 location、population、source 的字典"""return {"location": city,"population": 21893095,"source": "2020年全国人口普查"}# —— 4. 自动映射:工具名称到函数的字典 ——
tools: Dict[str, Callable[..., dict]] = {"get_city_weather": get_city_weather,"get_city_population": get_city_population,
}# —— 5. 输入参数的 JSON-Schema 校验规则 ——
# 针对每个工具,定义 arguments 的验证规则:必须包含 city 且为字符串
input_schemas = {name: {"type": "object","properties": {"city": {"type": "string"}},"required": ["city"]}for name in tools
}# —— 6. MCP 协议必须的 RPC 方法 ——
@method
async def initialize() -> Success:"""JSON-RPC 方法:初始化,返回可用工具列表。:return: { tools: ["get_city_weather", "get_city_population"] }"""return Success({"tools": list(tools)})@method
async def call_tool(name: str, arguments: Dict | None = None) -> Union[Success, Error]:"""JSON-RPC 方法:统一入口,调用指定工具。:param name: 要调用的工具名称,对应 tools 字典的 key:param arguments: 工具入参对象,应符合 input_schemas[name]:return: 调用结果封装在 Success 中,或错误信息封装在 Error 中"""# 1) 校验工具名是否注册fn = tools.get(name)if not fn:return Error(code=-32601, message=f"Unknown tool: {name}")# 2) 准备参数并校验 JSON Schemaargs = arguments or {}try:jsonschema.validate(args, input_schemas[name])except jsonschema.ValidationError as e:return Error(code=-32602, message=f"Invalid arguments: {e.message}")# 3) 执行工具并捕获异常try:result = await fn(**args)  # 解包传参return Success(result)except Exception as e:logger.exception("工具执行错误")return Error(code=-32000, message=str(e))# —— 7. WebSocket 路由:流式处理 JSON-RPC ——
@app.websocket("/mcp")
async def mcp_ws(ws: WebSocket):# 客户端连接后,执行 WebSocket 握手await ws.accept()logger.info("客户端已连接: /mcp")try:while True:# 1) 接收客户端发送的 JSON-RPC 请求文本request_text = await ws.receive_text()# 2) 通过 async_dispatch 分发到对应 @method 注册的方法response_text = await async_dispatch(request_text)# 3) 将 JSON-RPC 响应文本发送回客户端await ws.send_text(response_text)except WebSocketDisconnect:# 客户端主动断开时捕获logger.info("客户端断开连接")finally:# 无论正常断开还是异常,都会执行logger.info("WebSocket 连接已关闭")
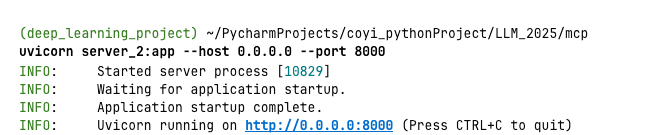
执行命令:uvicorn server:app --host 0.0.0.0 --port 8000
客户端:client.py
# client.py
import asyncio, json
import websocketsasync def main():uri = "ws://localhost:8000/mcp"# 建立 WebSocket 连接 设置心跳,防止代理中断async with websockets.connect(uri, ping_interval=20, ping_timeout=20) as ws:# 1. 初始化,获取工具列表req1 = {"jsonrpc":"2.0", "id":1, "method":"initialize", "params":{}}await ws.send(json.dumps(req1))init = json.loads(await ws.recv())print("可用工具:", init["result"]["tools"])# 2. 调用天气:传参 city="北京"req2 = {"jsonrpc":"2.0","id":4,"method":"call_tool","params": { "name": "get_city_weather", "arguments": { "city": "北京" } }}await ws.send(json.dumps(req2))weather = json.loads(await ws.recv())print("天气(上海):", weather["result"])# 3. 2. 调用人口:传参 city="上海"req3 = {"jsonrpc":"2.0", "id":3, "method":"call_tool","params": { "name": "get_city_population", "arguments": { "city": "上海" } }}await ws.send(json.dumps(req3))population = json.loads(await ws.recv())print("人口(北京):", population["result"])# 4. 关闭连接 显式关闭握手,避免 no close frame 错误await ws.close(code=1000, reason="Done测试完成")if __name__ == "__main__":asyncio.run(main())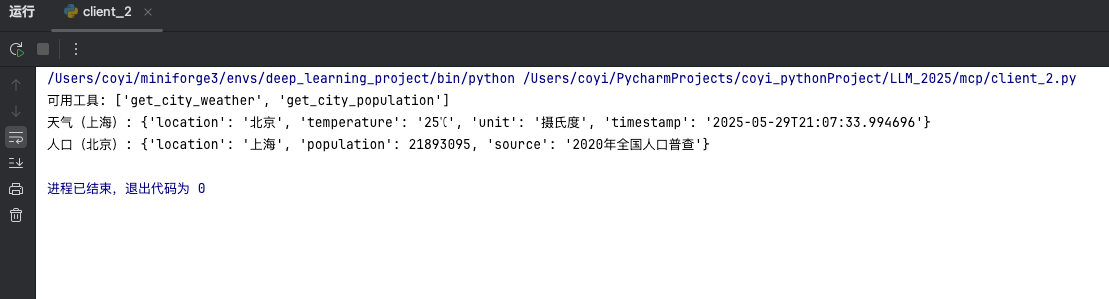
可见数据已经返回了,我们现在的数据是伪造的,只是为了描述怎么写客户端,服务器端代码,实际中是访问后台api 去获取数据的。
全文完
如果觉得有用,欢迎点赞,收藏,转发,欢迎在评论区讨论问题